Top Stories This Week:
| A compendium of Windows Azure, Service Bus, BizTalk Services, Access Control, Caching, SQL Azure Database, and other cloud-computing articles. |  |
• Updated 10/27/2013 with new articles marked •.
Note: This post is updated weekly or more frequently, depending on the availability of new articles in the following sections:
- Windows Azure Blob, Drive, Table, Queue, HDInsight and Media Services
- Windows Azure SQL Database, Federations and Reporting, Mobile Services
- Windows Azure Marketplace DataMarket, Power BI, Big Data and OData
- Windows Azure Service Bus, BizTalk Services and Workflow
- Windows Azure Access Control, Active Directory, and Identity
- Windows Azure Virtual Machines, Virtual Networks, Web Sites, Connect, RDP and CDN
- Windows Azure Cloud Services, Caching, APIs, Tools and Test Harnesses
- Windows Azure Infrastructure and DevOps
- Windows Azure Pack, Hosting, Hyper-V and Private/Hybrid Clouds
- Visual Studio LightSwitch and Entity Framework v4+
- Cloud Security, Compliance and Governance
- Cloud Computing Events
- Other Cloud Computing Platforms and Services
<Return to section navigation list>
 • Chris Harris will present HDInsight – Hadoop as an Enterprise Data Platform in the Cloud and Alan Mitchell will present Making the Most of your Azure Data with Pig and Hive at SQL Relay 2013R2 on 11/15/2013 in Hemel Hempstead, Herts., UK in the Cloud Computing Events section below:

<Return to section navigation list>
• Philip Fu posted [Sample Of Oct 26th] How to horizontally partition data in Windows Azure SQL Database on 10/27/2013:
This sample demonstrates how to partition your data in SQL Azure.
 You can find more code samples that demonstrate the most typical programming scenarios by using Microsoft All-In-One Code Framework Sample Browser or Sample Browser Visual Studio extension. They give you the flexibility to search samples, download samples on demand, manage the downloaded samples in a centralized place, and automatically be notified about sample updates. If it is the first time that you hear about Microsoft All-In-One Code Framework, please watch the introduction video on Microsoft Showcase, or read the introduction on our homepage http://1code.codeplex.com/.
• Alexandre Brisebois (@Brisebois) explained how to Create Database Diagrams of Your Windows Azure SQL Databases in a 10/26/2013 post:
 Do you miss Database Diagrams?
I find them to be indispensable when I join new projects, because they provide insight that makes my on-boarding much smoother.
 As my databases are hosted on the Windows Azure SQL Database Service, I am not able to create Database Diagrams using tools like Microsoft SQL Server Management Studio or Visual Studio 2013. Finding this to be a pain, I decided to look around for tools that were able to create Database Diagrams.
 Of course my first reflex at that time, was to generate an EDMX using Entity Framework and Visual Studio. This was an ok solution for short glimpse of the database. The EDMX is great at helping you grasp the data model, but it hides a few important details.
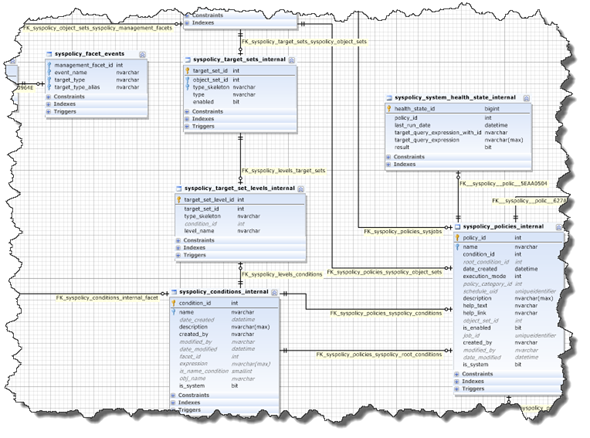
![image_thumb75_thumb3_thumb_thumb_thu[6]](http://lh6.ggpht.com/-Cvt1iUve9jg/Umrt_8u8NfI/AAAAAAABKIs/u9h5cjGoBGo/image_thumb75_thumb3_thumb_thumb_thu%25255B18%25255D.png?imgmax=800 "image_thumb75_thumb3_thumb_thumb_thu[6]") Then with a bit creativity I started throwing queries at Bing and found a few tools. The one I decided to test was dbForge Studio for SQL Server. With it, I started creating Database Diagrams in minutes. Tables are arranged so that it’s easy to grasp meaning from the diagrams.
Then with a bit creativity I started throwing queries at Bing and found a few tools. The one I decided to test was dbForge Studio for SQL Server. With it, I started creating Database Diagrams in minutes. Tables are arranged so that it’s easy to grasp meaning from the diagrams.
A few weeks in, I started using dbForge Studio for SQL Server to write test queries and stored procedures. To my surprise the tool has some really nice features. For starters, the code completion functionality is really useful. It helped me discover column names and relations as I typed my queries. Furthermore, it helped standardize my scripts by formatting statements as I typed them.

As you may already know, I’m a big fan of using the Microsoft SQL Server Data Tools. Teaming these tools together was a natural reflex that enabled me to work effectively with Windows Azure SQL Database.
- Has really good coding support like code completion and code formatting that help enforce coding standards (priceless when it comes to collaboration work)
- It’s easy to use and helps enforce best practices like creating indexes on Foreign Keys
- It’s able to create diagrams from Database hosted on Windows Azure SQL Database
- Has IntelliSense
- Statically validates SQL statements against targeted platforms like Windows Azure SQL Database
- Make it possible to manage database versions by storing scripts in TFS
- Facilitates deployments
Wrapping things up
In a post about Windows Azure SQL Database Application Life Cycle Management Made Easy! I wrote about how I use the Microsoft SQL Server Data Tools in order to allow teams to collaborate on database development.
Since then I started using dbForge Studio for SQL Server as a Dev & Test tool. Its tooling allows me to create Database Diagrams for Windows Azure SQL Databases and it boosted my productivity by helping me write SQL statement faster. To me it felt like R# for SQL =)
Both are now on my Windows Azure tool belt. Do you have any tools that help you develop more effectively on Windows Azure?

<Return to section navigation list>
 • See Michael Washington (@ADefWebserver) described Using JayData to Consume the Visual Studio LightSwitch OData Business Layer in an AngularJs CRUD Application in the Visual Studio LightSwitch and Entity Framework v4+ section below.
<Return to section navigation list>
Paolo Salvatori (@babosbird) described How to integrate a Windows Azure Web Site with a LOB app via a Service Bus Relay Service in a 10/24/2013 post:
 This sample demonstrates how to integrate an ASP.NET Web API REST service running in a Windows Azure Web Site with a line of business application, running on-premises or in the cloud, via Service Bus Relayed Messaging. The Access Control Service is used to authenticate the client and service application, in this case, the web site and LOB application. In addition, the solution demonstrates how to use a Notification Hub to send a push notification to mobile applications to advice that a new item is available in the products database. For more information on Notification Hubs, see the following resources:
 You can download the code from MSDN Code Gallery.
Scenario
A RESTful web service running in a Windows Azure Web Site receives CRUD operations from a client application (Windows Phone 8 app, Windows Store app, HTML5/JS web site), but instead of accessing data stored in a Windows Azure SQL Database, it invokes a LOB application running in a corporate data center via Service Bus Relayed Messaging. In this sample, the LOB application is represented by a WCF service that accesses data from the ProductDb database hosted by a local instance of SQL Server 2012. In particular, the WCF service uses the new asynchronous programming feature provided by ADO.NET 4.5 to access data from the underlying database and exposes three different endpoints on the Service Bus, each using a different binding:
The RESTful web service is implemented as a Web API Controller class and runs within an ASP.NET MVC 4 web site that exposes a HTML5/JS user interface that can be accessed using an internet browser.
The following articles explain how to implement the same scenario using a Mobile Service in place of the Windows Azure Web Site and ASP.NET Web API RESTful service.
Architecture
The following diagram shows the architecture of the solution.

Message Flow
- The client application (Windows Phone 8 app, Windows Store app or HTML5/JavaScript web site) sends a request via HTTPS to the RESTful web service that runs in a Windows Azure Web Site. The RESTful web service is implemented by the ProductsController class that is an ASP.NET Web API Controller, and as such it inherits from the ApiController class. Both the Windows Phone 8 app and Windows Store app use the HttpClient class to invoke the RESTful web service, while the HTML5/JavaScript web site uses a the jQuery.ajax(). The ASP.NET Web API Controllerimplements CRUD methods to create, read, update and delete data in the products repository. The HTTP method used by the client application to call the controller class depends on the invoked operation:
- Read: GET method
- Add: POST method
- Update: POST method
- Delete: DELETE method
- When the ProductsController class receives a request from a client application, it calls the ProductRepository class that implements the data access layer. This class can access data stored in-process in a static structure (this mode was created for testing purposes) or in a remote ProductDb database via Windows Azure Service Bus. You can control which of the two repositories is used by the ProductRepository class selecting a value in the Location drop down list on the HTML5/JS web site: when the selected value is equal to Local, the controller uses a static List<Product> structure for CRUD operations, while if the value is equal to ServiceBus, the controller class invokes the WCF wervice running on-premises via Service Bus Relayed Messaging. In this case, the ProductRepository class uses one of the 3 WCF client endpoints defined in the Web.config file to call the WCF service running on-premises via Service Bus Relayed Messaging.
- The Service Bus Relay Service validates and remove the security token, then forwards the request to one the listeners hosting the WCF service.
- The WCF service uses the new asynchronous programming feature provided by ADO.NET 4.5 to access data from the ProductDb database. For demo purpose, the WCF service runs in a console application, but the sample can easily be modified to host the service in IIS.
- The WCF service returns a response message to the Service Bus Relay Service.
- The Service Bus Relay Service forwards the message to the ASP.NET Web API RESTful service running in the Windows Azure Web Site.
- The ASP.NET Web API RESTful service returns data in JSON format to the client application. When the operation performed adds a new item to the products repository, the ProductsController class uses a NotificationHubClient class to send a push notification to the Windows Phone 8 and Windows Store apps.
Prerequisites
- Visual Studio 2012 Express for Windows 8
- Windows Azure account (get the Free Trial) ,,,
Paolo continues with programming details.

<Return to section navigation list>
• Vittorio Bertocci (@vibronet) claimed You Have to Sign Up With Your Own Multiple Organizations ASP.NET App Before You Can Sign In in a 10/26/2013 post:
Well, I’ve basically wroteitten most of the post already in the extra-long title!
 The ASP.NET project templates in VS2013 for multiple organizations apps contain a design choice which appears to be causing grief to many developers. In this post I am going to describe the issue (and show you how to make it a non-issue) – for the longer term I guess that the default behavior might have to be changed.
The Issue
The issue is easily explained. If you follow this blog, you already know that the ASP.NET project creation in VS2013 offers you the chance of configuring projects for various authentication styles for business apps.
One of the available templates generates one application meant to be consumed by multiple organizations: if you like buzzwords, that’s what you’d call a SaaS app or a multi-tenant app.
 Those apps are meant to accept users from multiple organizations, and more precisely from multiple Windows Azure AD tenants. The template code contains logic for onboarding new organizations: it boils down to triggering the consent flow which allows a the admin of a prospective customer to instantly grant to the application access to his/her own tenant. The application template provides a database which is used to maintain the list of organizations that have been onboarded; such database is used at sign in time to establish if the incoming user belongs to one of the onboarded tenants. The template contains logic for processing messages about successful onboardings by adding the corresponding organization in the database.

Here there’s the thing that is causing the issue for some of you: at creation time, that database is empty.
 Technically, when you create a multiple organizations app entry in Windows Azure AD you are doing two operations at once: creating the Application object which describes the app, and consenting for that app to use your directory (e.g. creating a service principal for it in your directory). For a deep dive on the application model, see here.
However, the VS template does NOT reflect the fact that your app is automatically provisioned in your own tenant. There is a reason for that: your application might call for some extra provisioning operations every time you onboard a new customer organization, and pre-provisioning a tenant in the DB would create an odd situation as your extra provisioning logic would have never a chance to run.
Regardless of the reason, this creates a problem for the ones among you who follow this rather natural sequence:
- you create the app
- you hit F5 right away
- once presented with the home screen (shown below) you hit sign in and you enter the credentials of your user in your development tenant

- after you entered your credentials, you are promptly welcomed by the error below
Server Error in ‘/’ Application.
WIF10201: No valid key mapping found for securityToken: ‘System.IdentityModel.Tokens.X509SecurityToken’ and issuer: ‘https://sts.windows.net/6133e43d-b70d-40ca-87c0-f16993f99070/’.
Description: An unhandled exception occurred during the execution of the current web request. Please review the stack trace for more information about the error and where it originated in the code.
Exception Details: System.IdentityModel.Tokens.SecurityTokenValidationException: WIF10201: No valid key mapping found for securityToken: ‘System.IdentityModel.Tokens.X509SecurityToken’ and issuer: ‘https://sts.windows.net/6133e43d-b70d-40ca-87c0-f16993f99070/’.
Source Error:
An unhandled exception was generated during the execution of the current web request. Information regarding the origin and location of the exception can be identified using the exception stack trace below.
Stack Trace:
[SecurityTokenValidationException: WIF10201: No valid key mapping found for securityToken: 'System.IdentityModel.Tokens.X509SecurityToken' and issuer: 'https://sts.windows.net/6133e43d-b70d-40ca-87c0-f16993f99070/'.]
   System.IdentityModel.Tokens.Saml2SecurityTokenHandler.ValidateToken(SecurityToken token) +867
   System.IdentityModel.Tokens.SecurityTokenHandlerCollection.ValidateToken(SecurityToken token) +73
   System.IdentityModel.Services.TokenReceiver.AuthenticateToken(SecurityToken token, Boolean ensureBearerToken, String endpointUri) +299
   System.IdentityModel.Services.WSFederationAuthenticationModule.SignInWithResponseMessage(HttpRequestBase request) +917
   System.IdentityModel.Services.WSFederationAuthenticationModule.OnAuthenticateRequest(Object sender, EventArgs args) +464
   System.Web.SyncEventExecutionStep.System.Web.HttpApplication.IExecutionStep.Execute() +136
   System.Web.HttpApplication.ExecuteStep(IExecutionStep step, Boolean& completedSynchronously) +69
Version Information: Microsoft .NET Framework Version:4.0.30319; ASP.NET Version:4.0.30319.33440
That is basically telling you that your tenant has no entry in the local database, hence you are not supposed to access the application.
The Solution
The solution is super straightforward: you just need to use the template logic itself to sign up your own tenant. Click on the “Sign up for this application” link on the top bar. You’ll get to the following page:

Hit Sign Up. Authenticate as one admin of your development tenant. You’ll land on the following page:

Now, this would be a good place for warning you about a small issue… if you are on Windows 8.1 & IE11, chances are that hitting “grant access” will trigger the following JavaScript error:

The portal guys are going to fix this issue soon, but in the meanwhile you can work around this by adding this page in the Compatibility View list of IE11. Hit Alt+T, select Compatibility View Settings, and click the Add button to add windowsazure.com in the compatibility view list. The page will reload and you’ll be all set.
Hit “grant access”. You’ll be redirected back to your app:

That’s it. Your tenant is now in the DB and you can sign in:

All done. In just 3 clicks and one authentication you are all set.
Granted, the one among you stumbling on this would likely rather have the development tenant pre-populated by default in the database right out of the gate… my understanding is that this is pretty high in the list of things to change, but of course your feedback can help
Vittorio Bertocci (@vibronet) asserted Securing a Web API with ADFS on WS2012 R2 Got Even Easier on 10/25/2013:
 A few weeks ago I gave you a taste of how you can use the modern ASP.NET OWIN stack for securing a Web API with tokens obtained from the latest ADFS version, the one in Windows Server 2012 R2. The flow I described was definitely easier than the one you’d have to implement should you choose to use the JWT handler directly, but it still required quite a lot of code.
 Well, good news! With the RTM of VS2013, we now have few new toys we can play with to make things easier. And that’s what I am going to do here.
Walkthrough
![image_thumb75_thumb3_thumb_thumb_thu[3]](http://lh4.ggpht.com/-Q_sMUZEzo24/UmruMJwlF1I/AAAAAAABKK8/ip_l3zjnIFY/image_thumb75_thumb3_thumb_thumb_thu%25255B19%25255D.png?imgmax=800 "image_thumb75_thumb3_thumb_thumb_thu[3]") To make things more interesting, I am going to use the same sections structure I have used for the old tutorial but I’ll do few things differently, so that if you want to mix & match features you can take one section from here, and another from there.
To make things more interesting, I am going to use the same sections structure I have used for the old tutorial but I’ll do few things differently, so that if you want to mix & match features you can take one section from here, and another from there.
The scenario I want to implement is practically the same, to the point that I can paste the old description (almost) verbatim:
The scenario we want to implement is pretty simple: we want to restrict access to an MVC5 Web API to the users of a given on-premises AD instance, which happens to be using Windows Server 2012 R2 ADFS (just “ADFS” from now on). Furthermore, we want to expose the Web API to the user via a .NET application.
I have highlighted the differences in red:
- This time I will take advantage of the new features in VS2013 to make things quicker, hence we’ll be playing with the latest Web API; but yo can obtain the same result if you build the project “by hand” if you still w ant to target VS2012
- Between the time I wrote the old tutorial and today lots of things happened – and one of the most relevant for this is that ADAL .NET hit GA! Hence, here’ I’ll use ADAL .NET for building the test client. Note that if you want to stick with Windows Store you can follow the same instructions as the old tutorial, the resulting client will work just fine with the Web API described here.
Setting Up the Web API Project
As I described here, since RC VS2013 supports the creation of Web API projects secured via Windows Azure AD organizational accounts.
Now, that’s not *exactly* what we want to do here: here we want to secure the Web API with Windows Server AD. The templates do not currently support our target scenario directly as of today; that said, the project they generate comes pretty darn close to what we need, hence the fastest way is to create a Windows Azure AD-secured Web API project and tweak its code afterwards. Go ahead and create such a project, you can use this as a rough reference. I have only one small suggestion: when you go through the authentication settings wizard, expand “more options” and change the default “App ID URI” (which is based on the windows azure AD tenant, which you will not use beyond this point) into something that will make sense for your service on-premises. Something like the following:
Done? Excellent! Now you have a project ready to tweaked. Also, you have an application entry in your directory that you’ll never use: next time you swing by the Windows Azure portal, remember to delete it to tidy up.
Alright, tweaking time! Go under App_Start and open Startup.Auth.cs. You’ll find the following code:
public partial class Startup
{
    public void ConfigureAuth(IAppBuilder app)
    {
        app.UseWindowsAzureActiveDirectoryBearerAuthentication(
            new WindowsAzureActiveDirectoryBearerAuthenticationOptions
            {
                Audience = ConfigurationManager.AppSettings["ida:Audience"],
                Tenant = ConfigurationManager.AppSettings["ida:Tenant"]
            });
    }
}
Looks familiar? Of course it does. It is the code which inject OWIN middleware with the longest name on the planet, which also happens to secure calls by validating incoming tokens as coming from the indicated Windows Azure AD tenant.
During last tutorial I created a custom class for overriding the default behavior of that middleware, to source the validation keys form the ADFS metadata instead of from the Windows Azure AD tenant metadata. However, I also mentioned that such trick would soon be no longer necessary.
Well, guess what: it is no longer necessary – the inimitable Barry added a specialized middleware for ADFS, which looks just as simple as the Windows Azure one. Comment out the call to UseWindowsAzureActiveDirectoryBearerAuthentication and substitute it with the following:
app.UseActiveDirectoryFederationServicesBearerAuthentication(
    new ActiveDirectoryFederationServicesBearerAuthenticationOptions
    {
        Audience = ConfigurationManager.AppSettings["ida:Audience"],
        MetadataEndpoint = ConfigurationManager.AppSettings["ida:MetadataEndpoint"]
    });
Super-straightforward! All you need to do next is to go in the AppSettings in web.config and add the following entry for your ADFS’s metadata doc address:
 <add key="ida:MetadataEndpoint"
value="https://sts.contoso100.com/federationmetadata/2007-06/federationmetadata.xml" />
That is all. Quite the improvement - keep the shell open, we’ll need it gain soon.
Setting up the Web API in ADFS
In the old tutorial I gave you detailed step by step instructions on how to use the ADFS management UX to register the web API as a relying party trust. Given that it was quite a lot of screenshots, I didn’t feel like doing it all over again: hence I asked my friend Jairo Cadena, PM on the ADFS team, for a little help in coming up with the most compact PowerShell script he could come out with for the purpose. The results are pretty awesome, all you need is a single well-crafted line!
Log in your server on which ADFS is running, and launch PowerShell from the server manager; then, modify the following line to use the coordinates of your web API and paste it right at the prompt:
Add-ADFSRelyingPartyTrust -Name MyWebAPI -Identifier http://myadfsvagaries/webapi -IssuanceAuthorizationRules ‘=> issue(Type = “http://schemas.microsoft.com/authorization/claims/permit”, Value = “true”);’ -IssuanceTransformRules ‘c:[Type == "http://schemas.xmlsoap.org/ws/2005/05/identity/claims/emailaddress”] => issue(claim = c);’
Hit enter and – magic – your API is now provisioned as a known RP in ADFS.
Setting Up a Test Client Project in ADFS and in Visual Studio
We’re almost done: here I am going to follow a simplified flow which will make things much faster.
Registering a client in ADFS
In the old tutorial I wanted to show you how to leverage the WebAuthenticationBroker’s SSO mode, which requires you to use as Redirect URI the identifier of the Windows Store app, which in turn needs you to do some work to find out its value. However here I am using ADAL .NET, which does not really have a SSO mode (there’s no need for it on the desktop, given that there are no sandboxing rules to relax with special modes). Also, .NET apps don’t have such identifiers. Hence, pretty much any URI will do! Given that you still have the PowerShell open, go ahead and paste something to the effect of the following:
Add-ADFSClient -Name “MyClient” -ClientId “E1CF1107-FF90-4228-93BF-26052DD2C714″ -RedirectUri “http://anarbitraryreturnuri/”
Done. ADFS has an entry for the client too.
Create the Client Project
Here any rich client project type will do: WPF, WInForm, even a console app (though in that case make sure you place [STAThread] where you’ll run ADAL). I am building a WPF app here, for old times’ sake 
Add a reference to the ADAL NuGet. Make sure you don’t pick the beta! (I know, I know… we’ll tidy up soon).

Add a button and double click on it to generate an event handler. Here, add the following:
private async void Button_Click(object sender, RoutedEventArgs e)
{
    string authority = "https://sts.contoso100.com/adfs";
    string resourceURI = "http://myadfsvagaries/webapi";
    string clientID = "E1CF1107-FF90-4228-93BF-26052DD2C714";
    string clientReturnURI = "http://anarbitraryreturnuri/";

    AuthenticationContext ac =
        new AuthenticationContext(authority, false);
    AuthenticationResult ar =
        ac.AcquireToken(resourceURI, clientID, new Uri(clientReturnURI));

    string authHeader = ar.CreateAuthorizationHeader();
    HttpClient client = new HttpClient();
    HttpRequestMessage request =
        new HttpRequestMessage(HttpMethod.Get, "https://localhost:44302/api/Values");
    request.Headers.TryAddWithoutValidation("Authorization", authHeader);
    HttpResponseMessage response = await client.SendAsync(request);
    string responseString = await response.Content.ReadAsStringAsync();
    MessageBox.Show(responseString);
}
By now you know that the actual ADAL code is only in the three highlighted lines above, to 1) initialize the authority to point to ADFS 2) obtain a token for the resource and 3) put it in form of header – everything else is there for legibility and for the REST call to the API.
Don’t forget to add usings for Microsoft.IdentityModel.Clients.ActiveDirectory and System.Net.Http. You need to add a reference to System.Net.Http BTW. Also, note the async keyword in the handler declaration.
Testing the Solution
Let’s test the solution. Start the Web API in debug mode.
Small aside: if you have a spank-new system (as it’s the case for me Surface Pro 2, baby!) chances are that when starting the web API you’ll get the following:

That’s because the Web API is creating the SSL channel using the development certificate from IIS Express, which is of course untrusted. For web based apps that can stay that way, given that you always have the option of hitting “continue”. However for Web API scenarios that’s more problematic, given that clients will refuse to establish an SSL channel with an untrusted SSL certificate. Here you have 2 options: install the certificate among the trusted roots of the development machine (easy to do: hit continue, click “certificate error” on the IE bar, click view certificates, click install certificate, choose local machine/trusted roots certification authorities) or disable the channel check in the client application. Personally I much prefer the former, given that with the latter you risk forgetting to fix the code before deploying to production.
Once the API is running, start the client as well.

Hit the button. You’ll be prompted by the usual ADAL dialog, pointed to our ADFS test instance. Sign in.

Once you enter your credentials, voila’!

The dialog demonstrates that the Web API was successfully called, concluding our little walkthrough. If you want to make sure the check is really taking place, try to mess with the auth string before sending it and observe the results.
Wrap
Wow. I wrote the first tutorial on how to use ADFS for securing Web API at the end of July: in less than 3 months, things got dramatically simpler – just compare the length of the old tutorial (which in itself depended on yet another one) with the length of this!
Not only things got simpler, the products involved (Windows Server 2012 R2 and ADAL .NET) are now generally available for your to use in production. If you are working on a solution using those technologies, we want to hear form you! Hit me on my contact page and I’ll be happy to route you accordingly

<Return to section navigation list>
Yung Chow announced a Webcast Recording of Windows Azure IaaS Quick Start Kit (QSK) on 10/24/2013:
 This is the recording of the webcast in which I reviewed the deployment methodology (http://aka.ms/AzureIaasMethod) and walked through the PowerShell script for automating a deployment. You can get the script from http://aka.ms/QSK and set up Windows Azure PowerShell by following the instructions at http://aka.ms/AzureCmdlets to test the script yourself.
 This will get you prepared for a more elaborated Windows Azure PowerShell script which I am planning to release in a few weeks. - See more at: http://blogs.technet.com/b/yungchou/archive/2013/10/24/webcast-recording-of-windows-azure-iaas-quick-start-kit-qsk.aspx#sthash.k7UCTy40.dpuf

Vittorio Bertocci (@vibronet) described VS2013 RTM, Organizational Accounts and Publishing to Windows Azure Web Sites in a 10/24/2013 post:
 Ahh joy, after a wait few weeks long I an finally typing on by brand new purple type cover 2, snapped to a shiny new Surface Pro 2! I just *have* to use this guy, and what better mixed workload than writing a blog post? That will exercise Visual Studio, the portal, Live Writer… it’s a comprehensive workout!
 Today I’d like to talk about some features of the new organizational ASP.NET project templates, which might catch you by surprise if you don’t know about it.
The New Templates Save Validation Settings in a DB
 Here there’s the customary backgrounder. If you don’t care about the theory, you can skip to the last section right away.
As many of you know, the essence of authenticating a call boils down to deciding whether the caller is presenting a valid token with his/her/its request. What determines if a token should be considered valid? Well, the usual: some aspects are purely structural (it should be signed and not having been tampered with; should be of the expected format; should be scoped for your app; should not be expired; and so on) while others are expressions of the trust relationship between your application and the authority you are outsourcing your authentication to. In a nutshell, the latters boil down to the following: the incoming token should be signed with the key that you know belongs to the authority you trust (or the infrastructure the authority uses for minting tokens), and should have an Issuer value corresponding to it too.
Traditionally, WIF 1.0 and the corresponding classes in .NET 4.5 kept track of those values by saving them in the web.config. I already spoke about some of the limitations the original classes had in terms of expressive power and maintaining the settings fresh. Although for relatively stable scenarios you are fine, there are multiple issues in keeping those in the config if your settings change often and if you have to keep tab of a large number of authorities (if you sell SaaS apps, that’s a good place to be).
Given that those are scenarios of great interest, the ASP.NET templates use the WIF extensibility endpoints to save the validation coordinates in a database. The process is pretty straightforward, although a bit verbose: you can trace it back by looking of the autogenerated code in the template. Starting from the web.config, the first change is in the <identityConfiguration> element:
 <system.identityModel>
    <identityConfiguration>
      <issuerNameRegistry type="WebApplication1.Utils.DatabaseIssuerNameRegistry, WebApplication1" />
      <audienceUris>
        <add value="https://contoso7.onmicrosoft.com/WebApplication1" />
      </audienceUris>
      <securityTokenHandlers>
        <add type="System.IdentityModel.Services.Tokens.MachineKeySessionSecurityTokenHandler, System.IdentityModel.Services, Version=4.0.0.0, Culture=neutral, PublicKeyToken=b77a5c561934e089" />
        <remove type="System.IdentityModel.Tokens.SessionSecurityTokenHandler, System.IdentityModel, Version=4.0.0.0, Culture=neutral, PublicKeyToken=b77a5c561934e089" />
      </securityTokenHandlers>
      <certificateValidation certificateValidationMode="None" />
    </identityConfiguration>
  </system.identityModel>
The key line is the one highlighted. There the template specifies that the issuer validation coordinates are handled by a custom class, DatabaseIssuerNameRegistry. Its code is included in the template itself, and in fact it doesn’t do anything especially glamorous, in fact it’s pretty much what you’d find in the custom IssuerNameRegistry here: the main difference is that instead of shoving keys and tenantIDs in an XML file, the template saves it in a DBContext.
That is of course very nice, but it does come with some extra requirements in respect to the web.config-only version: now your app needs to have a database. For many of you this is likely to be an absolute no-brainer, given that chances are that you app already needed a DB for its own purposes: but for some other, who perhaps are just playing with the templates for figuring this identity stuff out, you might simply not have one (yet).
When you run your app on IIS Express that does not really make any difference, but it does when you deploy to Windows Azure Web Sites. If you publish without providing a DB connection string, on first execution (and assuming you have the custom errors off) you’ll get the following, in all its unedited glory:
Server Error in ‘/’ Application.
The system cannot find the file specified
Description: An unhandled exception occurred during the execution of the current web request. Please review the stack trace for more information about the error and where it originated in the code.
Exception Details: System.ComponentModel.Win32Exception: The system cannot find the file specified
Source Error:
An unhandled exception was generated during the execution of the current web request. Information regarding the origin and location of the exception can be identified using the exception stack trace below.
Stack Trace:
[Win32Exception (0x80004005): The system cannot find the file specified]

[SqlException (0x80131904): A network-related or instance-specific error occurred while establishing a connection to SQL Server. The server was not found or was not accessible. Verify that the instance name is correct and that SQL Server is configured to allow remote connections. (provider: SQL Network Interfaces, error: 52 - Unable to locate a Local Database Runtime installation. Verify that SQL Server Express is properly installed and that the Local Database Runtime feature is enabled.)]
   System.Data.SqlClient.SqlInternalConnection.OnError(SqlException exception, Boolean breakConnection, Action`1 wrapCloseInAction) +5296071
   System.Data.SqlClient.TdsParser.ThrowExceptionAndWarning(TdsParserStateObject stateObj, Boolean callerHasConnectionLock, Boolean asyncClose) +558
   System.Data.SqlClient.TdsParser.Connect(ServerInfo serverInfo, SqlInternalConnectionTds connHandler, Boolean ignoreSniOpenTimeout, Int64 timerExpire, Boolean encrypt, Boolean trustServerCert, Boolean integratedSecurity, Boolean withFailover) +5308555
   System.Data.SqlClient.SqlInternalConnectionTds.AttemptOneLogin(ServerInfo serverInfo, String newPassword, SecureString newSecurePassword, Boolean ignoreSniOpenTimeout, TimeoutTimer timeout, Boolean withFailover) +145
   System.Data.SqlClient.SqlInternalConnectionTds.LoginNoFailover(ServerInfo serverInfo, String newPassword, SecureString newSecurePassword, Boolean redirectedUserInstance, SqlConnectionString connectionOptions, SqlCredential credential, TimeoutTimer timeout) +920
   System.Data.SqlClient.SqlInternalConnectionTds.OpenLoginEnlist(TimeoutTimer timeout, SqlConnectionString connectionOptions, SqlCredential credential, String newPassword, SecureString newSecurePassword, Boolean redirectedUserInstance) +307
   System.Data.SqlClient.SqlInternalConnectionTds..ctor(DbConnectionPoolIdentity identity, SqlConnectionString connectionOptions, SqlCredential credential, Object providerInfo, String newPassword, SecureString newSecurePassword, Boolean redirectedUserInstance, SqlConnectionString userConnectionOptions) +434
   System.Data.SqlClient.SqlConnectionFactory.CreateConnection(DbConnectionOptions options, DbConnectionPoolKey poolKey, Object poolGroupProviderInfo, DbConnectionPool pool, DbConnection owningConnection, DbConnectionOptions userOptions) +225
   System.Data.ProviderBase.DbConnectionFactory.CreatePooledConnection(DbConnectionPool pool, DbConnectionOptions options, DbConnectionPoolKey poolKey, DbConnectionOptions userOptions) +37
   System.Data.ProviderBase.DbConnectionPool.CreateObject(DbConnectionOptions userOptions) +558
   System.Data.ProviderBase.DbConnectionPool.UserCreateRequest(DbConnectionOptions userOptions) +67
   System.Data.ProviderBase.DbConnectionPool.TryGetConnection(DbConnection owningObject, UInt32 waitForMultipleObjectsTimeout, Boolean allowCreate, Boolean onlyOneCheckConnection, DbConnectionOptions userOptions, DbConnectionInternal& connection) +1052
   System.Data.ProviderBase.DbConnectionPool.TryGetConnection(DbConnection owningObject, TaskCompletionSource`1 retry, DbConnectionOptions userOptions, DbConnectionInternal& connection) +78
   System.Data.ProviderBase.DbConnectionFactory.TryGetConnection(DbConnection owningConnection, TaskCompletionSource`1 retry, DbConnectionOptions userOptions, DbConnectionInternal& connection) +167
   System.Data.ProviderBase.DbConnectionClosed.TryOpenConnection(DbConnection outerConnection, DbConnectionFactory connectionFactory, TaskCompletionSource`1 retry, DbConnectionOptions userOptions) +143
   System.Data.SqlClient.SqlConnection.TryOpen(TaskCompletionSource`1 retry) +83
   System.Data.SqlClient.SqlConnection.Open() +96
   System.Data.Entity.SqlServer.<>c__DisplayClass2f.<UsingConnection>b__2d() +73
   System.Data.Entity.SqlServer.<>c__DisplayClass1.<Execute>b__0() +10
   System.Data.Entity.SqlServer.DefaultSqlExecutionStrategy.Execute(Func`1 operation) +189
   System.Data.Entity.SqlServer.DefaultSqlExecutionStrategy.Execute(Action operation) +78
   System.Data.Entity.SqlServer.SqlProviderServices.UsingConnection(DbConnection sqlConnection, Action`1 act) +229
   System.Data.Entity.SqlServer.SqlProviderServices.UsingMasterConnection(DbConnection sqlConnection, Action`1 act) +376
   System.Data.Entity.SqlServer.SqlProviderServices.GetDbProviderManifestToken(DbConnection connection) +201
   System.Data.Entity.Core.Common.DbProviderServices.GetProviderManifestToken(DbConnection connection) +85

[ProviderIncompatibleException: The provider did not return a ProviderManifestToken string.]
   System.Data.Entity.Core.Common.DbProviderServices.GetProviderManifestToken(DbConnection connection) +269
   System.Data.Entity.Utilities.DbProviderServicesExtensions.GetProviderManifestTokenChecked(DbProviderServices providerServices, DbConnection connection) +33

[ProviderIncompatibleException: An error occurred while getting provider information from the database. This can be caused by Entity Framework using an incorrect connection string. Check the inner exceptions for details and ensure that the connection string is correct.]
   System.Data.Entity.Utilities.DbProviderServicesExtensions.GetProviderManifestTokenChecked(DbProviderServices providerServices, DbConnection connection) +193
   System.Data.Entity.Infrastructure.<>c__DisplayClass1.<ResolveManifestToken>b__0(Tuple`3 k) +32
   System.Collections.Concurrent.ConcurrentDictionary`2.GetOrAdd(TKey key, Func`2 valueFactory) +72
   System.Data.Entity.Infrastructure.DefaultManifestTokenResolver.ResolveManifestToken(DbConnection connection) +180
   System.Data.Entity.Utilities.DbConnectionExtensions.GetProviderInfo(DbConnection connection, DbProviderManifest& providerManifest) +56
   System.Data.Entity.DbModelBuilder.Build(DbConnection providerConnection) +43
   System.Data.Entity.Internal.LazyInternalContext.CreateModel(LazyInternalContext internalContext) +62
   System.Data.Entity.Internal.RetryLazy`2.GetValue(TInput input) +123
   System.Data.Entity.Internal.LazyInternalContext.InitializeContext() +611
   System.Data.Entity.Internal.InternalContext.GetEntitySetAndBaseTypeForType(Type entityType) +18
   System.Data.Entity.Internal.Linq.InternalSet`1.Initialize() +53
   System.Data.Entity.Internal.Linq.InternalSet`1.get_InternalContext() +15
   System.Data.Entity.Infrastructure.DbQuery`1.System.Linq.IQueryable.get_Provider() +38
   System.Linq.Queryable.Where(IQueryable`1 source, Expression`1 predicate) +63
   WebApplication1.Utils.DatabaseIssuerNameRegistry.ContainsKey(String thumbprint) +347
   WebApplication1.Utils.DatabaseIssuerNameRegistry.RefreshKeys(String metadataLocation) +89
   WebApplication1.IdentityConfig.RefreshValidationSettings() +31
   WebApplication1.IdentityConfig.ConfigureIdentity() +8
   WebApplication1.MvcApplication.Application_Start() +18

[HttpException (0x80004005): An error occurred while getting provider information from the database. This can be caused by Entity Framework using an incorrect connection string. Check the inner exceptions for details and ensure that the connection string is correct.]
   System.Web.HttpApplicationFactory.EnsureAppStartCalledForIntegratedMode(HttpContext context, HttpApplication app) +9863473
   System.Web.HttpApplication.RegisterEventSubscriptionsWithIIS(IntPtr appContext, HttpContext context, MethodInfo[] handlers) +118
   System.Web.HttpApplication.InitSpecial(HttpApplicationState state, MethodInfo[] handlers, IntPtr appContext, HttpContext context) +172
   System.Web.HttpApplicationFactory.GetSpecialApplicationInstance(IntPtr appContext, HttpContext context) +336
   System.Web.Hosting.PipelineRuntime.InitializeApplication(IntPtr appContext) +296

[HttpException (0x80004005): An error occurred while getting provider information from the database. This can be caused by Entity Framework using an incorrect connection string. Check the inner exceptions for details and ensure that the connection string is correct.]
   System.Web.HttpRuntime.FirstRequestInit(HttpContext context) +9877804
   System.Web.HttpRuntime.EnsureFirstRequestInit(HttpContext context) +101
   System.Web.HttpRuntime.ProcessRequestNotificationPrivate(IIS7WorkerRequest wr, HttpContext context) +254
Version Information: Microsoft .NET Framework Version:4.0.30319; ASP.NET Version:4.0.30319.19064
That clearly cannot stand. In the next section I’ll look at one way of making that error go away. Thanks to Dan Roth for the helpful chat about how to do so with the shortest path!
Adding a DB to an Existing Windows Azure Web Site and Using It at Publication Time
The fix for the issue is simple, you need to have a DB in your Web Site and you need to specify it at publication time. Luckily, the Windows Azure portal make adding a DB to an existing Web Site a walk in the park!
Start by navigating to https://manage.windowsazure.com, zero on the Web Sites section and pick the site you want to target. Once there, head to the Linked Resources tab. If you originally set up the site via Quick Create, you’ll see something like the following:

Hit the “link a resource” button.

Choose “Create a new resource”.

Lots of choices there! I’ll pick “SQL Database”.

In my case, I am happy with the default name… also, I have an existing server I can latch to, but you can create one on the fly if you don’t (very neat).
Once you are done choosing your options, hit the “done” button.

Back on the linked resources screen, you’ll see that you now have your new DB linked to your web site.
Go back to the dashboard. Once here, download the publish profile for your web site (you’ll the link under “quick glance”).
Switch to Visual Studio and start another Publish operation; this time, import the new publish profile. Go to Settings.

As you can see, you now have your newly created/linked DB available in the Databases section. Select it in the dropdown and hit Publish. Wait for it and…

…instead of that nasty error, you get the shiny default bootstrap themed app UI!
That’s it. Pretty straightforward, right?
Note, this applies only to the Web UX (MVC/Web Form) projects when used with Organizational Accounts options in the cloud (Single Organization and Multiple Organizations, cloud). For Single Organization –On Premises the template still sticks with the good ol’ValidatingIssuerNameRegistry.
The use of a DB for validation coordinates is great for multi organization apps (SaaS, multi-tenancy, etc). Personally, I am less convinced about it when it comes to single organization projects (e.g. LOB apps) given that the validation coordinates amount to 2 strings, one of which will change sparingly during the app lifetime; however I fully trust my friends in ASP.NET, who tell me that every app will need a DB anyway hence this is not going to really add any requirement that wasn’t already there. In any case, if you stumble in that hopefully the big verbatim dump with the error text will lure your search engine here to the solution. Let us know how that goes!

<Return to section navigation list>
• Michael S. Collier (@MichaelCollier) described Setting a Web/Worker Role Name in a 10/25/2013 post:
 I was recently reminded by my friend Nuno that you can actually set the name of the machine used in a Windows Azure Cloud Service (Web or Worker Role). Normally I really don’t care about the name of the machine. I’m fine with RD-whatever.
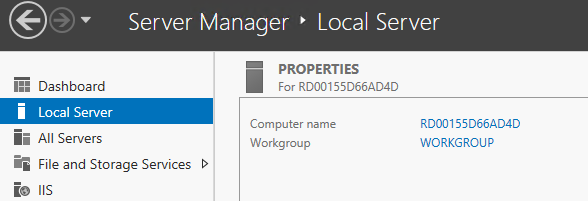
If I did care, there is a way to set that machine name. There is a “vmName” attribute in the Role element of the role’s .cscfg file.
<?xml version="1.0" encoding="utf-8"?>
<ServiceConfiguration serviceName="CloudServiceName" xmlns="http://schemas.microsoft.com/ServiceHosting/2008/10/ServiceConfiguration" osFamily="3" osVersion="*" schemaVersion="2013-10.2.2">
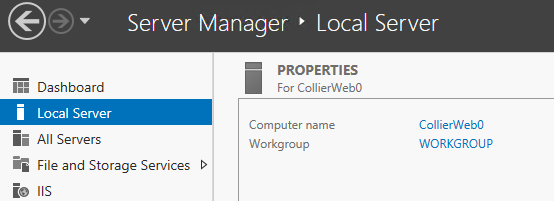
<Role name="WebRole1" vmName="CollierWeb">
<Instances count="1" />
<ConfigurationSettings/>
</Role>
</ServiceConfiguration>
Doing so will result in the machine name being set to whatever is in the “vmName” attribute, appended with the instance number (0, 1, 2, etc.)
Keep in mind that the “vmName” attribute value must be less than 10 characters.
Note that the role name will still be whatever is set in the .cscfg, appended with the instance number.
For more on the schema of the .cscfg file, please see MSDN.
Steven Martin (@stevemar_msft) reported Microsoft Acquires Apiphany on 10/23/2013:
 Today, I’m excited to announce that we have acquired Apiphany—a leading API management delivery platform.
While there is nothing new about app extensibility, cloud computing has rapidly accelerated the use cases for extensibility which has increased the value of the APIs. As you might expect, with expansion and increased value, comes additional work to expose APIs reliably, securely and at scale.
 Our newly acquired API management services provide businesses of any size the tools they need to expose particular endpoints while selectively gating access to more sensitive data and services.
![image_thumb75_thumb3_thumb_thumb_thu[9]](http://lh6.ggpht.com/-MinzcY4b-LY/UmruYCGHVoI/AAAAAAABKNY/1aq8qX4SWgw/image_thumb75_thumb3_thumb_thumb_thu%25255B12%25255D.png?imgmax=800 "image_thumb75_thumb3_thumb_thumb_thu[9]") We look forward to surfacing API management services within Windows Azure and providing our customers with the technology they need to grow their API ecosystem very soon.
We look forward to surfacing API management services within Windows Azure and providing our customers with the technology they need to grow their API ecosystem very soon.
Steven Martin
General Manager
Windows Azure Business and Marketing
Robert Green reported the availability of the Episode 82 of Visual Studio Toolbox video on 10/23/2013:
The Windows Azure SDK 2.2 has been released to support the final RTM release of Visual Studio 2013. In this episode, I am joined by Paul Yuknewicz, Dennis Angeline and Boris Scholl for a look at how the SDK adds new levels of productivity to Visual Studio for cloud development. These features include:
- Integrated Windows Azure Sign-In support [03:40]. Integrated sign-in support enables developers to develop/test/manage Azure resources within Visual Studio without having to download or use management certificates.
- Filtering and subscription management in the Server Explorer. Once you login within Visual Studio, you can filter which Azure subscriptions/regions are visible within the Server Explorer by right-clicking the "Filter Services" context menu. You can also use the "Manage Subscriptions" context menu to manage your Azure subscriptions.
- Remote debugging of Cloud Services within Visual Studio [17:00]. With live, remote debugging support from within Visual Studio, you are now able to have more visibility than ever before into how your code is operating live in Azure.
For more information on the Azure SDK 2.2 read ScottGu's blog.
Return to section navigation list>
• Walter Meyers III described Filtering Azure Applications in SCOM 2012 Performance Views in a 10/22/2013 post:
Okay, so you now have your shiny, new installation of SCOM 2012 up and running. You have migrated your old Windows Azure management pack using the Visual Studio Authoring Extensions for Visual Studio 2010, using techniques from my previous post here. You have created some new Performance views based on the now shipping SCOM 2012 Management Pack for Windows Azure found here. But now you realize that whereas with SCOM 2007 R2, you could filter your performance views based on role instance, as seen below.

With SCOM 2012, you see the following instead. Where are the individual role instances? Unfortunately, they’re not there any longer based on the operation of the new SCOM 2012 Management Pack for Windows Azure. Yes, I have asked the Program Manager of the management pack team to restore this functionality, so we’ll see how it goes. For now, though, we will have to find an alternate way to create a performance view targeted towards a specific Azure application. We will accomplish this with groups. Groups are an important feature in SCOM in that they provide you the flexibility to create various types of views by grouping together logical collections of objects. You can use groups to secure views by user role, or you can also specify subgroups, or even exclude objects from a given group. Not all groups, however, will necessarily apply to your Windows Azure applications.

So here is our starting point with a Performance view that displays memory performance for all applications within a given subscription.

Click on the Authoring view, and select the Groups node, as seen below. Right-click on the Groups node and select Create a new group… from the popup menu, which will display the Group creation wizard.

On the first page type a name for the application(s) that you want to group together in your Performance view. Select a management pack in which to store this monitor. Select the Next button when done.

On the Choose Members from a List wizard page, select the Add/Remove Objects… button, which will present a dialog for choosing objects that will be the members of this group.

In the dialog, use the filter to find and add the applications you would like to monitor in this Performance view. You can add each to the list box at the bottom using the Add button, as seen below.

Go ahead and skip through the Create a Membership Formula and Choose Optional Subgroups wizard pages until you reach the Specify Exclude List dialog, as seen below. Choose the Create button.

You should now see your group in the list, as below.

Now head back to the Monitoring view, as seen below. Right-click on your Performance view and select the Properties item in the popup menu, as seen below.

In the Properties dkalog, select the ellipsis button (…) under the Show data contained in a specific group: heading.

You will now see a dialog that will allow you to search through objects and select one, as seen below.

Type in a portion of the text of the group you created previously, as seen below. Select your group and then select the OK button.

You’re now back to the original Properties dialog. Select the OK button.

You should now see your Performance view is properly filtered.

We’re all done. See you next time, when we will cover how to filter Event logs.
Wade Wegner (@WadeWegner) posted a PowerShell Script for Cleaning Up Your indows Azure Resources on 10/25/2013:
Special thanks to Michael Washam for helping me find and fix a bug in my code!
 I find myself regularly creating resources in Windows Azure, such as cloud services, virtual machines, storage accounts, virtual networks, and the like. Most of the time this is part of writing scripts or testing out deployments, and I don't plan to keep them around indefinitely. The challenge this creates is how to cleanup all these resources. While it's possible to do this through the Windows Azure management portal you'll find in practice that it's slow and cumbersome.
 Consequently, I've created a script which I use regularly to cleanup my resources.
There are times when I want to keep a particular cloud service or storage account around yet they belong to the same subscription as a lot of resources I want to delete. Fortunately it's easy to create an array of resource names and use the -notin operator in the script.
Before we start, a few quick tips:
-
Use the Windows PowerShell ISE. You'll find this makes life a lot easier.
-
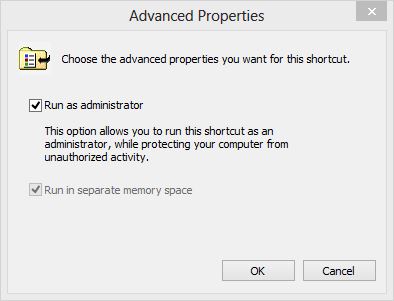
Run the Windows PowerShell ISE as an administrator. I find it easiest to go to the Advanced Properties of the ISE and check the Run as administrator box.
-
Change the execution policy for PowerShell so that you can run your script in the ISE.
Set-ExecutionPolicy RemoteSigned
-
Download the correct publish settings file from the Windows Azure management portal. The easiest way to do this is to run the following command in the ISE:
Get-AzurePublishSettingsFile
Okay, now that this is out of the way, here's the script I use for removing unwanted resources while preserving those I want to keep.
Import-AzurePublishSettingsFile "C:\temp\me.publishsettings"

$sub = "Windows Azure MVP"

Select-AzureSubscription -SubscriptionName $sub
Set-AzureSubscription -DefaultSubscription $sub

$websitesToSave = "website1", "website2"
$VMsToSave = "vm1", "vm2"
$storageAccountsToSave = "storageaccount1"

cls

Get-AzureWebsite | Where {$_.Name -notin $websitesToSave} | Remove-AzureWebsite -Force
Get-AzureService | Where {$_.Label -notin $VMsToSave} | Remove-AzureService -Force
Get-AzureDisk | Where {$_.AttachedTo -eq $null} | Remove-AzureDisk -DeleteVHD
Get-AzureStorageAccount | Where {$_.Label -notin $storageAccountsToSave} | Remove-AzureStorageAccount
Get-AzureAffinityGroup | Remove-AzureAffinityGroup
Remove-AzureVNetConfig
Notice that the first thing I do is ensure I've selected the correct subscription. Next I define the resources I do not want to remove.
When executed you'll see output similar to the following:
WARNING: 12:17:44 PM - Removing cloud service vm3...
WARNING: 12:17:46 PM - Removing Production deployment for webfarm9493uhp6np service
WARNING: 12:18:19 PM - Removing cloud service vm4...
WARNING: 12:18:21 PM - Removing Production deployment for webfarmcvotsjxpxa service
WARNING: 12:18:54 PM - Removing cloud service vm5...
WARNING: 12:18:57 PM - Removing Production deployment for webfarmwqpvdxl893 service
WARNING: 12:22:30 PM - Removing cloud service vm6...

OperationDescription         OperationId                            OperationStatus
--------------------         -----------                            ---------------
Remove-AzureDisk             8b8b5e5d-5c6b-2086-8882-d3c301004c2d   Succeeded
Remove-AzureDisk             64a75cf5-eb2c-2543-b32a-40fdf2b30a4e   Succeeded
Remove-AzureDisk             22af4853-e028-2b9b-9de2-cf58390ab833   Succeeded
Remove-AzureDisk             1df3ac85-4679-2edb-848e-7d8010d0cf25   Succeeded
Remove-AzureDisk             70e3551b-b0ab-2bcd-9e87-352e0a97e0c3   Succeeded
Remove-AzureDisk             3875a2af-9526-2f50-adf8-0ed99baaf675   Succeeded
Remove-AzureDisk             645615fa-c887-2431-8636-1b3e06b9e685   Succeeded
Remove-AzureDisk             c8dcd546-6161-23c6-8e24-e5e4725bce9d   Succeeded
Remove-AzureDisk             a79ff233-620a-23c4-89cc-34b963d55a01   Succeeded
Remove-AzureDisk             8b58db0d-aa6c-25d2-9939-f6c1912c8090   Succeeded

Remove-AzureStorageAccount   ffd7ef08-b913-2b20-aceb-ef06787a9674   Succeeded
Remove-AzureStorageAccount   26495110-66b0-230b-b98c-cb6d2b2b050e   Succeeded
Remove-AzureStorageAccount   9b85d71b-7f9a-2494-9eb3-9e00eb9b5820   Succeeded
Remove-AzureStorageAccount   806128ef-2990-2e27-bec0-c61ccb3fc7fe   Succeeded
Remove-AzureStorageAccount   850eb732-5df2-219c-82ed-e351a6b89f65   Succeeded
Remove-AzureStorageAccount   498b0283-4be3-2851-8abc-5b1da0108bf7   Succeeded

Remove-AzureAffinityGroup    07ddb3a8-7ef3-2e78-a30f-71753e77a6cb   Succeeded

Remove-AzureVNetConfig       d62374ca-c9c6-24b4-ae5d-31d93ada4623   Succeeded
Note: there's no way to specify a particular Virtual Network name. Consequently, the best you can do is delete everything and, if the VNet is still in use it will throw an error. That's fine.
I hope it goes without saying that with phenomenal cosmic power comes great responsibility. You can easily wreak havoc in your environments by deleting things you shouldn't. In fact, I would recommend you never run a script like this in a production environment; instead, focus on DEV/TEST environments.
Over time I'll like add additional resources to this list. For now I'm happy with the above as it removes most of the resources that have a monthly cost associated with them.
The Windows Azure Technical Support Team (WATS) posted Windows Azure technical support for MSDN, TechNet or MPN Users and Partners on 10/23/2013:
When you purchase a MSDN, TechNet or MPN subscription, you are entitled for submitting technical support incidents. You can use those for creating Windows Azure technical incidents.
Below is the summary of subscription name, levels and technical support incidents you are entitled to with a subscription.
MSDN

Please visit http://msdn.microsoft.com/en-gb/subscriptions/buy.aspx for updated information.
TechNet

Microsoft Partner Network (MPN)

Please visit https://mspartner.microsoft.com/en/us/Pages/Support/benefits-and-incidents.aspx?Page=IncidentsBenefitsControlJsonP for updated information.
Create a service request
Service requests can be created from the Management portal following the below steps:
- Log on to https://manage.windowsazure.com/
- Click on your account name and then click on Contact Microsoft Support

3.Click on Microsoft Professional Contract Support (for MSDN, TechNet, MPN subscribers)

4. Choose the appropriate details under Products, Problem type and Category and click Continue.

5.If you have not activated your technical support benefit yet then do so using this link http://support.microsoft.com/ActivateSupport

See Windows Azure support - How it works and how to receive help for other support options.
Scott Hanselman (@shanselman) produced an Intro to Windows Azure with Scott Hanselman on 10/22/2013 for Channel9:
 Get started with Windows Azure in less than five minutes. Watch as Scott Hanselman demonstrates how easy it is to create, deploy, and manage an ASP.NET web site on Windows Azure, all from within Visual Studio.
![image_thumb75_thumb3_thumb_thumb_thu[22]](http://lh6.ggpht.com/-o3UfluqLDhY/UmrufTjiGrI/AAAAAAABKO8/eOiBE-1jziM/image_thumb75_thumb3_thumb_thumb_thu%25255B14%25255D.png?imgmax=800 "image_thumb75_thumb3_thumb_thumb_thu[22]") Check out these resources for more information:
Check out these resources for more information:
<Return to section navigation list>
Praveen Vijayaraghavan described What’s new in Hyper-V Replica in Windows Server 2012 R2 on 10/22/2013:
18th October 2013 marked the General Availability of Windows Server 2012 R2. The teams have accomplished an amazing set of features in this short release cycle and Brad’s post @ http://blogs.technet.com/b/in_the_cloud/archive/2013/10/18/today-is-the-ga-for-the-cloud-os.aspx captures the investments made across the board. We encourage you to update to the latest version and share your feedback.
This post captures the top 8 improvements done to Hyper-V Replica in Windows Server 2012 R2. We will be diving deep into each of these features in the coming weeks through blog posts and TechNet articles.
Seamless Upgrade
You can upgrade from Windows Server 2012 to Windows Server 2012 R2 without having to re-IR your protected VMs. With new features such as cross-version live migration, it is easy to maintain your DR story across OS upgrades. You can also choose to upgrade your primary site and replica site at different times as Hyper-V Replica will replicate your virtual machines from a Windows Server 2012 environment to a Windows Server 2012 R2 environment.
30 second replication frequency
Windows Server 2012 allowed customers to replicate their virtual machines at a preset 5minute replication frequency. Our aspirations to bring down this replication frequency was backed by customer’s asks on providing the flexibility to set different replication frequencies to different virtual machines. With Windows Server 2012 R2, you can now asynchronously replicate your virtual machines at either 30second, 5mins or 15mins frequency.

Additional Recovery Points
Customers can now have a longer retention with 24 recovery points. These 24 (up from 16 in Windows Server 2012) recovery points are spaced at an hour’s interval.

Linux guest OS support
Hyper-V Replica, since it’s first release has been agnostic to the application and guest OS. However certain capabilities were unavailable on non-Windows guest OS in it’s initial avatar. With Windows Server 2012 R2, we are tightly integrated with non-Windows OS to provide file-system consistent snapshots and inject IP addresses as part of the failover workflow.
Extended Replication
You can now ‘extend’ your replica copy to a third site using the ‘Extended replication’ feature. The functionality provides an added layer of protection to recover from your disaster. You can now have a replica copy within your site (eg: ClusterA->ClusterB in your primary datacenter) and extend the replication for the protected VMs from ClusterB->ClusterC (in your secondary data center).

To recover from a disaster in ClusterA, you can now quickly failover to the VMs in ClusterB and continue to protect them to ClusterC. More on extended replication capabilities in the coming weeks.
Performance Improvements
Significant architectural investments were made to lower the IOPS and storage resources required on the Replica server. The most important of these was to move away from snapshot-based recovery points to “undo logs” based recovery points. These changes have a profound impact on the way the system scales up and consumes resources, and will be covered in greater detail in the coming weeks.
Online Resize
In Windows Server 2012 Hyper-V Replica was closely integrated with the various Hyper-V features such as VM migration, storage migration etc. Windows Server 2012 R2 allows you to resize a running VM and if your VM is protected – you can continue to replicate the virtual machine without having to re-IR the VM.
Hyper-V Recovery Manager
We are also excited to announce the paid preview of Hyper-V Recovery Manager (HRM)(http://blogs.technet.com/b/scvmm/archive/2013/10/21/announcing-paid-preview-of-windows-azure-hyper-v-recovery-manager.aspx). This is a Windows Azure Service that allows you to manage and orchestrate various DR workflows between the primary and recovery datacenters. HRM does *not* replicate virtual machines to Windows Azure – your data is replicated directly between the primary and recovery datacenter. HRM is the disaster recovery “management head” which is offered as a service on Azure.
![image_thumb75_thumb3_thumb_thumb_thu[8]](http://lh6.ggpht.com/-JDpxbW6NvpE/UmruglF1U3I/AAAAAAABKPM/bFipBGB0ln4/image_thumb75_thumb3_thumb_thumb_thu%25255B8%25255D.png?imgmax=800 "image_thumb75_thumb3_thumb_thumb_thu[8]") No significant Azure-specific articles so far this week.
No significant Azure-specific articles so far this week.
<Return to section navigation list>
• Julie Lerman (@julielerman) explained How EF6 Enables Mocking DbSets more easily in a 10/26/2013 post:
 There’s an interesting change in EF6 that simplifies unit testing when EF is in the way and you don’t want to engage it at all.
EF6 DbSet gained new features. The team had to decide if they would make a breaking change to the existing IDbSet interface or leave that be and just change DbSet. They chose the latter route. In doing so, they also ensured that we could use the DbSet directly for testing by adding a new constructor.
 Here'[s how] you can see the different constructors and how they affect our ability to test.
EF5 DbSet Constructor
The DbSet constructor is tied to a DbContext by way of the InternalQuery that is used internally in the constructor.
internal DbSet(InternalSet<TEntity> internalSet)
   : base((IInternalQuery<TEntity>) internalSet)
 {
   this._internalSet = internalSet;
 }
In EF5, we also have IDbSet (DbSet derives from this) (and IObjectSet which was introduced in EF4) . These interfaces contain the set operations (Add, Update, Remove and some additional methods through other interfaces) and can be implemented without forcing any ties to EF’s DbContext.
That’s what we’ve used in the past to create fake DbSets for testing scenarios.
EF6 DbSet Constructors
The internal constructor is still there.
    internal DbSet(InternalSet<TEntity> internalSet)
      : base((IInternalQuery<TEntity>) internalSet)
    {
      this._internalSet = internalSet;
    }
But now there is another constructor. It’s protected and only uses an set interface, but not the query interface. This allows mocking frameworks to get access to DbSet and at the same time, benefit from some of the methods added to DbSet for EF6.
  /// <summary>
  /// Creates an instance of a <see cref="T:System.Data.Entity.DbSet`1"/> when called from the constructor of a derived
  ///             type that will be used as a test double for DbSets. Methods and properties that will be used by the
  ///             test double must be implemented by the test double except AsNoTracking, AsStreaming, an Include where
  ///             the default implementation is a no-op.
  ///
  /// </summary>
  protected DbSet()
    : this((InternalSet<TEntity>) null)
  {
  }
Even if you wanted to create your own fakes (or test doubles) in EF6, you can do that with DbSet now, not IDbSet. IDbSet is still there for backwards compatibility.
There are two detailed documents on MSDN for using EF6 to create Test Doubles and to use with Mocking Frameworks.
You also might find the meeting notes about this change interesting. I sure do! :)
I am curious to revisit my work with Telerik’s JustMock. I built some tests with EF5 and JustMock in my Automated Testing for Fraidy Cats course on Pluralsight. When using the paid version, everything just works. But when using JustMock Lite, the free version, it was not able to grok DbSets and you still needed to implement your own fake. I’ll be checking to see if the new DbSet implementation allows the free version of JustMock to mock DbSets on it's own now.
//update about 20 minutes after initial post. The limitation of JustMock Lite is that it doesn't support ReturnsCollection which is what you want to emulate the return of a DbSet. So if you're not willing to pay for your tools, you can use the free version (which has a ton of features) and do a little extra work (create your own test double for DbSet which you can see how to do in MSDN doc I linked to above.
 • Michael Washington (@ADefWebserver) described Using JayData to Consume the Visual Studio LightSwitch OData Business Layer in an AngularJs CRUD Application on 10/25/2013:

You can consume your backend OData Visual Studio LightSwitch services in AngularJs. Coding your business layer in LightSwitch will save you a lot of development time and reduce the code you will be required to write.

This example uses JayData, a unified data access library for JavaScript that will be used to allow AngularJs to read and write to the LightSwitch OData layer.
The Application

Tasks are displayed in a list.

Clicking the add new button will display the form to allow a new task to be created.

The task can be entered and saved.

New tasks will appear immediately.

Clicking on an existing task will open it in a form so that it can be edited.
Clicking the remove button deletes a task.

Business rules created in the LightSwitch business layer are enforced.
Creating The LightSwitch Application

Use Visual Studio 2013 (or higher), create a New Project.

Create a new LightSwitch application.

Right-click on the Data Sources folder and select Add Table.

Create a table called ToDo and save it.

The table will be pluralized to ToDoes.

Select Write Code then ToDoes Validate.
Use the following code for the method:
        partial void ToDoes_Validate(ToDo entity,
            EntitySetValidationResultsBuilder results)
        {
            // Do not allow a task to be called {New Task]
            if (entity.TaskName == "[New Task]")
            {
                results.AddEntityError(
                    "Task cannot be named [New Task]"
                    );
            }
            // Do not allow more than 1 incomplete Task
            if (entity.IsComplete == false)
            {
                int intCountOfIncomplete =
                    this.DataWorkspace.ApplicationData.ToDoes
                    .Where(x => x.IsComplete == false).Count();
                if (intCountOfIncomplete > 0)
                {
                    results.AddEntityError(
                        "Cannot have more than 1 incomplete Task"
                        );
                }
            }
        }

We can create LightSwitch HTML Client screens to allow us to enter sample data.
(see: Visual Studio LightSwitch 2013–Hello World! for directions on creating LightSwitch screens)

We also see that the LightSwitch business rules are enforced.
Create the Entity Context
JayData tracks the changes of the entities using an entity context. Adding, updating, deleting entities happen through the context, which holds the reference to the added, updated and deleted objects and dispatches the operations (HTTP requests) to the OData endpoint after calling context.saveChanges(). Entity contexts can be defined manually or generated the JaySvcUtil.exe . You can download the latest version from JaySvcUtil CodePlex page.

When we run the application we note the url.

If we change the path to ApplicationData.svc we see the OData service.

We use the JayScvUtil tool to create the entity context using the format:
JaySvcUtil.exe -m http://{domain}:{port}/ApplicationData.svc/$metadata -o ApplicationData.js

We add the resulting file to the project.
Creating The AngularJs View Page

We will first make a simple page that displays data.
Right-click on the Server project and Add a new HTML page.

Name the page JayDataView.
Use the following code for the page:
<html>
<head>
    <title>JayData.org Sample</title>
    <script src="http://code.jquery.com/jquery-2.0.3.min.js"></script>
    <script src="http://code.angularjs.org/1.2.0-rc.3/angular.js"></script>
    <script src="http://include.jaydata.org/datajs-1.0.3.js"></script>
    <script src="http://include.jaydata.org/jaydata.js"></script>
    <script src="http://include.jaydata.org/jaydatamodules/angular.js"></script>
    <script src="JayDataView.js"></script>
    <script src="ApplicationData.js"></script>
</head>
<body data-ng-app="app">
    <div ng-controller="ToDoesController">
        <ul>
            <li ng-repeat="ToDo in ToDoes">
                <input id="checkSlave" type="checkbox" ng-model="ToDo.IsComplete">
                {{ToDo.TaskName}}
            </li>
        </ul>
    </div>
</body>
</html>
Create a JavaScript file called JayDataView.js and use the following code:
// Create an Angular app and inject JayData
var app = angular.module('app', ['jaydata']);
// Define a controller
function ToDoesController($scope, $data) {
    // Make a empty collection for ToDoes
    $scope.ToDoes = [];
    var ApplicationData = new LightSwitchApplication.ApplicationData({
        name: 'oData',
        oDataServiceHost: '/ApplicationData.svc'
    });
    ApplicationData.onReady(function () {
        // Connect the ToDoes collection to the
        // JayData toLiveArray()
        $scope.ToDoes = ApplicationData.ToDoes.toLiveArray();
    });
}

Run the application.

Navigate to the JayDataView page in the root of the website and the tasks will show.
Create The AngularJs CRUD Page
Create a new page called JayData.html and use the following code:
<html>
<script src="http://code.jquery.com/jquery-2.0.3.min.js"></script>
<script src="http://code.angularjs.org/1.2.0-rc.3/angular.js"></script>
<script src="http://include.jaydata.org/datajs-1.0.3.js"></script>
<script src="http://include.jaydata.org/jaydata.js"></script>
<script src="http://include.jaydata.org/jaydatamodules/angular.js"></script>
<script src="JayData.js"></script>
<script src="ApplicationData.js"></script>
<body>
    <div data-ng-app="app" ng-controller="ToDoEditorController">
        <ul>
            <li ng-repeat="ToDo in colToDoes">
                <input id="checkbox" type="checkbox" ng-model="ToDo.IsComplete" disabled="disabled">
                <a href="#" ng-click="$parent.selectedToDo = ToDo">{{ToDo.TaskName}}</a>
            </li>
        </ul>
        <button ng-click="newToDo()">add new</button>
        <p>
            <form ng-if="selectedToDo">
                <fieldset style="width: 300px; background-color: #FFFFCC;">
                    <legend>{{selectedToDo.TaskName}}</legend>
                    <br />
                    <label>
                        <span><strong>Id:</strong></span>
                        <span>{{selectedToDo.Id}}</span>
                        <span>
                            <br />
                            <strong>Task Name:</strong>
                        </span>
                        <input ng-model="selectedToDo.TaskName" size="20" />
                        <span>
                            <br />
                            <strong>Is Complete:</strong>
                        </span>
                        <input type="checkbox" ng-model="selectedToDo.IsComplete" />
                        <br />
                        <br />
                    </label>
                    <button ng-click="save()">Save</button>
                    <button ng-click="remove()">Remove</button>
                </fieldset>
            </form>
        </p>
    </div>
</body>
</html>
Use the following code for the JayData.js file:
var app = angular.module('app', ['jaydata']);
function ToDoEditorController($scope, $data) {
    $scope.ToDoes = [];
    $scope.selectedToDo = null;
    var ApplicationData = new LightSwitchApplication.ApplicationData({
        name: 'oData',
        oDataServiceHost: '/ApplicationData.svc'
    });
    ApplicationData.onReady(function () {
        $scope.ApplicationData = ApplicationData;
        $scope.ToDoes = ApplicationData.ToDoes.toLiveArray();
    });
    // This will be called when the collection changes
    Object.defineProperty($scope, "colToDoes", {
        get: function () {
            return $scope.ApplicationData
              .ToDoes
              .toLiveArray();
        }
    });
    $scope.save = function () {
        if ($scope.selectedToDo.Id) {
            // Save an existing ToDo item
            $scope.ApplicationData.ToDoes.attach($scope.selectedToDo, true);
            $scope.selectedToDo.entityState = $data.EntityState.Modified;
        }
        else {
            // Save a new ToDo item
            $scope.ApplicationData.ToDoes.add($scope.selectedToDo, true);
        }
        $scope.saveChanges();
    };
    // Save any changes
    $scope.saveChanges = function () {
        $scope.ApplicationData.saveChanges()
        .then(function () {
            $scope.selectedToDo = null;
        }, function (error) {
            // Get the validation error messages from LightSwitch
            var xml = error.message,
            xmlDoc = $.parseXML(xml),
            $xml = $(xmlDoc),
            $ValidationResults = $xml.find("ValidationResults");
            angular.forEach($ValidationResults, function (ValidationResult) {
                angular.forEach(ValidationResult.childNodes, function (childNode) {
                    alert(childNode.childNodes[0].textContent);
                });
            });
            $scope.ApplicationData.stateManager.reset();
        });
    };
    $scope.remove = function () {
        // Remove the ToDo item
        $scope.ApplicationData.ToDoes.remove($scope.selectedToDo);
        $scope.saveChanges();
    };
    $scope.newToDo = function () {
        var ctx = $scope.ApplicationData;
        // Add a new ToDo item
        $scope.selectedToDo = new ctx.ToDoes.elementType({
            // Set the default value for the Task Name
            TaskName: "[New Task]"
        });
    };
}
JayData Links
Download Code
The LightSwitch project is available at http://lightswitchhelpwebsite.com/Downloads.aspx
(you must have Visual Studio 2013 (or higher) installed to run the code)
Beth Massi (@bethmassi) continued her series with Beginning LightSwitch in VS 2013 Part 2: Feel the Love - Defining Data Relationships on 10/23/2013:
 NOTE: This is the Visual Studio 2013 update of the popular Beginning LightSwitch article series. For previous versions see:
 Welcome to Part 2 of the Beginning LightSwitch in Visual Studio 2013 series! In the last post we learned about tables, or entities, in LightSwitch and how to use the Data Designer to define them. If you missed it:
Beginning LightSwitch in VS 2013 Part 1: What’s in a Table? Describing Your Data
In this article I want to focus on data relationships as we build upon the data model we started in part 1. Relationships define how information in one table corresponds to information in another table in a database. Or more generically, relationships define how an entity corresponds to another entity in (or across) a data source. You can think of relationships between entities like relationships between things in everyday life. For instance, the relationship between a school and its students is one that exists in the real world. Similarly, a real-world relationship exists between students and the classes that those students attend. In a data model, you may have one entity that contains students and another that contains classes they are attending. When you tie the two entities together, you create a relationship.
Building a Better Address Book
In the example we started in part 1, we’re building an address book application that manages contacts. In our current data model, we’re only storing one phone number, one email address and one address for our contact.

However, in real life contacts typically have more than one email, phone number, and address information. In order to model this in the database we are building through LightSwitch, we need to define additional tables and relate them to the contact table in a one-to-many relationship. A one-to-many relationship is probably the most common type of relationship you can define. In our case, this means that one contact can have many email addresses. One contact can have many phone numbers. One contact can also have many physical addresses.
Let’s start with email address. If we want to collect multiple email addresses for a contact we have a couple options. One option is to add a fixed number of email properties to our contact in the form of Email1, Email2, Email3. This means that we would never be able to collect more than 3 email addresses for any given contact. Depending on the type of application you are building this may be just fine. But if you start adding too many properties with the same meaning (in this case email) to your table, then it’s time to think of a different strategy. Instead we should create an EmailAddress table and define a one-to-many relationship.
From the Data Designer, click the “New Table” button and define an entity called EmailAddress with two required properties: Email (of type Email Address) and EmailType (of type String).

For EmailType we’ll create an Choice List, which you learned about in Part 1 of the series. This property will capture the type of email, whether that’s Personal or Work. I’ve also chosen to make the maximum length only 25 characters – we won’t ever need all 255.

Why don’t we make the maximum length 8 characters, which is the length of the longest value in the choice list? Because if we need to add a value to the choice list later that is a little longer than 8 characters, then we won’t have to change the data model. Disk space is cheap these days so it’s better to err on the side of longer max lengths so that all your data can fit into the underlying table. This avoids having to change the data model too often.
Defining Relationships in LightSwitch
Now that we have our EmailAddress entity it’s time to define the relationship. Click on the “Relationship…” button at the top of the Data Designer and this will open up the “Add New Relationship” dialog window. In the “To” column select Contact to set up the one-to-many relationship. The multiplicity is set to Many to One by default so we don’t need to change it. Multiplicity defines the type of relationship you want to create. In LightSwitch, you can also specify the multiplicity as One to Zero or One which means that only a maximum of one related entity would be allowed.
For more information on defining different types of relationships see: How to: Define Data Relationships
For information on how to model a many-to-many relationship in LightSwitch see: How to Create a Many-to-Many Relationship
You can also specify what happens to the email addresses when a contact is deleted. By default, this is set to “Restricted”. This means that a user would not be allowed to delete a Contact if they had any Email Addresses. Leaving the setting makes sense if we were working with Customers who had many Orders, for instance, but not in this case. We want LightSwitch to automatically delete any Email Addresses when we delete the Contact, so set the “On Delete Behavior” equal to “Cascade delete”.

The description at the bottom of the dialog is there to help you understand what you are doing when setting up the relationship. Once you click OK you will see the relationship in the Data Designer which will show all direct relationships to the entity you are working with. Notice that a Contact property is now added to the EmailAddress entity. This is called a navigation property and represents the Contact to which the EmailAddress belongs.

Double-click on the Contact entity to open it and you will notice a navigation property to all the EmailAddresses for that Contact. Navigation properties are used by LightSwitch on screens to navigate through your data, so it’s important to model them correctly.
Now that we’ve got the EmailAddress table defined and a relationship set up, we need to delete the Email property we had previously defined on the Contact itself. Select the Email property and hit the Delete key. Alternatively you can right-click and choose Delete on the menu. Do the same to delete the Address1, Address2, City, State, ZIP and Phone properties as well.

Next, let’s add a PhoneNumber table in the same way we added EmailAddress. You might wonder why we need to create a new table separate from the EmailAddress. This is because an EmailAddress and a PhoneNumber are different aspects of a Contact and have no relation to each other except through the Contact itself. Therefore, we need to create a new table.
Click the “Add Table” button and define the PhoneNumber entity with two required properties: Phone (of type Phone Number) and PhoneType (of type String). PhoneType will have a Choice List of “Cell”, “Fax”, “Home”, and Work”.

Next add the relationship to Contact exactly the same way as before. While the PhoneNumber entity is displayed, click the “Relationship…” button at the top of the Data Designer and specify the relationship to the Contact table.

Last but not least, we need to create an Address table to store multiple physical addresses for a Contact. Click the Add Table button and define the Address entity with the following properties AddressType, Address1, Address2, City, State, ZIP. Set the AddressType and Address1 properties as required. We will also specify a Choice List for the the AddressType property with values “Home”, “Work”, and “Other”.

Now set up the relationship for Address exactly as before. While the Address entity is displayed, click the “Relationship…” button and specify the relationship to the Contact table. Again we’ll choose “Cascade delete” so that any Addresses are deleted automatically if a Contact is deleted. This makes sense in the case of Contact because if the user deletes the contact from the system all their information should be automatically deleted. Keep in mind, however, that you may not want this behavior in other applications. For instance if you are building an order entry application you would want to restrict deletion of Customers if they had any Orders in the system in order to keep the Order history intact.

Now when we open the Contact entity in the Data Designer you can see all the direct relationships.

Testing the Address Book
Now that we have the data model designed, let’s quickly test it out by creating a new screen. We’ll talk more about screens in a future post but for now let’s do something simple by replacing the AddEditScreen we created in Part 1.
As a side note, if you open the current AddEditContact screen – notice that the fields that we deleted from the Contact entity are now removed from the screen. This is a really nice feature of LightSwitch. As you design your data model, it makes sure that you do not have data binding errors on your screens. So if you change the name of a entity property or remove the property completely (i.e. Phone, Email and Address info in our case) then all the screens that are using those fields will be updated. Note that if you add a property to your entity, LightSwitch will not automatically add it to all your screens. However, this comes in real handy when renaming and deleting entity properties during your initial schema design.
So let’s add a new AddEditContact screen -- first delete the one we created in Part 1 from the Solution Explorer. Then right-click on the screens node under the HTMLClient and select Add Screen…

In the Add New Screen dialog, select Add/Edit Details Screen template. Then drop down the Screen Data and select Contacts. Once you do this, you will see checkboxes for the additional related entities we created. Select all of them and click OK.

This will set up a screen that lets you edit the contact details and view the related children in lists on separate tabs. By default, this screen is shown as a dialog, but you can take up the full width of the browser by unchecking “Show As Dialog” in the appearance section of the properties window.

Finally, hook up this screen to the BrowseContacts screen we created in Part 1. Open BrowseContacts in the Screen Designer, select the Add Contact button and specify the Tap action addAndEditNew. LightSwitch will automatically suggest navigating to the correct screen. You can also change the icon of the Add Contact button in the properties window.

Do the same for editing a Contact. Select the Contacts list and set the Tap action to editSelected:

To build and launch the application hit F5. Click the Add button (now displaying a “+” icon) to add new contacts, or select a contact in the list to edit.

Notice that LightSwitch read all the one-to-many relationships we set up in our data model and created a tabs for each of the children; Email Addresses, Phone Numbers and Addresses. You can make the lists on these tabs editable by applying the same technique above like we did with the Contacts. Select the list, then choose editSelected as the Tap action and LightSwitch will hand hold you through creating the add/edit screen for each of the children.
Because we defined the relationships properly in our data model, LightSwitch is able to create very usable screens for entering our data into the database without much work. In the next post we’ll dive deeper into the Screen Templates and how to customize the layout of screens. Until next time!
<Return to section navigation list>
• James Staten (@Staten7) asserted Cloud computing and highly secure data DO mix in a 10/23/2013 article for the Forrester Research blog:
 Every client (especially every government client) who says I’ll never use cloud services with highly secure data needs to hear this story. In no more sensitive a place than law enforcement is just such a value proposition playing out.
Police departments in 18 states in the US, and soon Canada, are dramatically increasing the efficiency of commercial use of highways through a disruptive SaaS solution that costs a fraction of the incumbent service and mixes well with their permitting and inspection databases.
 If you drive toll roads or bridges you know the value of Drivewyze. In rush hour, you can wait 10-25 minutes to pay your toll with cash or you can sign up for an electronic toll system that lets you breeze past. Drivewyze does the same for commercial trucks and fleets but not at toll booths but weigh stations, that take much longer to get through. And in the trucking business every minute lost at a weigh station can cost thousands of dollars in lost delivery time. For law enforcement the value is even higher as any time lost inspecting a safe truck is time not spent stopping an unsafe one.
 The system works by helping known-good drivers and trucks register with the weigh station wirelessly as they approach it on the highway, get an all-clear, then drive right by. Trucks send their credentials to the weigh stations using any mobile device they happen to have – iPhone, Android, Blackberry. Anything with a cellular connection will do the trick. At the weigh station, they receive the information about the driver over whatever equipment they have – aging PCs and laptops are most common. The system checks each driver and truck against long-standing databases of safety records, expired licenses, past weigh station checks and other information that would indicate an unsafe driving circumstance.
How are these highly sensitive, confidential databases connected to a SaaS solution from a small startup company? By going old school. Like you would expect, US state law enforcement agencies weren’t about to hand this type of data over to a new company. To meet government security requirements, Drivewyze doesn’t take possession of any of this data, they simply read from it and transfer less sensitive status information, such as “clear to pass.” Read-only is an Adaptive Intelligence best practice lesson all enterprises should follow. But even this read-only access was scrutinized. To even connect its systems, Drivewyze needed to show that the operational procedures in its data center would pass government scrutiny.
“At the time we built the solution, it would have cost us hundreds of thousands of dollars and lots of time and effort to meet these strict standards had we built out the solution ourselves or gone with one of the public clouds,” said Brian Mofford, VP of Technology at Drivewyze. So the SaaS startup chose to leverage a vendor who could offer a solution the government would accept. It’s choice: IBM SmartCloud Enterprise+. This managed services offering met the government’s strict standards for physical and infrastructure operations security while giving Drivewyze a flexible virtual infrastructure that would scale with the needs of its application. SmartCloud was also offered in the geographic locations the company needed at first launch and to grow. It would need a Canada data center within six months to meet that government’s privacy requirements.
Drivewyze, of course, encrypts the connections between its service and law enforcement databases and encrypts all resultant data it moves through the SaaS solution. And since it supports any cellular device a driver might have, it has to constantly update its client software to stay in step with mobile OS and UI changes. For agility here, the company iterates its software using Amazon Web Services and SmartCloud, IBM’s public IaaS solution. SmartCloud, handles pre-production tasks as its architecture is closer to the resultant production environment in IBM SmartCloud Enterprise+.
Is this just another tale about what startups can do that you cannot? Not even close. While Drivewyze may be a startup, it’s a spin out from Intelligent Imaging Systems Inc., a ten-year-old traditional systems and solutions company. Drivewyze shares many back-office services with IIS including HR, finance and IT. So why not use IIS’ data center? Drivewyze needed speed, ability, flexibility and self-service for its developers who were building the solution on a tiny budget and couldn’t justify the capital costs its IT department needed to justify the effort. Like many business units, Drivewyze’s needs were out of line with how traditional IT worked.
But doesn’t this approach breed resentment? “At first, sure it did,” said Mofford, “but now they understand why we did what we did and are even starting to learn from us to improve how they do things.”
If you don’t see IIS and Drivewyze in yourself, perhaps you instead see Xerox Commercial Vehicle Operations instead. It’s the long-standing incumbent in the weigh station pre-clearance market. It has dominant market share with law enforcement across North America built around proprietary systems and equipment that costs law enforcement agencies around $150,000 per station and truckers about $500 per cab. It’s being rapidly disrupted by this upstart SaaS solution that costs law enforcement a fraction of the PrePass solution, with no equipment requirements and works with any truck and truck driver for less than a tank of gas per month.
What it means?
What should you take away from this story?
1. You don’t have to be cloud-based to deliver cloud value. If your security or compliance requirements can’t be met via the cloud today, you don’t have to be based on a cloud service to deliver a multitenant cloud service yourself. There’s still value in managed services, traditional static hosting offerings and legacy systems of record like the law enforcement databases. Take a hybrid approach to your cloud service and you might just find there’s far more cloud value you can deliver than you might think.
2. And you don’t have to be a disruptor. You can always be the disrupted. Your choice.
No significant articles so far this week.
<Return to section navigation list>
• Chris Harris will present HDInsight – Hadoop as an Enterprise Data Platform in the Cloud and Alan Mitchell will present Making the Most of your Azure Data with Pig and Hive at SQL Relay 2013R2 on 11/15/2013 in Hemel Hempstead, Herts. UK:
HDInsight – Hadoop as an Enterprise Data Platform in the Cloud with Chris Harris
To rise to the challenge of big data, the modern data center demands lower cost, higher capacity infrastructure to complement existing EDW, RDBMS and MPP systems. HDInsight, the Microsoft Hadoop offering in Partnership with Hortonworks is designed to meet that need. Hadoop can now run across the broadest array of datacenter infrastructure owing to native Linux and Windows support. Hortonworks HDP provides the basis for Microsoft’s HDInsight Service meaning complete portability of data is can be retained in the cloud. Understand how HDInsight will facilitated and drive the modern day data architecture and the business benefits for organisations that are already being exploited through a number of case studies exploring transformation of their data strategies and demonstrating the business value being leveraged.
Making the Most of your Azure Data with Pig and Hive with Allan Mitchell
-
Using HDInsight in the cloud, how do you make the most of your data? This session is going to look at two of arguably the most prevalent and important tools when looking to gain insights from your data:
Pig. Pig is a platform for analysing large datasets using a high level language. It was developed in order to avoid the complexities of Map Reduce, and is therefore easy to use, intuitive and parallel. During this session we will see Pig being used to manipulate structured and unstructured data, and this is particularly relevant to people who are familiar with SSIS.
Hive.
-
Hive is often known as data warehousing in Hadoop, but really it is so much more. It allows one to perform complex and deep manipulation of your data and is the basis for presentation to analytical tools such as Microsoft Office 365 Excel 2013 and PowerPivot. It uses a language called HiveQL which is similar to SQL, and is thereby accessible to to all Microsoft Business Intelligence professionals.
Once you have finished manipulating your data you are going to want to present it in some fashion. This is where Microsoft's familiar BI tools come into their own, allowing us to perform analysis on Hive held data with ease using everyone's favourite business intelligence tool: Excel.
• Sam Vanhoutte (@SamVanhoutte) will present Windows Azure, an open platform on your terms to the Developers Conference for You (DevConFu) in Jūrmala, Estonia on 11/14/2013:
 Windows Azure is the Microsoft cloud platform. And be sure that this is an open platform! In this session, Sam will give an overview of Windows Azure, both on the PaaS (platform as a service) as on the IaaS side (virtual machines).
A lot of different capabilities will be demonstrated and it will be shown that Windows Azure is an open platform, available for a lot of different languages and platforms.
Objectives
- Learn more on the different capabilities of the Windows Azure platform offering
- Learn more on the infrastructure capabilities of Windows Azure
- See that the platform is open for a big variety of platforms and technologies
 Sam Vanhoutte is CTO and Product Manager with Codit. Based in Belgium, Sam is a Microsoft BizTalk Virtual Technology Specialist and has extensive experience in building integrated enterprise, ESB and SOA solutions. Because of the specialized focus on integration on Microsoft technology, Sam is part of Microsoft's Connected Systems and Azure Advisory boards and is a Windows Azure Insider as well as a Belgian MEET member. Sam co-founded the BizTalk User Group in Belgium (http://www.btug.be) and is part of the crew of the Windows Azure User group (http://www.azug.be).
While managing and architecting the online integration platform "Codit Integration Cloud", Sam has been focusing on Cloud integration with the Windows Azure platform the last years, focusing on the Windows Azure Service Bus and BizTalk Services technology.
Sam is blogging on the Codit blog (http://blog.codit.eu) and tweets via http://twitter.com/SamVanhoutte.
About the Conference:
 For the first time, DevClub is gathering all its community groups. Estonian, Latvian and Russian DevClubs are coming together and inviting all developers for DevConFu Conference to widen its circles and get to know each other in a festive and enjoyable atmosphere. The conference will be held on 13th – 15th November 2013 in Jurmala, Latvia. The main organizer of conference is DevClub.lv and co- organizers are Devclub.ee, Devclub.eu, Devclub.ru and Devtraining.
Our vision is that DevClub members and speakers from different countries can meet and share their experiences, have fun and feel the “Big DevClub” community. With this conference we want to grow the community awareness about latest trends in software development. This conference is the first of its kind and will be an annual event for software developers in Baltic region and Russia.
Conference theme:
DevConFU will be an educational festival spiced with DevClub atmosphere – place where developers can, in a relaxed environment, learn the latest information about: .Net, Java, Open Source, Agile, Architecture and Design, Web, Cloud, DevOps, New Languages and Processes.
<Return to section navigation list>
 AWS Direct Connect makes it easy for you to establish a dedicated network connection from your premises to AWS. You can do this to reduce your network costs, improve throughput, or to provide a more consistent network experience than is possible with an Internet-based connection.
Today we are making AWS Direct Connect even more powerful and flexible, with additional connection speeds, an updated console, and the ability to share virtual interfaces on a single connection between multiple AWS accounts. Let's take a look at each one of these new features.
Additional Connection Speeds
 We launched Direct Connect in 2011 with support for connection speeds of 1 and 10 Gigabits per second. Today we are expanding that range, with support for speeds of 50 to 500 Megabits per second.
Connections of this type are available in all eleven of the AWS Direct Connect locations, and can be ordered through select members of the AWS Partner Network (APN). This additional flexibility lets you use Direct Connect in new ways. For example, you can connect branch offices and subsidiaries that have modest connectivity needs.
Updated Direct Connect Console
We have revised the Direct Connect Console to make it easier for you to manage your Connections and your Virtual Interfaces.
As a reminder, a single 1 Gigabit or 10 Gigagit Connection supports multiple Virtual Interfaces. Each Interface can be public or private. A public interface can access all AWS services using public IP addresses. A private interface can access a single Virtual Private Cloud (VPC) using private IP addresses.
Here is how you create a public Virtual Interface:
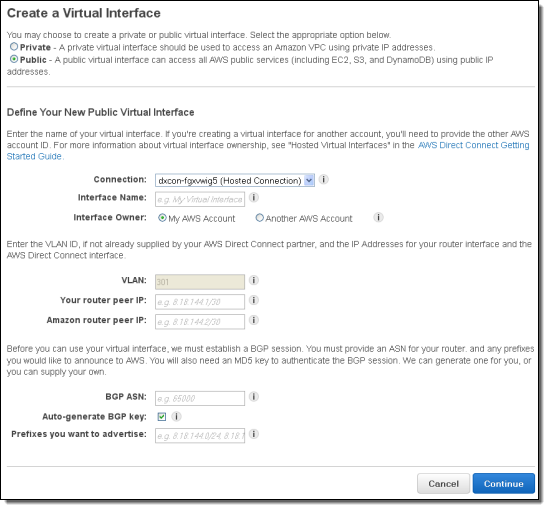
If you look closely at the screen shot above, you will see that you can now set the IP address of the Amazon router. You can also choose to supply your own BGP key. Both of these features provide you with additional control and will let you choose addresses and keys that are in alignment with your organization's policies.
And here's how you create a private one. Note that a private Virtual Interface always connects to a specific Virtual Private Gateway on a particular VPC:
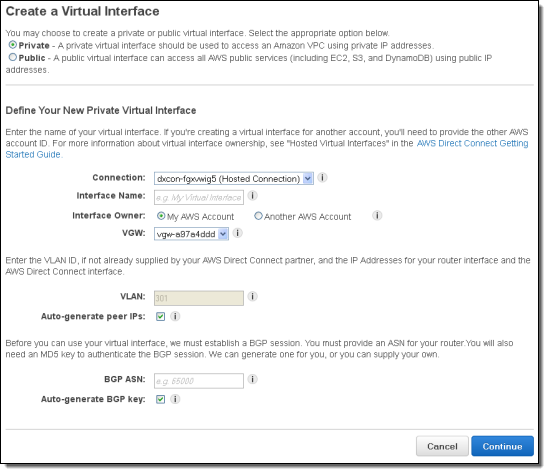
In either case you can choose to delegate ownership of the Virtual Interface to another AWS account as follows:
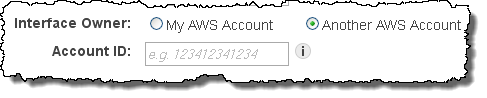
Shared Virtual Interfaces
You can now create Virtual Interfaces for multiple AWS accounts on a single 1 Gigabit or 10 Gigabit Connection. If you have VPCs owned by different AWS accounts, you can now create multiple Virtual Interfaces and share the underlying connection. When you share a Virtual Interface with another account, the state of the Interface (as seen by the new account) will be shown as "pending acceptance" until the invitation is accepted:
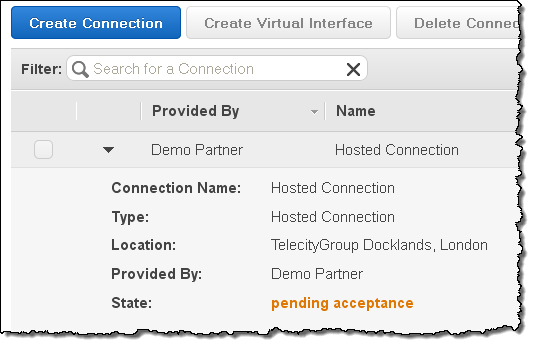
Accepting the request will make it available:

A similar invite/accept model applies to the new sub-Gigabit hosted connections:
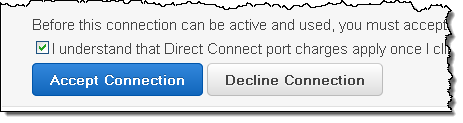
If you create a connection using one of the new sub-gigabit port speeds, the APN Partner will use this connection sharing model to make the connection available to you. You will have to accept it in order to create a Virtual Interface on it and to start using it.
<Return to section navigation list>
Technorati Tags:
Windows Azure,
Windows Azure Platform,
Windows Azure Cloud Services,
Windows Azure Storage Services,
Windows Azure Service Bus,
Windows Azure BizTalk Services,
WABS,
Windows Azure Access Control Services,
Windows Azure Virtual Machines,
WAVM,
Windows Azure Virtual Networks,
WAVN,
Windows Azure Active Directory,
WAAD,
Windows Azure SQL Database,
WASB,
SQL Database Federations,
Window Azure Mobile Services,
Mobile Services,
WAMS,
Open Data Protocol,
OData,
Cloud Computing,
Visual Studio LightSwitch,
LightSwitch,
Amazon Web Services,
Apiphany
 My (@rogerjenn) Android MiniPCs and TVBoxes blog runs WordPress on WebMatrix with Super Cache in Windows Azure Web Site (WAWS) Standard tier instance in Microsoft’s West U.S. (Bay Area) data center and ClearDB’s MySQL database (Venus plan). I converted the site from the Shared Preview to the Standard tier on September 7, 2013 in order to store diagnostic data in Windows Azure blobs instead of the file system.
Microsoft Windows Azure had a bad day Wednesday with compute capability severely impacted worldwide throughout the day, as first reported by The Register. Compute service was partially disrupted across nearly all regions, according to the Azure status page,
A flurry of updates followed throughout the day and as of 10:45 a.m. UTC (3:45 a.m. PDT) on Thursday, the status report declared that the problem had been addressed and the company was “remediating” affected services.


![image_thumb2_thumb_thumb1_thumb_thum[1]](http://lh5.ggpht.com/-6xRL3Mv9rEE/T_M0NYKktLI/AAAAAAAAk5g/hxo2jfHymMQ/s1600-h/image_thumb2_thumb_thumb1_thumb_thum%25255B1%25255D%25255B2%25255D.png "image_thumb2_thumb_thumb1_thumb_thum[1]")


