Windows Azure and Cloud Computing Posts for 2/11/2012+
| A compendium of Windows Azure, Service Bus, EAI & EDI, Access Control, Connect, SQL Azure Database, and other cloud-computing articles. |
Note: This post is updated daily, depending on the availability of new articles in the following sections:
- Windows Azure Blob, Drive, Table, Queue, HDInsight and Media Services
- Windows Azure SQL Database, Federations and Reporting, Mobile Services
- Marketplace DataMarket, Cloud Numerics, Big Data Stream Insight, and OData
- Windows Azure Service Bus, Caching, Access Control, Active Directory, Identity and Workflow
- Windows Azure Virtual Machines, Virtual Networks, Web Sites, Connect, RDP and CDN
- Live Windows Azure Apps, APIs, Tools and Test Harnesses
- Visual Studio LightSwitch and Entity Framework v4+
- Windows Azure Infrastructure and DevOps
- Windows Azure Platform Appliance (WAPA), Hyper-V and Private/Hybrid Clouds
- Cloud Security, Compliance and Governance
- Cloud Computing Events
- Other Cloud Computing Platforms and Services
Azure Blob, Drive, Table, Queue, HDInsight and Media Services
Gaurav Mantri (@gmantri) described Uploading Large Files in Windows Azure Blob Storage Using Shared Access Signature, HTML, and JavaScript in a 2/15/2013 post:
In my last post [see article below] I talked about Shared Access Signature feature of Windows Azure Storage. You can read that post here: http://gauravmantri.com/2013/02/13/revisiting-windows-azure-shared-access-signature/. In this post we’ll put that to some practical use.
One thing I wanted to accomplish recently is the ability to upload very large files into Windows Azure Blob Storage from a web application. General approach is to read the file through your web application using “File” HTML control and upload that entire file to some server side code which would then upload the file in blob storage. This approach would work best for smaller files but would fail terribly when it comes to moderately to very large files as the file upload control would upload the entire file to the server (for bigger files, this would cause timeouts depending on your Internet connection) and then that file resides in the server memory before any action can be taken on that file (again for bigger files, this would cause performance issues assuming you have thousands of users uploading thousands of large files).
In this blog post, we’ll talk about how we can accomplish that using File API feature in HTML5.
Please be warned that I’m no JavaScript/HTML/CSS expert. About 4 – 5 years ago I used to do a lot of JavaScript development and built some really insane applications using JavaScript (like mail merge kind of features, office automation, native device interfacing all using JS) but that was then. For last 4 – 5 years, I have been extensively doing desktop application development. So most of the JS code you’ll see below is copied from various sites and StackOverflow.
Objectives
Following were some of the objectives I had in mind:
- The interface should be web based (possibly pure HTML).
- I don’t have to share my storage account credentials with the end users.
- If possible, there should not be any server side code (ASP.Net/PHP etc.) i.e. it should be pure HTML and the communication should be between user’s web browser and storage account.
- If possible, the solution should upload the file in chunks so that bigger files can be uploaded without reading them in completely in a single go.
Now let’s see how we can meet our objectives.
Solution
Here’re some of the things I did to achieve the objectives listed above.
Chunking File
The first challenge I ran into is how to upload the file in chunks. All the examples I saw were uploading an entire file however this is not what I wanted. Finally I ran into this example on HTML5 Rocks where they talked about the File API: http://www.html5rocks.com/en/tutorials/file/dndfiles/. Basically what caught my interest there is the “slicing” feature available in HTML 5’s File interface. In short, what this slice feature does is that it reads a portion of a file asynchronously and returns that data. This is exactly I was looking at. Once I found that, I knew 75% of my work was done! Everything else was a breeze.
Securing Storage Account Credentials
Next thing on my list was securing storage account credentials and this was rather painless as I knew exactly what I had to do – Shared Access Signature. SAS provided me with a secured URI using which users will be able to upload files in my storage account without me giving them access to storage account credentials. This was covered extensively in my post about the same: Revisiting Windows Azure Shared Access Signature.
Direct Communication Between Client Application and Windows Azure Storage
Next thing was to facilitate direct communication between the client application and storage. As we know Windows Azure Storage is built on REST so that means I can simply use AJAX functionality to communicate with REST API. One important thing to understand is that Windows Azure Storage still does not support Cross-Origin Resource Sharing (CORS) at the time of writing this blog. What that means is that your web application and blob storage must be in the same domain. The solution to this problem is to host your HTML application in a public blob container in the same storage account where you want your users to upload the files. I’ve been told that CORS support is coming soon in Windows Azure Storage and once that happens then you need not host this application in that storage account but till then you would need to live with this limitation.
The Code
Now let’s look at the code.
HTML Interface
Since I was trying to hack my way through the code, I kept the interface rather simple. Here’s how my HTML code looks like:
<body>
    <form>
        <div style="margin-left: 20px;">
            <h1>File Uploader</h1>
            <p>
                <strong>SAS URI</strong>:
                <br/>
                <span class="input-control text">
                    <input type="text" id="sasUrl" style="width: 50%"
                           value=""/>
                </span>
            </p>
            <p>
                <strong>File To Upload</strong>:
                <br/>
                <span class="input-control text">
                    <input type="file" id="file" name="file" style="width: 50%"/>
                </span>
            </p>
            <div id="output">

                <strong>File Properties:</strong>
                <br/>
                <p>
                    Name: <span id="fileName"></span>
                </p>
                <p>
                    File Size: <span id="fileSize"></span> bytes.
                </p>
                <p>
                    File Type: <span id="fileType"></span>
                </p>
                <p>
                    <input type="button" value="Upload File" onclick="uploadFileInBlocks()"/>
                </p>
                <p>
                    <strong>Progress</strong>: <span id="fileUploadProgress">0.00 %</span>
                </p>
            </div>
        </div>
        <div>
        </div>
    </form>
</body>


All it has a textbox for a user to enter SAS URI and HTML File control. Once the user selects a file, I display the file properties and the “Upload” button to start uploading the file.
Reading File Properties
To display file properties, I made use of “onchange” event of File element. The event gave me a list of files. Since I was uploading just one file, I picked up the first file from that list and got its name (blob would have that name), size (blob’s size and determining chunk size) and type (for setting blob’s content type property).
//Bind the change event.
$("#file").bind('change', handleFileSelect);


        //Read the file and find out how many blocks we would need to split it.
        function handleFileSelect(e) {
            var files = e.target.files;
            selectedFile = files[0];
            $("#fileName").text(selectedFile.name);
            $("#fileSize").text(selectedFile.size);
            $("#fileType").text(selectedFile.type);
        }
Chunking
In my application I made an assumption that I will split the file in chunks of 256 KB size. Once I found the file’s size, I just found out the total number of chunks.
        //Read the file and find out how many blocks we would need to split it.
        function handleFileSelect(e) {
            maxBlockSize = 256 * 1024;
            currentFilePointer = 0;
            totalBytesRemaining = 0;
            var files = e.target.files;
            selectedFile = files[0];
            $("#output").show();
            $("#fileName").text(selectedFile.name);
            $("#fileSize").text(selectedFile.size);
            $("#fileType").text(selectedFile.type);
            var fileSize = selectedFile.size;
            if (fileSize < maxBlockSize) {
                maxBlockSize = fileSize;
                console.log("max block size = " + maxBlockSize);
            }
            totalBytesRemaining = fileSize;
            if (fileSize % maxBlockSize == 0) {
                numberOfBlocks = fileSize / maxBlockSize;
            } else {
                numberOfBlocks = parseInt(fileSize / maxBlockSize, 10) + 1;
            }
            console.log("total blocks = " + numberOfBlocks);
        }
Endpoint for File Uploading
The SAS URI actually represented a URI for blob container. Since I had to create an endpoint for uploading file, I split the URI (path and query) and appended the file name to the path and then re-appended the query to the end.
            var baseUrl = $("#sasUrl").val();
            var indexOfQueryStart = baseUrl.indexOf("?");
            submitUri = baseUrl.substring(0, indexOfQueryStart) + '/' + selectedFile.name + baseUrl.substring(indexOfQueryStart);
            console.log(submitUri);
Reading Chunk
This is where File API’s chunk function would come in picture. What happens in the code is that when the user clicks the upload button, I read a chunk of that file asynchronously and get a byte array. That byte array will be uploaded.
        var reader = new FileReader();
        var fileContent = selectedFile.slice(currentFilePointer, currentFilePointer + maxBlockSize);
        reader.readAsArrayBuffer(fileContent);
Uploading Chunk
Since I wanted to implement uploading in chunk, as soon as a chunk is read from the file, I create a Put Block request based on Put Block REST API specification using jQuery’s AJAX function and pass that chunk as data. Once this request is successfully completed, I read the next chunk and repeat the process till the time all chunks are processed.
        reader.onloadend = function (evt) {
            if (evt.target.readyState == FileReader.DONE) { // DONE == 2
                var uri = submitUri + '&comp=block&blockid=' + blockIds[blockIds.length - 1];
                var requestData = new Uint8Array(evt.target.result);
                $.ajax({
                    url: uri,
                    type: "PUT",
                    data: requestData,
                    processData: false,
                    beforeSend: function(xhr) {
                        xhr.setRequestHeader('x-ms-blob-type', 'BlockBlob');
                        xhr.setRequestHeader('Content-Length', requestData.length);
                    },
                    success: function (data, status) {
                        console.log(data);
                        console.log(status);
                        bytesUploaded += requestData.length;
                        var percentComplete = ((parseFloat(bytesUploaded) / parseFloat(selectedFile.size)) * 100).toFixed(2);
                        $("#fileUploadProgress").text(percentComplete + " %");
                        uploadFileInBlocks();
                    },
                    error: function(xhr, desc, err) {
                        console.log(desc);
                        console.log(err);
                    }
                });
            }
        };
Committing Blob
Last step in this process is to commit the blob in blob storage. For this I create a Put Block List request based on Put Block List REST API specification and process that request again using jQuery’s AJAX function and pass the block list as data. This completed the process.
        function commitBlockList() {
            var uri = submitUri + '&comp=blocklist';
            console.log(uri);
            var requestBody = '<?xml version="1.0" encoding="utf-8"?><BlockList>';
            for (var i = 0; i < blockIds.length; i++) {
                requestBody += '<Latest>' + blockIds[i] + '</Latest>';
            }
            requestBody += '</BlockList>';
            console.log(requestBody);
            $.ajax({
                url: uri,
                type: "PUT",
                data: requestBody,
                beforeSend: function (xhr) {
                    xhr.setRequestHeader('x-ms-blob-content-type', selectedFile.type);
                    xhr.setRequestHeader('Content-Length', requestBody.length);
                },
                success: function (data, status) {
                    console.log(data);
                    console.log(status);
                },
                error: function (xhr, desc, err) {
                    console.log(desc);
                    console.log(err);
                }
            });
Complete Code
Here’s the complete code. For CSS, I actually used Metro UI CSS – http://metroui.org.ua/. If you’re planning on building web applications and want to give them Windows 8 applications style look and feel, do give it a try. It’s pretty awesome + it’s open source. Really no reason for you to not give it a try!
<!DOCTYPE html>
<html xmlns="http://www.w3.org/1999/xhtml">
<head>
    <title>File Uploader</title>
    <script src="js/jquery-1.7.1.js"></script>
    <link rel="stylesheet" href="css/modern.css"/>
    <script>
        var maxBlockSize = 256 * 1024;//Each file will be split in 256 KB.
        var numberOfBlocks = 1;
        var selectedFile = null;
        var currentFilePointer = 0;
        var totalBytesRemaining = 0;
        var blockIds = new Array();
        var blockIdPrefix = "block-";
        var submitUri = null;
        var bytesUploaded = 0;

        $(document).ready(function () {
            $("#output").hide();
            $("#file").bind('change', handleFileSelect);
            if (window.File && window.FileReader && window.FileList && window.Blob) {
                // Great success! All the File APIs are supported.
            } else {
                alert('The File APIs are not fully supported in this browser.');
            }
        });

        //Read the file and find out how many blocks we would need to split it.
        function handleFileSelect(e) {
            maxBlockSize = 256 * 1024;
            currentFilePointer = 0;
            totalBytesRemaining = 0;
            var files = e.target.files;
            selectedFile = files[0];
            $("#output").show();
            $("#fileName").text(selectedFile.name);
            $("#fileSize").text(selectedFile.size);
            $("#fileType").text(selectedFile.type);
            var fileSize = selectedFile.size;
            if (fileSize < maxBlockSize) {
                maxBlockSize = fileSize;
                console.log("max block size = " + maxBlockSize);
            }
            totalBytesRemaining = fileSize;
            if (fileSize % maxBlockSize == 0) {
                numberOfBlocks = fileSize / maxBlockSize;
            } else {
                numberOfBlocks = parseInt(fileSize / maxBlockSize, 10) + 1;
            }
            console.log("total blocks = " + numberOfBlocks);
            var baseUrl = $("#sasUrl").val();
            var indexOfQueryStart = baseUrl.indexOf("?");
            submitUri = baseUrl.substring(0, indexOfQueryStart) + '/' + selectedFile.name + baseUrl.substring(indexOfQueryStart);
            console.log(submitUri);
        }

        var reader = new FileReader();

        reader.onloadend = function (evt) {
            if (evt.target.readyState == FileReader.DONE) { // DONE == 2
                var uri = submitUri + '&comp=block&blockid=' + blockIds[blockIds.length - 1];
                var requestData = new Uint8Array(evt.target.result);
                $.ajax({
                    url: uri,
                    type: "PUT",
                    data: requestData,
                    processData: false,
                    beforeSend: function(xhr) {
                        xhr.setRequestHeader('x-ms-blob-type', 'BlockBlob');
                        xhr.setRequestHeader('Content-Length', requestData.length);
                    },
                    success: function (data, status) {
                        console.log(data);
                        console.log(status);
                        bytesUploaded += requestData.length;
                        var percentComplete = ((parseFloat(bytesUploaded) / parseFloat(selectedFile.size)) * 100).toFixed(2);
                        $("#fileUploadProgress").text(percentComplete + " %");
                        uploadFileInBlocks();
                    },
                    error: function(xhr, desc, err) {
                        console.log(desc);
                        console.log(err);
                    }
                });
            }
        };

        function uploadFileInBlocks() {
            if (totalBytesRemaining > 0) {
                console.log("current file pointer = " + currentFilePointer + " bytes read = " + maxBlockSize);
                var fileContent = selectedFile.slice(currentFilePointer, currentFilePointer + maxBlockSize);
                var blockId = blockIdPrefix + pad(blockIds.length, 6);
                console.log("block id = " + blockId);
                blockIds.push(btoa(blockId));
                reader.readAsArrayBuffer(fileContent);
                currentFilePointer += maxBlockSize;
                totalBytesRemaining -= maxBlockSize;
                if (totalBytesRemaining < maxBlockSize) {
                    maxBlockSize = totalBytesRemaining;
                }
            } else {
                commitBlockList();
            }
        }

        function commitBlockList() {
            var uri = submitUri + '&comp=blocklist';
            console.log(uri);
            var requestBody = '<?xml version="1.0" encoding="utf-8"?><BlockList>';
            for (var i = 0; i < blockIds.length; i++) {
                requestBody += '<Latest>' + blockIds[i] + '</Latest>';
            }
            requestBody += '</BlockList>';
            console.log(requestBody);
            $.ajax({
                url: uri,
                type: "PUT",
                data: requestBody,
                beforeSend: function (xhr) {
                    xhr.setRequestHeader('x-ms-blob-content-type', selectedFile.type);
                    xhr.setRequestHeader('Content-Length', requestBody.length);
                },
                success: function (data, status) {
                    console.log(data);
                    console.log(status);
                },
                error: function (xhr, desc, err) {
                    console.log(desc);
                    console.log(err);
                }
            });

        }
        function pad(number, length) {
            var str = '' + number;
            while (str.length < length) {
                str = '0' + str;
            }
            return str;
        }
    </script>
</head>
<body>
    <form>
        <div style="margin-left: 20px;">
            <h1>File Uploader</h1>
            <p>
                <strong>SAS URI</strong>:
                <br/>
                <span class="input-control text">
                    <input type="text" id="sasUrl" style="width: 50%"
                           value=""/>
                </span>
            </p>
            <p>
                <strong>File To Upload</strong>:
                <br/>
                <span class="input-control text">
                    <input type="file" id="file" name="file" style="width: 50%"/>
                </span>
            </p>
            <div id="output">

                <strong>File Properties:</strong>
                <br/>
                <p>
                    Name: <span id="fileName"></span>
                </p>
                <p>
                    File Size: <span id="fileSize"></span> bytes.
                </p>
                <p>
                    File Type: <span id="fileType"></span>
                </p>
                <p>
                    <input type="button" value="Upload File" onclick="uploadFileInBlocks()"/>
                </p>
                <p>
                    <strong>Progress</strong>: <span id="fileUploadProgress">0.00 %</span>
                </p>
            </div>
        </div>
        <div>
        </div>
    </form>
</body>
</html>
Some Caveats
This makes use of HTML5 File API and while all new browsers support that, same can’t be said about older browsers. If your users would be accessing an application like this using older browsers, you would need to think about alternative approaches. You could either make use of SWF File Uploader or could write an application using Silverlight. Steve Marx wrote a blog post about uploading files using Shared Access Signature and Silverlight which you can read here: http://blog.smarx.com/posts/uploading-windows-azure-blobs-from-silverlight-part-1-shared-access-signatures.
I found the code working in IE 10, Google Chrome (version 24.0.1312.57 m) on my Windows 8 machine. I got error when I tried to run the code in FireFox (version 18.0.2) and Safari (version 5.1.7) browsers so obviously one would need to keep the browser incompatibility in mind.
Enhancements
I hacked this code in about 4 hours or so and obviously my knowledge is somewhat limited when it comes to JavaScript and CSS so a lot can be improved on that front. However some other features I could think of are:
Generate SAS on demand: You could possibly have a server side component which would generate SAS URI on demand instead of having a user enter that manually.
Multiple file uploads: This application can certainly be extended to upload multiple files. A user would select multiple files (or may be even a folder) and have the application upload multiple files.
Drag/drop support: This application can certainly be extended to support drag/drop scenario where users could drag files from their desktop and drop them to upload.
Do upload in Web Worker: This is another improvement that can be done where uploads are done through web worker capability in HTML5.
Parallel uploads: Currently the code uploads one chunk at a time. A modification could be to upload multiple chunks simultaneously.
Transient error handling: Since Windows Azure Storage is a remote shared resource, you may encounter transient errors. You could modify the application to handle these transient errors. For more details on transient errors, please see this blog post of mine: http://gauravmantri.com/2013/01/11/some-best-practices-for-building-windows-azure-cloud-applications/.
Summary
So that’s it for this post! As you saw, it is quite easy to implement a very simple HTML/JS based application for getting data into Windows Azure Blob Storage. Obviously there’re some limitations and there’s cross-browser compatibility issues one would need to consider but once those are sorted out, it opens up a lot of exciting opportunities. I hope you’ve found this post useful. As always, if you find any issues with the post please let me know and I’ll fix it ASAP.
Gaurav Mantri (@gmantri) explained Revisiting Windows Azure Shared Access Signatures in a 2/13/2013 post:
In this blog post, we’ll talk about Shared Access Signature (SAS) functionality in Windows Azure. Steve Marx (@smarx) wrote excellent blog posts on the same subject a few years ago which you can read here: http://blog.smarx.com/posts/shared-access-signatures-are-easy-these-days, http://blog.smarx.com/posts/uploading-windows-azure-blobs-from-silverlight-part-1-shared-access-signatures.
However a lot has changed since Steve wrote the posts and I thought it might be useful to write about it taking those new things into consideration (hence the word “Revisiting” in the title). This blog will start with a basic explanation of shared access signature and the purpose it serves and then I will show you some code to perform some basic operations against Windows Azure Storage especially Blob Storage.
Now that the agenda is set, let’s start.
Shared Access Signature (SAS) – Why and What?
This section describes why we need SAS and what exactly it is. If you’re familiar with these concepts, please feel free to skip this section otherwise read on!
Why?
First let’s understand why we need SAS. As you may already know that access to Windows Azure Storage is not anonymous. Rather you would need an “account key” to access resources in a Storage Account. This account key (actually there’re 2 account keys – primary and secondary) is generated automatically for you by Windows Azure Storage and you also get the ability to regenerate the key on demand. The problem with account key based access is that the account key grants “Admin” privileges on the storage account in question. Anybody who has access to this account key can perform any allowed operation on the storage account. This is obviously a security concern and one must attempt to keep the account key secret at all times and guard it with full zeal.
However there’re scenarios where you would want to grant a user (who may be a partner or a customer etc.) restricted access to your storage account. You would that user to perform only a few operations and that too for a limited amount of time. Obviously handing that user your account key won’t do you any good because that would make the user an admin. The answer to this problem is SAS. A SAS allows you to grant temporary access to private resources in your storage account.
I was recently reading a book by Bill Wilder (@codingoutloud) on Cloud Architecture Patterns and he has explained this concept very nicely by using a “Valet Key” analogy. If you’re planning on building a cloud application in Windows Azure, I would strongly recommend reading this book first before writing code.
What?
Simply put, SAS is a URL (or rather a part of it). You, as a creator of SAS define the validity duration of SAS and what a user in possession of this SAS can do with the resources protected by SAS. For example, you could define a SAS which would allow a user to upload a file into a blob container in your storage account and would expire after say 1 hour. Within that hour for which the SAS is valid, any user who has access to this SAS will be able to upload the files in the blob container. After that hour, the link will become useless.
You could create a SAS for a blob resources (blob containers and blobs), table resources (table and PartitionKey/RowKey ranges) and queue resources (queues and messages). You could give one or more of CRUD operation permissions in a SAS. Lastly, you could define a start and an end date for which the SAS is valid.
With blob storage, you could create a SAS for a blob container or a blob. Following table summarizes the permissions and the purpose they serve on various blob resources:


With table storage, you could create a SAS for a table or entity ranges in a table. For entity ranges, you could specify PartitionKey/RowKey ranges. Following table summarizes the permissions and the purpose they serve on various table resources:

With queue storage, you could create a SAS for a queue. Following table summarizes the permissions and the purpose they serve on queue resources:

A few more comments about SAS before we jump into the code.
Revocable SAS
You could make a SAS revocable. What that means is that you could make a SAS invalid before its expiry time. This is achieved through what is known as “Blob Container Access Policy”. When you create a SAS using blob container access policy, to revoke the SAS, you could just change the access policy identifier or delete that access policy all together. At the time of writing, a blob container can have a maximum of 5 access policies.
Anonymous SAS
When a SAS is created without a blob container access policy, it’s called anonymous SAS. Since these are not revocable, proper care must be taken in handling this SAS. Generally speaking, you should try and create very short duration anonymous SAS.
Never Expiring SAS
Though not a recommended practice, it is possible to create a SAS which never expires. To achieve this, you don’t specify the expiry date when creating SAS. In the earlier version of storage service, only revocable SAS can be never expiring and anonymous SAS are only valid for 1 hour duration. However with the latest version of storage service, it is possible to create never expiring anonymous SAS.
SAS Start Date/Time
Please note that SAS start and expiry date/time are in UTC. Furthermore these are validated in Windows Azure. There may be a possibility that there may be a mismatch between time on your local computer (where SAS is generated) and time in Windows Azure. To counter this issue, it is generally recommended that you make your SAS start time by subtracting about 5 – 10 minutes from your local computer’s time (in UTC). For example:
            var sas = blobContainer.GetSharedAccessSignature(new SharedAccessBlobPolicy()
                {
                    Permissions = permission,
                    SharedAccessStartTime = DateTime.UtcNow.AddMinutes(-5),//SAS Start time is back by 5 minutes to take clock skewness into consideration
                    SharedAccessExpiryTime = DateTime.UtcNow.AddMinutes(15),
                });
MSDN has nice documentation about SAS functionality and much more which I recommend you to read: http://msdn.microsoft.com/en-us/library/windowsazure/ee393343.aspx
The Code!
OK, enough talking! Let’s see some code. In the code examples below, I have used latest version of storage client library (2.0.4 at the time of writing this post). I’ve used the storage client library to create SAS URIs however you could use tools like Cloud Storage Studio which supports this functionality. Then using that SAS URI, I’m going to demonstrate how you’re going to perform some common operations against blob storage. For each operation, I’ve included how you’re going to perform the operation using storage client library as well as if you’re going to do this by consuming REST API directly using HttpWebRequest/HttpWebResponse. The common theme with storage client library is that it allows you to create instances of CloudBlobContainer and CloudBlockBlob (I’ve focused only on block blobs in this post) using the SAS URI only. Again for simplicity, I just went with anonymous SAS and did not use blob container access policy for creating SAS URIs.
Helper Functions
I created two helper functions to create SAS on a blob container and blob. For the sake of simplicity, I hard coded the start and expiry time for SAS:
        /// <summary>
        /// Creates a SAS URI for the blob container.
        /// </summary>
        /// <param name="blobContainer"></param>
        /// <param name="permission"></param>
        /// <returns></returns>
        static string GetSaSForBlobContainer(CloudBlobContainer blobContainer, SharedAccessBlobPermissions permission)
        {
            var sas = blobContainer.GetSharedAccessSignature(new SharedAccessBlobPolicy()
                {
                    Permissions = permission,
                    SharedAccessStartTime = DateTime.UtcNow.AddMinutes(-5),//SAS Start time is back by 5 minutes to take clock skewness into consideration
                    SharedAccessExpiryTime = DateTime.UtcNow.AddMinutes(15),
                });
            return string.Format(CultureInfo.InvariantCulture, "{0}{1}", blobContainer.Uri, sas);
        }
/// <summary> /// Creates a SAS URI for the blob. /// </summary> /// <param name="blob"></param> /// <param name="permission"></param> /// <returns></returns> static string GetSaSForBlob(CloudBlockBlob blob, SharedAccessBlobPermissions permission) { var sas = blob.GetSharedAccessSignature(new SharedAccessBlobPolicy() { Permissions = permission, SharedAccessStartTime = DateTime.UtcNow.AddMinutes(-5), SharedAccessExpiryTime = DateTime.UtcNow.AddMinutes(15), }); return string.Format(CultureInfo.InvariantCulture, "{0}{1}", blob.Uri, sas); }Listing Blobs
Here’s the code for listing blobs in a blob container. For listing blobs, “List” permission must be defined in SAS.
Using Storage Client Library
        /// <summary>
        /// List blobs in a blob container using storage client library.
        /// </summary>
        /// <param name="blobContainerSasUri"></param>
        static void ListBlobsWithStorageClientLibrary(string blobContainerSasUri)
        {
            CloudBlobContainer blobContainer = new CloudBlobContainer(new Uri(blobContainerSasUri));
            var blobs = blobContainer.ListBlobs(null, true);
            foreach (var blob in blobs)
            {
                Console.WriteLine(blob.Uri);
            }
        }
Using REST API
        /// <summary>
        /// List blobs in a blob container using REST API.
        /// </summary>
        /// <param name="blobContainerSasUri"></param>
        static void ListBlobsWithRestAPI(string blobContainerSasUri)
        {
            string requestUri = string.Format(CultureInfo.InvariantCulture, "{0}&comp=list", blobContainerSasUri);
            HttpWebRequest request = (HttpWebRequest) WebRequest.Create(requestUri);
            request.Method = "GET";
            using (HttpWebResponse resp = (HttpWebResponse) request.GetResponse())
            {
                using (Stream s = resp.GetResponseStream())
                {
                    using (StreamReader reader = new StreamReader(s, true))
                    {
                        string blobsData = reader.ReadToEnd();
                        Console.WriteLine(blobsData);
                    }
                }
            }
        }
You must append “&comp=list” to the URI for listing blob containers. Also the output is XML.
I could just take the URI (in requestUri variable above) and paste it in browser’s address window and see the list of blobs in the blob container. See screenshot below for example.
Upload Blobs
Here’s the code for uploading a blob in a blob container. For uploading a blob, you could create a SAS with “Write” permission on either a blob container or a blob. The blob need not be present in the blob container. If the blob is not present, it will be created otherwise it will be overwritten.
Using Storage Client Library
        /// <summary>
        /// Uploads a blob in a blob container where SAS permission is defined on a blob container using storage client library.
        /// </summary>
        /// <param name="blobContainerSasUri"></param>
        static void UploadBlobWithStorageClientLibrarySasPermissionOnBlobContainer(string blobContainerSasUri)
        {
            CloudBlobContainer blobContainer = new CloudBlobContainer(new Uri(blobContainerSasUri));
            CloudBlockBlob blob = blobContainer.GetBlockBlobReference("sample.txt");
            string sampleContent = "This is sample text.";
            using (MemoryStream ms = new MemoryStream(Encoding.UTF8.GetBytes(sampleContent)))
            {
                blob.UploadFromStream(ms);
            }
        }
/// <summary> /// Uploads a blob in a blob container where SAS permission is defined on a blob using storage client library. /// </summary> /// <param name="blobSasUri"></param> static void UploadBlobWithStorageClientLibrarySasPermissionOnBlob(string blobSasUri) { CloudBlockBlob blob = new CloudBlockBlob(new Uri(blobSasUri)); string sampleContent = "This is sample text."; using (MemoryStream ms = new MemoryStream(Encoding.UTF8.GetBytes(sampleContent))) { blob.UploadFromStream(ms); } }Using REST API
        /// <summary>
        /// Uploads a blob in a blob container where SAS permission is defined on a blob container using REST API.
        /// </summary>
        /// <param name="blobContainerSasUri"></param>
        static void UploadBlobWithRestAPISasPermissionOnBlobContainer(string blobContainerSasUri)
        {
            string blobName = "sample.txt";
            string sampleContent = "This is sample text.";
            int contentLength = Encoding.UTF8.GetByteCount(sampleContent);
            string queryString = (new Uri(blobContainerSasUri)).Query;
            string blobContainerUri = blobContainerSasUri.Substring(0, blobContainerSasUri.Length - queryString.Length);
            string requestUri = string.Format(CultureInfo.InvariantCulture, "{0}/{1}{2}", blobContainerUri, blobName, queryString);
            HttpWebRequest request = (HttpWebRequest)WebRequest.Create(requestUri);
            request.Method = "PUT";
            request.Headers.Add("x-ms-blob-type", "BlockBlob");
            request.ContentLength = contentLength;
            using (Stream requestStream = request.GetRequestStream())
            {
                requestStream.Write(Encoding.UTF8.GetBytes(sampleContent), 0, contentLength);
            }
            using (HttpWebResponse resp = (HttpWebResponse)request.GetResponse())
            {

            }
        }
/// <summary> /// Uploads a blob in a blob container where SAS permission is defined on a blob using REST API. /// </summary> /// <param name="blobSasUri"></param> static void UploadBlobWithRestAPISasPermissionOnBlob(string blobSasUri) { string sampleContent = "This is sample text."; int contentLength = Encoding.UTF8.GetByteCount(sampleContent); HttpWebRequest request = (HttpWebRequest)WebRequest.Create(blobSasUri); request.Method = "PUT"; request.Headers.Add("x-ms-blob-type", "BlockBlob"); request.ContentLength = contentLength; using (Stream requestStream = request.GetRequestStream()) { requestStream.Write(Encoding.UTF8.GetBytes(sampleContent), 0, contentLength); } using (HttpWebResponse resp = (HttpWebResponse)request.GetResponse()) { } }When working with REST API, you must specify “x-ms-blob-type” request header. For block blobs, its value must be “BlockBlob” and for page blobs, the value must be “PageBlob”.
Upload Blobs in Blocks
Here’s the code if you want to upload a blob by splitting it into blocks. For uploading a blob, you could create a SAS with “Write” permission on either a blob container or a blob. The blob need not be present in the blob container. If the blob is not present, it will be created otherwise it will be overwritten.
Using Storage Client Library
        /// <summary>
        /// Uploads a blob by splitting into blocks in a blob container where SAS permission is defined on a blob container using storage client library.
        /// </summary>
        /// <param name="blobContainerSasUri"></param>
        static void UploadBlobInBlocksWithStorageClientLibrarySasPermissionOnBlobContainer(string blobContainerSasUri)
        {
            CloudBlobContainer blobContainer = new CloudBlobContainer(new Uri(blobContainerSasUri));
            CloudBlockBlob blob = blobContainer.GetBlockBlobReference(Guid.NewGuid().ToString() + ".txt");
            List<string> blockIds = new List<string>();
            for (int i = 0; i < 10; i++)
            {
                string sampleContent = string.Format(CultureInfo.InvariantCulture, "Line {0}: This is sample text.\r\n", i);
                string blockId = i.ToString("d4");
                blockIds.Add(blockId);
                using (MemoryStream ms = new MemoryStream(Encoding.UTF8.GetBytes(sampleContent)))
                {
                    blob.PutBlock(blockId, ms, null);
                }
            }
            blob.PutBlockList(blockIds);
        }
/// <summary> /// Uploads a blob by splitting into blocks in a blob container where SAS permission is defined on a blob using storage client library. /// </summary> /// <param name="blobSasUri"></param> static void UploadBlobInBlocksWithStorageClientLibrarySasPermissionOnBlob(string blobSasUri) { CloudBlockBlob blob = new CloudBlockBlob(blobSasUri); List<string> blockIds = new List<string>(); for (int i = 0; i < 10; i++) { string sampleContent = string.Format(CultureInfo.InvariantCulture, "Line {0}: This is sample text.\r\n", i); string blockId = i.ToString("d4"); blockIds.Add(blockId); using (MemoryStream ms = new MemoryStream(Encoding.UTF8.GetBytes(sampleContent))) { blob.PutBlock(blockId, ms, null); } } blob.PutBlockList(blockIds); }Using REST API
        /// <summary>
        /// Uploads a blob by splitting into blocks in a blob container where SAS permission is defined on a blob container using REST API.
        /// </summary>
        /// <param name="blobContainerSasUri"></param>
        static void UploadBlobInBlocksWithRestAPISasPermissionOnBlobContainer(string blobContainerSasUri)
        {
            string blobName = Guid.NewGuid().ToString() + ".txt";
            string queryString = (new Uri(blobContainerSasUri)).Query;
            string blobContainerUri = blobContainerSasUri.Substring(0, blobContainerSasUri.Length - queryString.Length);
            List<string> blockIds = new List<string>();
            for (int i = 0; i < 10; i++)
            {
                string sampleContent = string.Format(CultureInfo.InvariantCulture, "Line {0}: This is sample text.\r\n", i);
                string blockId = i.ToString("d4");
                blockIds.Add(blockId);
                int contentLength = Encoding.UTF8.GetByteCount(sampleContent);
                string requestUri = string.Format(CultureInfo.InvariantCulture, "{0}/{1}{2}&comp=block&blockid={3}", blobContainerUri, blobName, queryString, Convert.ToBase64String(Encoding.UTF8.GetBytes(blockId)));
                HttpWebRequest request = (HttpWebRequest)WebRequest.Create(requestUri);
                request.Method = "PUT";
                request.ContentLength = contentLength;
                using (Stream requestStream = request.GetRequestStream())
                {
                    requestStream.Write(Encoding.UTF8.GetBytes(sampleContent), 0, contentLength);
                }
                using (HttpWebResponse resp = (HttpWebResponse)request.GetResponse())
                {

                }
            }
            string commitBlockListRequestBodyFormat = @"<?xml version=""1.0"" encoding=""utf-8"" ?><BlockList>{0}</BlockList>";

            string blockListReuestBodyFormat = "<Latest>{0}</Latest>";
            StringBuilder sb = new StringBuilder();
            for (int i = 0; i < blockIds.Count; i++)
            {
                sb.AppendFormat(CultureInfo.InvariantCulture, blockListReuestBodyFormat,
                                Convert.ToBase64String(Encoding.UTF8.GetBytes(blockIds[i])));
            }
            string requestPayLoad = string.Format(CultureInfo.InvariantCulture, commitBlockListRequestBodyFormat,
                                                  sb.ToString());
            int contentLengthForCommitBlockList = Encoding.UTF8.GetByteCount(requestPayLoad);
            string requestUriForCommitBlockList = string.Format(CultureInfo.InvariantCulture, "{0}/{1}{2}&comp=blockList", blobContainerUri, blobName, queryString);
            HttpWebRequest req = (HttpWebRequest)WebRequest.Create(requestUriForCommitBlockList);
            req.Method = "PUT";
            req.ContentLength = contentLengthForCommitBlockList;
            using (Stream requestStream = req.GetRequestStream())
            {
                requestStream.Write(Encoding.UTF8.GetBytes(requestPayLoad), 0, contentLengthForCommitBlockList);
            }
            using (HttpWebResponse resp = (HttpWebResponse)req.GetResponse())
            {

            }
        }
/// <summary> /// Uploads a blob by splitting into blocks in a blob container where SAS permission is defined on a blob using REST API. /// </summary> /// <param name="blobSasUri"></param> static void UploadBlobInBlocksWithRestAPISasPermissionOnBlob(string blobSasUri) { List<string> blockIds = new List<string>(); for (int i = 0; i < 10; i++) { string sampleContent = string.Format(CultureInfo.InvariantCulture, "Line {0}: This is sample text.\r\n", i); string blockId = i.ToString("d4"); blockIds.Add(blockId); int contentLength = Encoding.UTF8.GetByteCount(sampleContent); string requestUri = string.Format(CultureInfo.InvariantCulture, "{0}&comp=block&blockid={1}", blobSasUri, Convert.ToBase64String(Encoding.UTF8.GetBytes(blockId))); HttpWebRequest request = (HttpWebRequest)WebRequest.Create(requestUri); request.Method = "PUT"; request.ContentLength = contentLength; using (Stream requestStream = request.GetRequestStream()) { requestStream.Write(Encoding.UTF8.GetBytes(sampleContent), 0, contentLength); } using (HttpWebResponse resp = (HttpWebResponse)request.GetResponse()) { } } string commitBlockListRequestBodyFormat = @"<?xml version=""1.0"" encoding=""utf-8"" ?><BlockList>{0}</BlockList>"; string blockListReuestBodyFormat = "<Latest>{0}</Latest>"; StringBuilder sb = new StringBuilder(); for (int i = 0; i < blockIds.Count; i++) { sb.AppendFormat(CultureInfo.InvariantCulture, blockListReuestBodyFormat, Convert.ToBase64String(Encoding.UTF8.GetBytes(blockIds[i]))); } string requestPayLoad = string.Format(CultureInfo.InvariantCulture, commitBlockListRequestBodyFormat, sb.ToString()); int contentLengthForCommitBlockList = Encoding.UTF8.GetByteCount(requestPayLoad); string requestUriForCommitBlockList = string.Format(CultureInfo.InvariantCulture, "{0}&comp=blockList", blobSasUri); HttpWebRequest req = (HttpWebRequest)WebRequest.Create(requestUriForCommitBlockList); req.Method = "PUT"; req.ContentLength = contentLengthForCommitBlockList; using (Stream requestStream = req.GetRequestStream()) { requestStream.Write(Encoding.UTF8.GetBytes(requestPayLoad), 0, contentLengthForCommitBlockList); } using (HttpWebResponse resp = (HttpWebResponse)req.GetResponse()) { } }When working with REST API, for putting blocks you must specify “comp=block” and Base64 encoded block id in the request URI. For putting block list, you must specify “comp=blockList” in the request URI.
Download Blobs
Here’s the code for downloading a blob from a blob container. For downloading blob, “Read” permission must be defined in SAS.
Using Storage Client Library
        /// <summary>
        /// Downloads a blob from a blob cobtainer using storage client library.
        /// </summary>
        /// <param name="blobSasUri"></param>
        static void DownloadBlobWithStorageClientLibrary(string blobSasUri)
        {
            CloudBlockBlob blob = new CloudBlockBlob(new Uri(blobSasUri));
            using (MemoryStream ms = new MemoryStream())
            {
                blob.DownloadToStream(ms);
                byte[] data = new byte[ms.Length];
                ms.Position = 0;
                ms.Read(data, 0, data.Length);
                string blobContents = Encoding.UTF8.GetString(data);
                Console.WriteLine(blobContents);
            }
        }
Using REST API
        /// <summary>
        /// Downloads a blob from a blob cobtainer using REST API.
        /// </summary>
        /// <param name="blobSasUri"></param>
        static void DownloadBlobWithRestAPI(string blobSasUri)
        {
            HttpWebRequest request = (HttpWebRequest)WebRequest.Create(blobSasUri);
            request.Method = "GET";
            using (HttpWebResponse resp = (HttpWebResponse)request.GetResponse())
            {
                using (Stream s = resp.GetResponseStream())
                {
                    using (StreamReader reader = new StreamReader(s, true))
                    {
                        string blobData = reader.ReadToEnd();
                        Console.WriteLine(blobData);
                    }
                }
            }
        }
Deleting Blobs
Here’s the code for deleting a blob from a blob container. For delete operation, “Delete” permission must be defined in SAS.
Using Storage Client Library
        /// <summary>
        /// Deletes a blob from a blob cobtainer using storage client library.
        /// </summary>
        /// <param name="blobSasUri"></param>
        static void DeleteBlobWithStorageClientLibrary(string blobSasUri)
        {
            CloudBlockBlob blob = new CloudBlockBlob(new Uri(blobSasUri));
            blob.Delete();
        }
Using REST API
        /// <summary>
        /// Deletes a blob from a blob cobtainer using REST API.
        /// </summary>
        /// <param name="blobSasUri"></param>
        private static void DeleteBlobWithRestAPI(string blobSasUri)
        {
            HttpWebRequest request = (HttpWebRequest)WebRequest.Create(blobSasUri);
            request.Method = "DELETE";
            using (HttpWebResponse resp = (HttpWebResponse) request.GetResponse())
            {

            }
        }
Summary
That’s it for this post. I could have possibly done more and included more samples but these should give you an idea about how to use SAS to perform various operations. May be in another post, I will show some functionality related to Tables and Queues with SAS. I hope you’ve found this post useful. If you find any issues with this post, please let me know and I’ll try and fix them ASAP. Feel free to provide your comments below.


Philip Fu posted [Sample Of Feb 11st] Call Azure storage REST API to the Microsoft All-In-One Code Framework blog on 2/11/2013:
Sample Download: http://code.msdn.microsoft.com/CSAzureStorageRESTAPI-2b9055fb
This Windows Azure code sample shows how to use REST API to generate an HTTP message that uses the List Blobs.
You can find more code samples that demonstrate the most typical programming scenarios by using Microsoft All-In-One Code Framework Sample Browser or Sample Browser Visual Studio extension. They give you the flexibility to search samples, download samples on demand, manage the downloaded samples in a centralized place, and automatically be notified about sample updates. If it is the first time that you hear about Microsoft All-In-One Code Framework, please watch the introduction video on Microsoft Showcase, or read the introduction on our homepage http://1code.codeplex.com/.
Carl Nolan described Hadoop .Net HDFS File Access in a 2/8/2013 post (missed when published):
Provided with the Microsoft Distribution of Hadoop, HDInsight, is a C library for HDFS file access. This code extends this library through a Managed C++ solution. This solution enables one to consume HDFS files from within a .Net environment. The purpose of this post is first to ensure folks know about the new Windows HDFS Managed library (WinHdfsManaged) provided alongside the native C library, and secondly to give a few samples of its usage from C#.
The complete code libraries can be downloaded from here: http://code.msdn.microsoft.com/Hadoop-Net-HDFS-File-Access-18e9bbee
Class Structure
Let’s start with a simple class diagram of the Win HDFS Managed library:
The main premise is that the HdfsFileSystem is your starting point, from which one can acquire a HdfsFileStream or a HdfsFileHandle. From the HdfsFileStream you can perform operations one would normally expect when working with .Net Streams. From the HdfsFileHandle you can perform operations analogous to normal HDFS file operations.
For brevity I have excluded samples using the HdfsFileHandle. So let’s run through some sample file operations.
Directory Operations
As in all operations one firstly needs to get a connection to the HDFS cluster. This is achieved by calling a Connect() method and specifying the host, name or IP address, and access port:
Create File System Access
- using (HdfsFileSystem hdfsSystem = HdfsFileSystem.Connect("127.0.0.1", 9000))
- {
- ...
- }
Once one has the connection one can then easily perform a directory traversal to enquire into the files and directories:
List Directory Structure
- Action<string> processDirectory = null;
- processDirectory = (looppath) =>
- {
- using (HdfsFileInfoEntries entries = hdfsSystem.ListDirectory(looppath))
- {
- foreach (HdfsFileInfoEntry entry in entries.Entries)
- {
- string kind = entry.Kind == HdfsFileInfoEntryKind.Directory ? "Directory" : "\tFile";
- Console.WriteLine(string.Format(@"{0}:""{1}"", Modified/Accessed:""{2:G}, {3:G}"", Owner:""{4}""", kind, entry.Name, entry.LastModified, entry.LastAccessed, entry.Owner));
- if (entry.Kind == HdfsFileInfoEntryKind.Directory)
- {
- processDirectory(entry.Name);
- }
- }
- }
- };
- processDirectory(hdfspath)
Here is a sample output created from the test application:
- Directory:"hdfs://127.0.0.1:9000/user/isotope/qwanchi", Modified/Accessed:"30/01/2012 20:46:38, 01/01/1970 00:00:00", Owner:"isotope"
- File:"hdfs://127.0.0.1:9000/user/isotope/qwanchi/MobileSampleData.txt", Modified/Accessed:"30/01/2012 20:46:38, 30/01/2012 20:46:38", Owner:"isotope"
- Directory:"hdfs://127.0.0.1:9000/user/isotope/qwanchi/duplicate", Modified/Accessed:"30/01/2012 20:46:38, 01/01/1970 00:00:00", Owner:"isotope"
- File:"hdfs://127.0.0.1:9000/user/isotope/qwanchi/duplicate/testdata.txt", Modified/Accessed:"30/01/2012 20:46:38, 30/01/2012 20:46:38", Owner:"isotope"
- File:"hdfs://127.0.0.1:9000/user/isotope/qwanchi/testdata.txt", Modified/Accessed:"28/01/2012 20:46:38, 29/01/2012 20:46:38", Owner:"isotope"
In addition to getting directory information one can also query on a file or directory directly:
Get Path Information
- hdfsSystem.SetWorkingDirectory(hdfspath);
- using (HdfsFileInfoEntry pathinfo = hdfsSystem.GetPathInfo(hdfspath))
- {
- if (pathinfo != null)
- {
- string kind = pathinfo.Kind == HdfsFileInfoEntryKind.Directory ? "Directory" : "\tFile";
- Console.WriteLine(string.Format(@"{0}:""{1}"", Modified/Accessed:""{2:G}, {3:G}"", Owner:""{4}""", kind, pathinfo.Name, pathinfo.LastModified, pathinfo.LastAccessed, pathinfo.Owner));
- }
- }
The HdfsFileSystem class also supports other operations such as copying and moving files, file renaming, deleting files, modifying security, checking a file exists, etc. The copy and move operations support copying and moving these files between systems.
So now onto creating and reading files.
Reading Files
Processing HDFS files is not that dissimilar from normal .Net file operations. Once one has opened a file for reading, operations are available for operations such as reading a byte, line, or block of bytes:
Reading Stream File Data
- using (HdfsFileStream file = hdfsSystem.OpenFileStream(filename, HdfsFileAccess.Write, chunksize))
- {
- file.Write(dataBytes, 0, data.Length);
- file.WriteByte((byte)47);
- file.Flush();
- }
The OpenFile operations support parameter overrides for the file block size and replication factors, whereas a value of zero implies the default values will be used.
If one wants to read the full contents of a file into a second Stream, the HdfsFileStream makes this a simple process:
Reading a File by Stream
- using (HdfsFileStream hdfsStream = hdfsSystem.OpenFileStream(localhdfsfilename, HdfsFileAccess.Read))
- {
- using (FileStream fileStream = new FileStream(localfilestream, FileMode.Create, FileAccess.Write))
- {
- hdfsStream.CopyTo(fileStream);
- }
- }
There are other options available for reading the full contents of a file. The first option is to perform a ReadLine() until a null is returned, processed using a StreamReader:
Writing a HDFS to Local Stream
- using (StreamReader reader = new StreamReader(hdfsSystem.OpenFileStream(localhdfsfilename, HdfsFileAccess.Read, chunksize)))
- {
- using (StreamWriter writer = new StreamWriter(localfileline, false, Encoding.UTF8))
- {
- string line;
- while ((line = reader.ReadLine()) != null)
- {
- writer.WriteLine(line);
- }
- }
- }
Alternatively, for more efficient reading of files, one can read the blocks of data into a byte array:
Reading a File in Bytes
- using (HdfsFileStream file = hdfsSystem.OpenFileStream(filename, HdfsFileAccess.Read))
- {
- while ((chunk = file.Read(readBytes, 0, chunksize)) > 0)
- {
- Console.Write(Encoding.UTF8.GetString(readBytes, 0, chunk));
- }
- }
Other operations that are supported are PositionalReadByte(), PositionalReadBytes(), and Seek(). These operations allow reading the contents of a file from specific positions.
One final sample worth noting is copying a HDFS file to a local file using byte reads:
Writing a HDFS to Local File
- using (HdfsFileStream file = hdfsSystem.OpenFileStream(localhdfsfilename, HdfsFileAccess.Read, chunksize))
- {
- using (FileStream stream = new FileStream(localfilewrite, FileMode.Create, FileAccess.Write))
- {
- while ((chunk = file.Read(readBytes, 0, chunksize)) > 0)
- {
- stream.Write(readBytes, 0, chunk);
- }
- }
- }
The reason a chunk size is specified in this case is to sync the size being used for HDFS file access to the byte array used for writing the local file.
If one has a Stream reference one can also get the associated file information:
Get File Information
- HdfsFileInfoEntry fileinfo = file.GetInformation();
- if (fileinfo != null)
- {
- Console.WriteLine(string.Format(@"'{0}', Modified/Accessed:""{1:G}, {2:G}"", Owner:""{3}""", fileinfo.Name, fileinfo.LastModified, fileinfo.LastAccessed, fileinfo.Owner));
- }
Also one can modify the file properties:
Modifying File Properties
- file.Chown("isotope", null);
- file.SetTimes(DateTime.Now.AddDays(-2), DateTime.Now.AddDays(-1));
So now onto writing files.
Writing Files
As in the case for reading, writing operations are supported for writing a byte, line, and block of bytes:
Writing File Stream Data
- using (HdfsFileStream file = hdfsSystem.OpenFileStream(filename, HdfsFileAccess.Write, chunksize))
- {
- file.Write(dataBytes, 0, data.Length);
- file.WriteByte((byte)47);
- file.Flush();
- }
The chunk size when opening a file is set to correspond to the size of the buffer used for writing the data.
As in the reading case, if one wants to copy a file from the local file system to an HDFS file one would write:
Writing a Local to HDFS Stream
- using (HdfsFileStream file = hdfsSystem.OpenFileStream(localhdfsfilename, HdfsFileAccess.Write, chunksize))
- {
- using (FileStream stream = new FileStream(localfilepath, FileMode.Open, FileAccess.Read))
- {
- while ((chunk = stream.Read(localbytes, 0, chunksize)) > 0)
- {
- file.Write(localbytes, 0, chunk);
- }
- }
- file.Flush();
- }
All one has to do is read, in byte chunks, data from the local file and write the corresponding bytes to the HDFS file.
Of course one can also use the CopyTo operation:
CopyTo Local to HDFS Stream
- using (HdfsFileStream file = hdfsSystem.OpenFileStream(localhdfsfilename, HdfsFileAccess.Write, chunksize))
- {
- using (FileStream stream = new FileStream(localfilepath, FileMode.Open, FileAccess.Read))
- {
- stream.CopyTo(file);
- }
- }
A quick word is warranted on appending to a file. Although the API currently supports open files for Append, this is only supported in Hadoop version 1.0.0 and above.
Building the Library
The download not only consists of the compiled libraries but also the full source code and sample C# application that this post is based upon. The source supports both x86 and x64 compilations. However one has to remember that if one does a 32-bit compilation then a 32-bit version of the JRE will also be required.
In the Native library the include path is defined as:
$(JAVA_HOME)\include;$(JAVA_HOME)\include\win32;$(IncludePath)
If your environment variable is not correctly defined for the Java include directory this will have to be modified.


<Return to section navigation list>
Windows Azure SQL Database, Federations and Reporting, Mobile Services
Liam Cavanagh (@liamca) recommended that you Check out the new look of Cotega – SQL Azure Monitoring Service on 2/9/2013 (missed when published):
I am the founder of a startup called Cotega and also a Microsoft employee where I work as a Program Manager. This is a series of posts where I talk about my experience building a startup outside of Microsoft. I do my best to take my Microsoft hat off and tell both the good parts and the bad parts I experienced using Azure.
It has been some time since I have posted an update, but the past few months have been quite busy. One of the things that I have been working on is a major update to the Cotega service. I heard a lot of feedback from people on the v1 version of Cotega and I think one of the biggest things I heard was in the area of ease-of-use. There are a lot of things that people want to be able to monitor for their database and I just made it too hard to add all of the things needed. So I decided to step back and try to come up with a new way to set up your database monitoring. Now, you simply point Cotega to your database, provide an email to send notifications and you are ready to go.
In addition, there is now a “Free” subscription that does not require a credit card and allows you to try out the service before making a commitment. The key difference between the Free plan and a paid one is that monitoring is only done once every 2 hours (as opposed to every 10 min for a paid account). In additions paid accounts will send email notifications when database issues occur.


<Return to section navigation list>
Marketplace DataMarket, Cloud Numerics, Big Data, Stream Insight and OData
Andrew Brust (@andrewbrust) asserted “As a follow-up to the data warehouse Magic Quadrant, here's a roundup of Gartner's annual Business Intelligence Magic Quadrant report” in a deck for his Gartner releases 2013 BI Magic Quadrant article of 2/14/2013 for ZD Net’s Big Data blog:
Last week, I provided an overview of Gartner's data warehouse Magic Quadrant (DW MQ). I explained that the DW MQ has a lot of significance for the Big Data world. The same is true of the Business Intelligence Magic quadrant (BI MQ) which was released just five days later. As such, I thought it a good idea to let the DW MQ analysis sink in and then provide a similar summary for the BI MQ this week.
The BI MQ has many more vendors than does the DW MQ (with all of last year's vendors retained and three new ones added to this year's MQ), and so I'm not going to each vendor included in the report. As before, I will recommend you read the full report in any case, and will instead concentrate on some of the trends and themes that evidenced themselves in the report that were not explicitly spelled out.
Image Credit: Gartner
A BI Vendor Primer
Before covering those trends, though, some background on the BI vendor lineup may be in order.
One thing to keep in mind as you consider both the BI MQ and DW MQ reports, is that the "MISO" vendors (Microsoft, IBM, SAP and Oracle) figure prominently in both. There are major pure plays on the BI MQ side, too: just as Teradata is a specialist vendor in the DW space, but a substantial force nonetheless, so too are a certain vendors in the BI world, including SAS and MicroStrategy.
BI has more subcategories than does the DW space. One of them - involving interactive visualization for data exploration and discovery, has crowned its own kings: Tableau is chief among them, QlikTech's QlikView is right behind it and Tibco's Spotfire is there too.
The Big Data world is dominated by Open Source technologies; the BI world, not so much. But there are Open Source BI players, and three of them -- Pentaho, Jaspersoft and Actuate -- make a significant showing in this year's BI MQ.
And speaking of the Big Data world, you will see in the BI MQ report, as you did in the DW MQ, that partnerships and connectors to major Hadoop distributions, and the beginnings of standardization on the R programming language for statistics and predictive analytics, is starting to take place.
In fact, in the near future, we may find that distinguishing between DW, BI and Big Data markets will be a contrived endeavor. These worlds will likely become like neighborhoods in the same city, even if today they seem like loosely federated states. The very reason this blog is called Big on Data (and not just "Big Data") is in anticipation of such unification.
I'll get down off my soapbox now though. Let's run through the trends evident in this year's report.
Microsoft leads in ability to execute
As I did with the DW report, I'll start with the "winners" in this MQ. Each axis ("ability to execute" and "completeness of vision") had its own winner, and that for the former is Microsoft. I tend to go out of my way to point out my bias on Microsoft. I built much of my career around Microsoft technologies, especially its developer and BI stacks, and I served on the company's BI Partner Advisory Council for several years. I've long thought the MS BI stack provided significant value, and have watched that value increase recently with the introduction of PowerPivot and SQL Server Analysis Services Tabular mode (in-memory column store databases that are highly integrated with Excel and SharePoint) and Power View (interactive visualization technology integrated with those same products). Microsoft has also recently added Master Data Management and Data Quality tools that, while still maturing, round out very nicely a stack that costs little to nothing for customers already using SQL Server, Office and SharePoint.
So it's interesting to see strong recognition from Gartner this year of the Microsoft BI stack. Couple that with the Microsoft's rise on both axes in the DW MQ report, and the impending release of its HDInsight Hadoop distribution for Windows Server and the Windows Azure cloud platform, and I think we're at a point where everyone needs to pay attention. Again, I am far from objective on this point, but even those that are objective have to take notice.
Meanwhile, Microsoft continues as a laggard in the mobile BI space. While it is technically possible to work with Power View on a Windows 8 tablet, this is not the case for iOS, Android, or even Microsoft's own Windows RT platform. Power View is still based on Silverlight, which is a technology all but disowned by Redmond, supported only on the full Windows desktop and MacOS (but, again, not iOS) platforms. Microsoft is out of excuses on this one, and it's no wonder that the company did not win on the MQ's completeness of vision axis. Which brings us to the company that did.
IBM leads in completeness of vision
IBM, if nothing else, is a master of acquisitions. While it's long had its DB2 database, and some BI enhancements surrounding it, the company's acquisition of Cognos (and thus TM1) and SPSS, as well as acquisitions in the analytics space like Netezza and Vivisimo; and even marketing technology acquisitions Unica and Coremetrics, are what have really propelled IBM in the BI space. With so many products in its portfolio, and with subsequent organic additions, like Cognos Insight, Cognos Express and InfoSphere Streams (a complex event processing engine), it seems almost a no-brainer to award IBM the winner in the completeness of vision axis.
- Also read: IBM’s Big Data Analytics Empire
- Also read: NYC Data Week, Day 1: IBM, Tervela, Cisco and SiSense announce
- Also read: IBM eyes vertical applications for big data
But Gartner does have cautions for IBM, like performance and ease of use, discussed below. The downside of so many acquisitions is the monumental integration burden that comes with them. IBM has, however, shown that with time, they make the integration happen. Given that IBM is so focused on services, that's especially impressive. Then again, Big Data and analytics are so important to growth in the services business these days, that such strong efforts are certainly justified and, ultimately, good for the bottom line. …


Read more (page 2).
Red Gate Software (@redgate) published my (@rogerjenn) Testing the StreamInsight Service for Windows Azure, Part 2 to the Simple-Talk newsletter on 2/5/2013. It begins:
In my previous article StreamInsight Service for Windows Azure about the “Project Austin” StreamInsight service, I explained how to provision it on Windows Azure with Visual Studio 2010 or 2012 and the downloadable AustinCtpSample solution. StreamInsight is a Complex event processing (CEP) application that tracks streams of information that combines data from several sources in order to identify meaningful events and respond to them rapidly.
In this article, I’ll be showing you how to test the StreamInsight Service for Windows Azure CTP with the SampleApplication and EventSourceSimulator projects and use the graphical Event Flow Debugger. To do this, you will need the following: (see StreamInsight Service for Windows Azure).
- Visual Web Developer 2010 Express or Visual Studio Express 2012 for Web or higher version
- Windows Azure SDK v1.7 (June 2012), which includes the Visual Studio Tools for Windows Azure
- A Windows Azure trial or paid subscription, preferably dedicated to StreamInsight
- An invitation to the StreamInsight Service for Windows Azure CTP, the source code and binaries for which you must download and install
- Completion of all sections of Part 1 except “Deleting a Service Instance Deployment”


Unfortunately, the Stream Insight Service for Windows Azure team sent the following message to registered preview users (apparently except me) in late January 2013:
It has been a few months since you’ve heard from us, and we would like to fill you in on some advancements in the evolution of the Windows Azure StreamInsight Platform.
First off, we would like to thank you for participating in the Microsoft ‘Project Austin’ Customer Technology Preview (CTP). We received very valuable feedback which continues to help us shape the range of our offerings. We recognize that ‘Project Austin’ is as a crucial piece of the cloud data pipeline and are looking for ways to provide a more integrated data pipeline platform. As such, we are pausing the ‘Project Austin’ CTP, and dedicating resources toward evolving the capability of the technology. We feel confident that we are on the right path to providing a richer and even more compelling solution.
As a result of the change in direction, we will be ramping down the existing service by the end of January 2013, and working with our existing customers to transition to the new data pipeline service when it becomes available. If you would like to request an extension period for your project, please reach out directly to Welly Lee [email alias redacted.]
I submitted my manuscript for the above and Part 1, StreamInsight Service for Windows Azure, to Red Gate on 10/25/2012. Publication was delayed by migration of the publication location from the ACloudyPlace blog to the Simple-Talk Newsletter.
Full disclosure: I’m a paid contributor to Red Gate Software’s Simple-Talk newsletter and the former ACloudyPlace blog. I receive free evaluation and beta versions of Cerebrata tools for Windows Azure and use them regularly.
![]() No significant articles today:
No significant articles today:
<Return to section navigation list>
Windows Azure Service Bus, Caching Access Control, Active Directory, Identity and Workflow
Haishi Bai (@haishibai2010) posted a Windows Azure Active Directory (current) resource list on 2/16/2013:
This post is a survey of currently available Windows Azure Active Directory resources. I’ve listed links to various concepts, tools, and scenarios. Many of the links, unsurprisingly, point to Vittorio's blog. I hope this post can provide a little help for you to sort out WA AD resources.
WA AD is under active development and things will probably change. I intend to keep this post refreshed once a while, with preview features clearly marked. If you’ve spot a mistake or out-of-date info, or have anything you want to add to this list, please let me know!
Last updated: February 16, 2013
Concepts
- Introduction
http://www.windowsazure.com/en-us/home/features/identity/- MSDN
http://msdn.microsoft.com/en-us/library/windowsazure/jj673460.aspx- Windows Azure Active Directory is not a FP. If anything, it is an IP; or rather, it defines an IPs space.
http://blogs.msdn.com/b/vbertocci/archive/2013/02/08/multitenant-sts-and-token-validation.aspx
- Tokens from Windows Azure AD are all signed with the same certificate for every tenant
Tooling for Common Tasks
To provision a new Windows Azure Active Directory Tenant
- If you are an Office365 customer, you already have one.
- Use this link to set up one tenant for free as part of our developer preview program. [PREVIEW!]
To manage a Windows Azure Active Directory Tenant
- https://activedirectory.windowsazure.com/ [PREVIEW!]
To provision a service principal
To validate token by signer and issuer pair
To configure applications that use WIF
- Identity and Access Tools (For Visual Studio 2012)
To query Windows Azure Active Directory
- Windows Azure Active Directory Graph
- Use AAL (beta NuGet) to obtain a token for calling the Graph API. [Beta!]
http://blogs.msdn.com/b/vbertocci/archive/2013/01/22/group-amp-role-claims-use-the-graph-api-to-get-back-isinrole-and-authorize-in-windows-azure-ad-apps.aspxTo handle JWT token
Scenarios
How to provision a Windows Azure Active Directory Tenant as an Identity Provider in an ACS Namespace
Integrating Multi-Tenant Cloud Applications with Windows Azure Active Directory
http://www.windowsazure.com/en-us/develop/net/tutorials/multitenant-apps-for-active-directory/ [Preview]
To use Windows Azure Active Directory as a trusted IP of a Windows Azure Web Site
- Use Windows Azure Authentication.
- Use Identity and Access Tools to configure RP. Beware of cookie protection method constrains:
http://blogs.msdn.com/b/vbertocci/archive/2013/01/28/running-wif-based-apps-in-windows-azure-web-sites.aspxTo use Windows Azure Active Directory as a trusted IP of a Windows Azure Cloud Service
- Use Identity and Access Tools to configure RP. Create service principal on Windows Azure Active Directory tenant.
How to get role and group membership claims for users signing in via Windows Azure Active Directory
Delegation without ActAs token
- Both frontend and backend belongs to the same owner/realm.
- Bearer tokens are allowed.
- The risk of token being stolen across layers is understood and managed.
Claims issued by a Windows Azure Active Directory Tenant
This is not a complete list. It contains only claims that are known to be provided
- http://schemas.xmlsoap.org/ws/2005/05/identity/claims/name (UPN of the user – “user@domain”, see Vittorio's blog)
- http://schemas.xmlsoap.org/claims/FirstName
Common URLs
- Active Directory tenant federation metadata
https://accounts.accescontrol.windows.net/[tenant (???.onmicrosoft.com)]/FederationMetadata/2007-06/FederationMetadata.xml- ws-Federation endpoint
https://accounts.accesscontrol.windows.net/[tenant id]/v2/wsfederation (you can get tenant id from the metadata above - entityID)


Nathan Totten (@ntotten) and Nick Harris (@cloudnick) produced CloudCover Episode 100 - Introduction to the Windows Azure Service Bus Notification Hubs on 2/10/2013:
Recently we announced a new preview feature Windows Azure Service Bus Notification Hubs. In this episode Nick Harris and Nate Totten are joined by Elio Damaggio Program Manager II on Windows Azure Service Bus who provides a great overview, and demo of, Notification Hubs and their use from Windows Store and iOS applications.
Service Bus Notification Hubs are an intrinsic feature of Windows Azure Service Bus and are different from other push notification services in four key areas:
- Complete client registration management. Your backend application does not need to worry at all about device-ids or channels or other particulars of push notifications and doesn't need to cooperate in management. It doesn't even have to be a web app that's publicly accessible.
- Platform independence. Service Bus Notification Hubs allow cross-platform push notifications so that iOS Alerts and Windows Live Tiles can be targeted with a single event message.
- Broadcast and tag-based Multicast - Service Bus Notification Hubs are optimized around automatic notification broadcast to many thousand devices with low latency. One message in, thousands of notifications out.
- Mass customization - Notification Hub notification templates allow for customization of notification delivery for each individual registration, allowing each instance of a client App to choose how it wants to receive events.
In this preview, Notification Hubs are able to push notifications to Windows Store apps and iOS apps from .NET back-ends. Support for Android and Windows Phone, along with additional back-end technologies (including Windows Azure Mobile Services) will be added soon.
And here are all the key links
- Feature guide (Windows Store Apps) - http://go.microsoft.com/fwlink/?LinkID=275828
- Feature guide (iOS) - http://go.microsoft.com/fwlink/?LinkId=275829
- Fundamentals - http://go.microsoft.com/fwlink/?LinkId=277072
- Tutorial (Windows Store Apps) - http://go.microsoft.com/fwlink/?LinkId=277073
- Tutorial (iOS) - http://go.microsoft.com/fwlink/?LinkId=277074
SDKs:
- Windows 8 Managed Client Library - http://go.microsoft.com/fwlink/?LinkID=277160
- iOS Client Library - http://go.microsoft.com/fwlink/?LinkID=277161
- Preview client NuGet - http://nuget.org/packages/ServiceBus.Preview


<Return to section navigation list>
Windows Azure Virtual Machines, Virtual Networks, Web Sites, Connect, RDP and CDN
Madhan Arumugam Ramakrishnan posted Choosing between SQL Server in Windows Azure VM & Windows Azure SQL Database to the Windows Azure blog on 2/14/2013:
Editor's Note: This post was co-written by Madhan Arumugam and Guy Bowerman from the SQL Server Cloud Infrastructure Team.
Introduction
Windows Azure gives you a choice in where to host your SQL data, with both SQL Server running in a VM (henceforth referred to as SQL/VM), and Windows Azure SQL database (henceforth referred to as SQL DB). SQL/VM and SQL DB come from a single code base, and each offering has its own strengths when it comes to cloud deployment. In this article we will build upon the earlier blog post on SQL Server in Windows Azure Virtual Machine vs. SQL Database and provide a simple decision tree to help choose the best SQL database solution in Windows Azure for your application/service. Windows Azure SQL DB is a Microsoft Platform as a Service (PaaS) offering that has been in production for a few years. SQL Server in Windows Azure Virtual Machine is a Microsoft Infrastructure as a Service (IaaS) offering with an integrated database server instance, available as a set of pre-configured platform images. The Windows Azure Virtual Machine offering is currently in Public Preview.
This post is focused on SQL Engine rather than BI and reporting. Future posts will looking into BI/Reporting choices in more detail.
Why choose Azure for SQL?
Windows Azure offers deep integration across the Microsoft stack, for example between applications such as SharePoint and Active Directory, and also integration of licensing across different deployment models with a unified developer experience. This level of integration is built upon and supported by extensive testing of Microsoft products working together. It also offers a significant level of interoperability. In addition to supporting multiple operating systems including Linux, Windows Azure VMs are based on the standard VHD format, making them easy to import to and export from the Azure environment.
This level of integration, standardization and interoperability makes Azure the ideal cloud environment to run SQL Server, providing a seamless, consistent experience across Microsoft assets from traditional on-premises, to private cloud, to public cloud.
Ongoing innovations in SQL/VM and SQL DB enable both low overall TCO for management of existing applications/services and an efficient platform for the new breed of cloud applications/services. Additionally the ability to mix and match existing and new applications in the same hosted service, and to integrate with on-premises applications and networks in hybrid models provides tremendous flexibility.
Choosing the right database solution
The range of Microsoft database products available, across physical on-premises machines, private cloud environments, 3rd party hosted private cloud environments and public cloud provide a continuum of SQL Server offerings amounting to a cohesive, flexible and open data platform in the cloud.
Each offering can be characterized by the level of control you have over the infrastructure, and by the degree of cost efficiency achieved by database level consolidation and automation. There are other dimensions by which these offerings can be characterized, such as compatibility, which we will look at in more detail in the decision tree below.
This post will focus on the contrast between SQL/VM and SQL DB, and offers a path to choosing a database service which matches your desired level of cost efficiency and control.
Decision tree
In this decision tree, the following key application/service specific decision points are examined:
- New or existing application/service: Migrating existing applications (“lift and shift”) typically requires a higher need to emulate on-premises application behavior than new applications which typically don’t have that need.
- Application/Service requirements: This decision point checks for any compatibility, networking or security requirements which might require SQL Server in a VM. See SQL Server in Windows Azure Virtual Machine vs. SQL Database for more details, and for a full list of feature compatibility differences between SQL DB and SQL/VM refer to the MSDN article Guidelines and Limitations (Windows Azure SQL Database).
- Database size: There are size limits by SQL Database editions, and the current maximum size of a single Azure SQL DB is 150 GB. For SQL/VM, the current maximum VM size is ExtraLarge (8 CPU cores, 14 GB RAM and up to 16 TB of disk space). See the MSDN article How to Configure Virtual Machine Sizes for more details on VM sizes.
- Willingness to (Re)architect/partition for economies of scale: This decision point checks for elasticity and scale-out requirements which can be met using SQL DB scale-out technologies such as Federations in Windows Azure SQL Database. Typically to fully take advantage of the economies of scale and elasticity features offered by SQL DB, a degree of re-architecture is required (see design considerations for scale out in SQL DB here).
Additional considerations
As you progress beyond these high-level decision points you may have lower-level design criteria and sizing expectations which can impact the choice of database solution, for example a new application might have a specific feature requirement that is not available in SQL DB. The purpose of this decision tree is to provide an easy to use framework to quickly evaluate your application needs.
An important consideration is the SLA provided by an IaaS vs. a PaaS database solution. For example in IaaS, Windows Azure has an SLA which covers all VM storage. When Windows Azure VM becomes generally available there will be a Windows Azure VM-level SLA of 99.95% availability for two or more instances in an availability set. In SQL DB there is a database level availability SLA. For more details refer to http://www.windowsazure.com/en-us/support/legal/sla/. Any operations not covered by an SLA become the customer’s responsibility.
An application/service does not have to choose exclusively between IaaS or PaaS. Mixed mode application patterns which include both PaaS and IaaS services (for example, SQL DB and SQL/VM in Azure) represent a real and practical possibility for application development and deployment that allows applications to run components in VMs which require compatibility and control such as BI or applications migrated from on-premises, and also use databases in SQL DB to minimize DBA and database costs.
Conclusion
Both Windows Azure SQL DB and SQL Server running on Windows Azure virtual machines are valid approaches for satisfying distinct database application needs.
In summary choose SQL/VM if:
- You require full compatibility with SQL Server on-premises.
- You want to make minimal changes to an existing application.
- You require infrastructure level Isolation.
- Your application/service is designed for “planned database scale” (AKA scale up).
Choose SQL DB if:
- You are building a net new cloud based application.
- You want to reduce the cost of database management and focus on the application layer.
- You need database level isolation.
- Your app/service is designed for “unplanned & unbounded database scale” (elasticity via scale out).
References
Gregory Leake’s blog post on SQL Server in Windows Azure Virtual Machine vs. SQL Database: http://blogs.msdn.com/b/windowsazure/archive/2012/06/26/data-series-sql-server-in-windows-azure-virtual-machine-vs-sql-database.aspx
Guidelines and Limitations (Windows Azure SQL Database)
SQL Server Virtualization support statement covering virtualized environments beyond Hyper-V: http://support.microsoft.com/kb/956893


<Return to section navigation list>
Live Windows Azure Apps, APIs, Tools and Test Harnesses
Bruno Terkaly (@brunoterkaly) announced Bruno Terkaly Office Hours – A chance to learn for everyone, especially me on 2/12/2013:
Announcing My Office Hours: http://ohours.org/brunoterkaly
I am reaching out to my communities and inviting them to join me for office hours. It will be a time the developer can sit down with me and discuss his cloud and Windows 8 development challenges. As many of my blog readers know, I have been primarily focused on the backend cloud technologies, specifically Windows Azure. But I believe you can only understand the backend if you have a clear understanding of how the client side works the front-end.
I really enjoy seeing people use the cloud and interesting ways from client applications. I’ve helped many already and I look forward to doing it. After all, I was a teacher for 20 years.
I now have shared my first Windows 8 application, called Kids Car Colors. It is now available in the Windows 8 store. It is targeted to young children who would like to learn colors by viewing a variety of cars. Although it is self-contained and does not even leverage a backend, it does put me in a position to better help other developers wanting to get their applications into the Windows store.
I mostly wrote it for my kid. He loves cars. And one of the first things kids like to learn about is colors. He actually brings them to bed with at night. So this game is very popular with kids who just love cars as well as learning colors. If you are simply curious, take a peek - it is free. If you like it and if your child enjoys it, I’d love to hear about it.Download Kids Car Colors: ms-windows-store:PDP?PFN=18885BrunoTerkaly.KidsCarColors_w46xb7x0p7f14
Most of my content now around cloud computing comes out of my work with the monthly column that I write in MSDN magazine, Windows Azure Insider.
I maintain my regular office hours at http://ohours.org/brunoterkaly. You will typically either find me in San Francisco at an incubation site or at Microsoft. You may also find me at the Windows store in Corte Madera.

Peter Laudati (@jrzyshr) and Brian Hitney (@bhitney) produced Microsoft DevRadio: (Part 1) Using Windows Azure to Build Back-End Services for Windows 8 Apps on 2/7/2013 (missed when posted):
Peter Laudati (pictrued at right) and Brian Hitney (pictured below) welcome fellow Developer Evangelist, Andrew Duthie to the show as they kick off their series on how to build back-end services for their Windows 8 apps using Windows Azure. Tune in for part 1 as Andrew gives an overview of the series and introduces some potential techniques you could incorporate as you build your back-end services.
After watching this video, follow these next steps:
Step #1 – Try Windows Azure: No cost. No obligation. 90-Day FREE trial.
Step #2 – Download the Tools for Windows 8 App Development
Step #3 – Start building your own Apps for Windows 8
Subscribe to our podcast via iTunes or RSS
If you're interested in learning more about the products or solutions discussed in this episode, click on any of the below links for free, in-depth information:
Register for our Windows Azure Hands-on Lab Online (HOLO) events today!
Blogs:
Videos:
- Microsoft DevRadio: How to Get Started with Windows Azure
- Microsoft DevRadio: (Part 1) What is Windows Azure Web Sites?
- Microsoft DevRadio: (Part 2) Windows Azure Web Sites Explained
Virtual Labs:
Download
- MP3 (Audio only)
- MP4 (iPod, Zune HD)
- High Quality MP4 (iPad, PC)
- Mid Quality MP4 (WP7, HTML5)
- High Quality WMV (PC, Xbox, MCE)


Philip Fu posted [Sample Of Feb 10th] Host and use WCF Services in Windows Azure to the Microsoft All-In-One Code Framework blog on 2/10/2013:
This project shows how to host WCF in Windows Azure, and how to consume it. It includes:
1) A WCF web role , which hosts WCF in IIS;
2) A work role which hosts a WCF service (self-hosting); and
3) A windows console client that consumes the WCF services above.The client application talks to the web role via http protocol defined as an input endpoint. The client application also talks to the work role directly via tcp protocol defined as an input point. This demonstrates how to expose an Azure worker role to an external connection from the internet. The web role talks to the worker role via tcp protocol defined in an internal end point, to demonstrate the inter-role communication within an Azure hosted service.

<Return to section navigation list>
Visual Studio LightSwitch and Entity Framework 4.1+
Beth Massi (@bethmassi) provided a LightSwitch OData Tip: Easily Expose Many-to-Many Relationships using Queries on 2/14/2013:
The other day I got an email from a good friend trying to expose a many-to-many relationship via his LightSwitch OData service. He was trying to recreate a feed similar to the one at http://odata.msteched.com/teau12/sessions.svc/ using LightSwitch. What he wanted to see was a list of all the speakers for a given session, but there’s a many-to-many relationship between sessions and speakers. Since this feed supports direct many-to-many relationships we can pull up all the speakers for a given session using navigation properties:
http://odata.msteched.com/teau12/sessions.svc/Sessions(27981)/Speakers
Since LightSwitch currently doesn’t support direct many-to-many relationships in its intrinsic (i.e. ApplicationData) database we need to support this scenario a different way. And I should make it clear, LightSwitch will support many-to-many relationships when consuming external data sources (like the feed above), it just doesn’t support modeling the data directly this way when creating a data model through the data designer at this time.
The Data Model
OK first we need to model the data in LightSwitch. In order to model a many-to-many relationship, you need a linking table. Here we have SpeakerSession table that holds the many-to-one relationships to both Speaker and Session.
Now if I create a List & Details screen, choose the Session for the screen data, and include the SpeakerSession, LightSwitch will automatically bring in the Speakers as drop down lists in the SpeakerSession grid. So the screens do the right thing automatically. (BTW, if you’re trying to design a screen with a multi-select control have a look at Andy’s article here: How to Create a Many-to-Many Relationship)
However, if we take a look at the OData service LightSwitch creates for us, when we look at a Session, you will notice that we need to traverse the SpeakerSession linking table to find each of the Speakers.
http://…/ApplicationData.svc/Sessions(1)/SpeakerSessions
So to get the speakers for session 1 we have to make two calls.
http://…/ApplicationData.svc/SpeakerSessions(1)/Speaker
http://…/ApplicationData.svc/SpeakerSessions(5)/SpeakerInstead we only want to have to make 1 call to get all the speakers for a given session.
Create a Query
The trick is to create a query. Queries are also exposed on your OData service endpoint. For instance, we can open the Query Designer and create a query called SpeakersBySession based on the Speakers entity. Add a parameter for the SessionID.
Now drop down the Write Code button and add code to the SpeakersBySession_PreprocessQuery method. We need to write a LINQ query that will check the Session ID and return only those speakers that match.
Private Sub SpeakersBySession_PreprocessQuery(SessionID As System.Nullable(Of Integer),
                ByRef query As System.Linq.IQueryable(Of LightSwitchApplication.Speaker))

    'Return the speakers that have sessions matching the passed in Session ID
    query = From speaker In query
            Where speaker.SpeakerSessions.Any(Function(s) s.Session.Id = SessionID)
            Select speaker
End Sub
BTW, in C# the LINQ statement would be:
query = from speaker in query
        where speaker.SpeakerSessions.Any(s => s.Session.Id == SessionID)
        select speaker;
RUN IT!
Now we can call the query directly via the service and it will return the list of Speakers for a given session.
http://…/ApplicationData.svc/SpeakersBySession?SessionID=1
Of course you can expose any simple or complex queries you want this way, not just many-to-many relationships. You can also limit who can execute any of the queries using the access control hooks in the Query designer as well.
For more information on OData & LightSwitch in Visual Studio 2012 see:
- Enhance Your LightSwitch Applications with OData
- Creating and Consuming LightSwitch OData Services
- LightSwitch Architecture: OData
For more information on queries see:
And for more information on writing LINQ queries see:


 No significant articles today
Return to section navigation list>
Windows Azure Infrastructure and DevOps
![]() No significant articles today
No significant articles today
<Return to section navigation list>
Windows Azure Platform Appliance (WAPA), Hyper-V and Private/Hybrid Clouds
![]() No significant articles today
No significant articles today
<Return to section navigation list>
Cloud Security, Compliance and Governance
David Linthicum (@DavidLinthicum) asserted “PCI Security Standards Council guidelines for cloud providers are a step in the right direction for regulated businesses” in a deck for his New guidelines eliminate PCI as a barrier to cloud adoption article of 2/15/2013 for InfoWorld’s Cloud Computing blog:
You know a trend is picking up steam when the security standards bodies start issuing guidelines. So it's good news that the Payment Card Industry trade group, whose PCI Security Standards Council's standards dictate how most electronic payment transactions are handled, has come out with its guidelines for cloud security (PDF). In even better news, they're worth reading, with solid lessons for IT.
The document offers advice on the use of cloud computing technology, as well as guidelines for maintaining the critical PCI Data Security Standard (PCI DSS) controls in cloud environments.
Its objective are simple: explaining common deployment and service models for cloud environments and describing how PCI DSS security may be applied. It explores the emerging architectural and deployment patterns for the cloud, how PCI DSS should be implemented in those patterns, and how to discover and document responsibilities around the different types of cloud implementations, including the use of public cloud providers.
Of course, other security bodies also deal with the use of cloud computing, such as the Cloud Security Alliance. Most traditional security standards organizations have either published guidance around the use of cloud computing, as the PCI Security Standards Council has now done, or are looking to do so in the next few years.
What's important about all this work is that it removes some of the excuses for keeping cloud computing off the table at many enterprises, by allaying some of the uncertainty over compliance with existing security standards. Obviously, if the standards bodies publish guidance around the use of cloud computing providers and technology, IT systems should be able to work securely in the cloud.


No significant articles today
<Return to section navigation list>
Cloud Computing Events
Craig Kitterman (@craigkitterman) posted Windows Azure Community News Roundup (Edition #55) on 2/15/2013
Editor's Note: This post comes from Mark Brown, Windows Azure Community Manager.
Welcome to the newest edition of our weekly roundup of the latest community-driven news, content and conversations about cloud computing and Windows Azure.
Here is what we pulled together this week based on your feedback:
Articles, Videos and Blog Posts
- Blog: Demo connecting 11 Netduinos to Windows Azure Service by @mlinnen (posted Feb. 14)
- Blog: Deploying a Linuz Web Farm on Windows Azure in 30 mins by @azurecoder (posted Feb. 13)
- Blog: Revisiting Windows Azure Shared Access Signature by @gmantri (posted Feb.13)
- Blog: There is more to PaaS than you think by @toddysm (posted Feb. 11)
- Blog: Has the term "big data" completely lost meaning yet? by @greglow (posted Feb. 10)
Upcoming Events and User Group Meetings
North America
- October - June, 2013: Windows Azure Developer Camp – Various (50+ cities)
Europe
- February 19, 2013: Advanced: Windows Azure - Brussels, Belgium
- February 27, 2013: Windows Azure and Twilio - A happy tale to tell - Zaventem, Brussels
- February 20, 22, 26, 2013; Windows Azure Open Platform Services Summit - Mumbai, Pune & Bangalore, India
- February 28-March 1, 2013: Windows Azure Camp - Brussels, Belgium
- March 4-6, 2013: Scandinavian Developer Conference - Goteborg, Sweden
- March 5-7, 2013: TechDays 2013 - Antwerp, Belgium
- March 6, 2013: Technical Update for the Microsoft Platform 2013 - London, England
- April 10-11, 2013: Microsoft Synopsis 2013 - Darmstadt, Germany
- April 17-19, 2013: Database Days 2013 - Baden, Switzerland
- April 24-25, 2013: Events and Workshops - Brussels, Belgium
Rest of World/Virtual
- April 27, 2013: Global Windows Azure Bootcamp - Various Locations
- Ongoing: Windows Azure Virtual Labs – On-demand
Interesting Recent Windows Azure Discussions on Stack Overflow
- Can't delete blob from windows azure storage when filename ends in question mark - 1 answer, 1 vote
- Access ACS Azure from Winforms - 1 answer, 1 vote
- Asynchronous method for QueueClient.Receive()? - 1 answer, 0 votes
- One or multiple Affinity Groups for separate environments? - 2 answers, 0 votes
- May I lose Drive D: if I add new storage to my Azure VM? - 1 answer, 0 votes
- How to perform a Windows Azure Backup? - 3 answers, 0 votes
- Worker Role instance unhealthy - 1 answer, 2 votes

Karl Ots (@fincooper) reported about his TechDays Finland 2013 presentations: Windows 8, Azure and Phone on 2/6/2013 (missed when posted):
I’ll be presenting at TechDays Finland this year. TechDays is the biggest technology conference in Finland with over 1500 attendees. I have two presentations there, namely:
- Architecting applications for Windows 8 and Windows Phone 8. Level 300
- Building modern media services with Windows Azure. Level 200
The Architecting for Windows and Windows Phone -presentation will cover topics such as the meaning of shared core and usability differences of the two platforms. I’ll also share some best practices as well as common strategies about porting and maximum reuse. I’ll be showcasing the Moomin application that we created for Windows 8 and Windows Phone 8.
The Azure Media presentation will try to give you an overview of what Windows Azure offers you in terms of media distribution. And of course, how to use those features. If you’re interested in this topic I suggest you also take a look at Lauri Kotilainen’s talk about anatomy of cloud video services.
I’ll post all of the demos I use in the presentations here in my blog. The presentations will also be recorded and posted to the TechDays website. If there are any specific topics you’d like me to cover in my presentations, feel free to ask me here or by simply pinging me at twitter (@fincooper)!
In case you’re not familiar with Microsoft’s Standard Level Definitions, here they are:
- Level 100: Introductory and overview material. Assumes little or no expertise with topic and covers topic concepts, functions, features, and benefits.
- Level 200: Intermediate material. Assumes 100-level knowledge and provides specific details about the topic.
- Level 300: Advanced material. Assumes 200-level knowledge, in-depth understanding of features in a real-world environment, and strong coding skills. Provides a detailed technical overview of a subset of product/technology features, covering architecture, performance, migration, deployment, and development.
- Level 400: Expert material. Assumes a deep level of technical knowledge and experience and a detailed, thorough understanding of topic. Provides expert-to-expert interaction and coverage of specialized topics.

No significant articles today
<Return to section navigation list>
Other Cloud Computing Platforms and Services
Jeff Barr (@jeffbarr) reported Amazon Redshift - Now Broadly Available on 2/15/2013:
We announced Amazon Redshift, our fast and powerful, fully managed, petabyte-scale data warehouse service, late last year (see my earlier blog post for more info). As we often do with complex new services, we started out by making a limited preview version of Redshift available by invitation.
Today I am happy to announce that Amazon Redshift is now available to all customers, and that you can get started with it today by provisioning a cluster from the AWS Management Console. You can start small (which, at data warehouse scale, means a couple of hundred gigabytes), and scale up to a petabyte or more as you discover what Amazon Redshift can do for you.
We've designed Amazon Redshift to be cost-effective, easy to use, and flexible.
Cost Effective
We designed Amazon Redshift to deliver 10 times the performance at 1/10th the cost of the on-premises data warehouses that are commonly used today. We used a number of techniques to do this including columnar data storage, advanced compression, and high-performance disk and network I/O.You can use the High Storage Extra Large (15 GiB of RAM, 4.4 ECU, and 2 TB of local attached compressed user data) for $0.85 per hour or the High Storage Eight Extra Large (120 GiB of RAM, 35 ECU, and 16 TB of local attached user data) for $6.80 per hour. With either instance type, you pay an effective price of $3,723 per terabyte per year for storage and processing. One Year and Three Year Reserved Instances are also available, pushing the annual cost per terabyte down to $2,190 and $999, respectively.
We're starting out in US East (Northern Virginia), with plans to expand to other AWS Regions in the coming months.
Easy to Use
As I noted earlier, you can manage Redshift from the AWS Management Console. Here are some screen shots of some common operations, starting with provisioning:
You can use a variety of graphs and visualizations to monitor the status and performance of each of your clusters, as well as the resources consumed by each of your queries:
You can easily resize a cluster, adding or removing nodes or changing the instance type, as well (your cluster will be in read-only mode for the duration of the operation):
You can create a snapshot, and then restore the snapshot to a new cluster, all with a couple of clicks:
Flexible
Redshift integrates nicely with a number of other AWS services. You can load data into a cluster from Amazon S3 or Amazon DynamoDB. You can also use the AWS Data Pipeline to load data from Amazon RDS, Amazon Elastic MapReduce, and your own Amazon EC2 data sources.Time to Get Started
As always, we have plenty of information to get you started:
- Redshift Home Page
- Redshift Getting Started Guide
- Redshift Partner Page
- Amazon Redshift Presentation from AWS re:Invent
- Amazon Redshift for Business Intelligence
We've put together a new video with more information about Amazon Redshift:
A number of our technology partners have been working hard to test their big data and analytics products with Redshift. Many of these products are now available in the AWS Marketplace:
Some Reviews & Commentary
The first reviews are starting to show up! Here are a few to give you an outside perspective on Amazon Redshift:


Werner Vogels (@werner) chimed in with Amazon Redshift and Designing for Resilience on 2/15/2013:
As you may remember from our announcement at re: Invent in November 2012, Amazon Redshift is a fast and powerful, fully managed, petabyte-scale data warehouse service that delivers fast query performance at less than one tenth the cost of most traditional data warehouse systems. I’ve been eagerly waiting for Amazon Redshift’s launch since we announced the service preview at re: Invent and I’m delighted that it’s now available for all customers in the US East (N. Virginia) Region, with additional AWS Regions planned for the coming months. To get started with Amazon Redshift, visit: http://aws.amazon.com/redshift.
Amazon Redshift and Resilience
Previously, I’ve written at length about how Amazon Redshift achieves high performance. Today, I’m going to focus on Amazon Redshift’s durability and fault tolerance.
Amazon Redshift uses local attached storage to deliver high IO performance. To provide data durability, Amazon Redshift maintains multiple copies of your data at all times. When you load data into an Amazon Redshift cluster, it is synchronously replicated to multiple drives on other nodes in the cluster. Your data is also automatically replicated to Amazon S3 which is designed for 99.99999999% durability. Backups of your data to Amazon S3 are continuous, incremental, and automatic. This combination of in-cluster replication and continuous backup to Amazon S3 ensures you have a highly durable system. You simply load the data and Amazon Redshift takes care of the rest.
Amazon Redshift implements a number of features that make the service resilient to drive and node failures within the data warehouse cluster. Although individual component failures are rare, as the number of components in a system increases, the probability of any single component failing also increases. The probability of a drive failure in a large cluster is the probability of an individual drive failure times the number of drives in the cluster. If you have a 50-node 8XL cluster containing a total of 1,200 hard drives, you will inevitably experience a drive failure at some point. You have to anticipate these sorts of failures and design your systems to be resilient to them.
Amazon Redshift continuously monitors your data warehouse cluster for drive and node failures. If Amazon Redshift detects a drive failure, it automatically begins using the other in-cluster copy of the data on that drive to serve queries while also creating another copy of the data on healthy drives within the cluster. If all of the copies within the cluster are unavailable, it will bring the data down from S3. This is all entirely transparent to the running system. If Amazon Redshift detects a failure that requires a node to be replaced, it automatically provisions and configures a new node and adds it to your cluster so you can resume operations.
But what about a scenario in which you need to restore an entire cluster? You can use any of the saved system or user backups to restore a copy of your cluster with a few clicks. Amazon Redshift automatically provisions and configures your cluster and begins restoring data from Amazon S3 to each node in your cluster in parallel. Amazon Redshift’s streaming restore feature enables you to resume querying as soon as the new cluster is created and basic metadata is restored. The data itself will be pulled down from S3 in the background, or brought in on demand as needed by individual queries. This is important since most queries in a typical data warehouse only access a small fraction of the data. For example, you might have three years of data in the warehouse, but have most queries referencing the last day or week. These queries will become performant quickly, as the hot data set is brought down.
I tell developers all the time to plan for failure and to design their systems around it. Performance is important, but it just doesn’t matter unless the system is up. I’m very happy to see Amazon Redshift incorporating sound principles of distributed systems design for achieving availability and durability at petabyte scale. I can’t wait to see how our customers will use the service.
Amazon Redshift and Amazon DynamoDB
I’m also pleased that we have built a powerful and easy-to-use integration between Amazon Redshift and one of our other highly available and durable services: Amazon DynamoDB. You can move all of your Amazon DynamoDB data into an Amazon Redshift table with a single command run from within Amazon Redshift:
copy table_redshift from 'dynamodb:// table_dynamodb'
credentials 'aws_access_key_id=xxx;aws_secret_access_key=xxx'
readratio 50;
I’m excited that Amazon Redshift is now available to everyone. I can’t wait to see how our customers will use the service.


Jeff Barr (@jeffbarr) described an Amazon RDS Price Reduction for Multi-AZ Deployments on 2/13/2013:
When you create a Multi-AZ Database Instance using the Amazon Relational Database Service, we automatically create a standby instance which maintains an up-to-date copy of the primary database. If the primary database goes down due to a instance, storage, or network issue, Amazon RDS automatically initiates a failover from primary to secondary and also creates a fresh secondary for you. Here's the basic architecture (see my Multi-AZ blog post for more information):
Today we are making the Multi-AZ deployment model an even better value, with price reductions ranging from 15% to 32%. As an example, here are the old and new On-Demand prices for an m1.small RDS Database Instance running MySQL or Oracle (BYOL) in a Multi-AZ deployment:

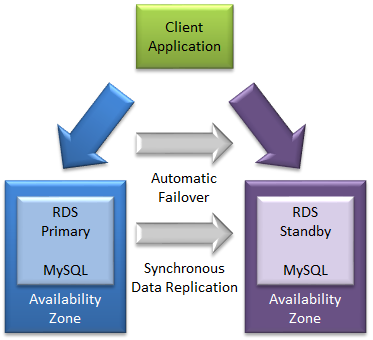


This price reduction takes effect February 1, 2013 and represents our continued commitment to make AWS a better and better value over time.
Jeff Barr (@jeffbarr) provided a link to a description of how to Create a Backup Website Using Route 53 DNS Failover and S3 Website Hosting on 2/11/2013:
Route 53's new DNS Failover feature gives you the power to monitor your website and automatically route your visitors to a backup site if it goes down.
In today's guest post, Product Manager Sean Meckley shows you how to use this powerful new feature on a fictitious website.

Jeff Barr (@jeffbarr)
<Return to section navigation list>


0 comments:
Post a Comment