Monday, December 31, 2012

Using the OakLeaf ToDo List App with Windows 8 or a Surface RT Tablet

The OakLeaf ToDo List app is a simple, multi-tenanted application intended to demonstrate the basic capabilities of Windows Azure Mobile Services (WAMoS) in conjunction with data storage in a Windows Azure SQL Database (formerly SQL Azure) instance in Microsoft’s West US (Bay Area) data center. The app is available without charge to Windows 8 and Windows RT users from the OakLeaf Store.

You’ll find OakLeaf’s Terms of Service and Use for the App here and our Privacy Statement here.

To test drive the app with Windows 8 or Windows RT, do the following:

1. Click the OakLeaf ToDo List tile to momentarily display a splash screen:

imageImages were capture from a Surface RT device. Click to display them in full size.

and then open a Sign In page:

image

Note: Privacy and Terms link to a Microsoft privacy statement for Microsoft Accounts and terms of service for Microsoft-branded services, not the app’s privacy and terms statements required for Windows Store apps. Other authentication options provided by Windows Azure Access Control services are Facebook, Twitter, and Google accounts.

2. Complete the sign-in information and click Sign in to display the following permissions screen, if you haven’t used your Windows Account for the app previously:

image_thumb2

3. Click Sign In or Yes to display an acknowledgment screen with a GUID representing your Microsoft Account name:

image

4. Click OK to display the main (and only) user screen, which displays uncompleted ToDo items (see item 22 in the todoitem table screen capture above:

image

5. Type a ToDo item in the Insert a TodoItem text box and click the Save button to display a push notification and add the item to the Query and Update Data list:

image

6. Click the check box of items in the Query and Update Data list to mark it completed and remove it from the list.

7. Click the Refresh button to list currently uncompleted ToDo items.


OakLeaf Systems Terms of Service and Use

Updated 12/31/2012 by addition of the following section:

OakLeaf Systems’ Free Downloadable .NET Projects, Free Sample Applications, and Windows Store and Microsoft Office Store Apps
OakLeafLogoMVP100px_thumbOakLeaf Systems and Roger Jennings (‘us’ or ‘we’) from time to time offer:

  1. Free downloadable software in the form of complete or partial Visual Studio .NET projects
  2. Free sample applications in the form of files containing executable or other compiled software and related data that users can run on personal computers and other computing devices
  3. Finished applications offered free or for which a charge is made from Microsoft’s Windows Store and/or Office Store

If you download and install such software or applications, you are agreeing to comply with and be bound by the following terms and conditions of service and use.

  • Neither we nor any third parties provide any warranty or guarantee as to the accuracy, timeliness, performance, completeness or suitability of the applications, software and/or related information provided by us for any particular purpose.
  • You acknowledge that such applications, software and/or related information may contain flaws or errors and we expressly exclude liability for any such flaws or errors to the fullest extent permitted by law.
  • Your use of any applications, software and/or related information is entirely at your own risk, for which we shall not be liable. It shall be your own responsibility to ensure that any products, services or information available through this website meet your specific requirements.

OakLeaf Systems Website
OakLeafLogoMVP100px_thumbWelcome to the OakLeaf Systems website. If you continue to browse and use this website you are agreeing to comply with and be bound by the following terms and conditions of use.

The term ‘us’ or ‘we’ refers to Roger Jennings and OakLeaf systems, the owners of the website. The term ‘you’ refers to the user or viewer of our website.

The use of this website is subject to the following terms of service and use:

  • The content of the pages of this website is for your general information and use only. It is subject to change without notice.
  • Neither we nor any third parties provide any warranty or guarantee as to the accuracy, timeliness, performance, completeness or suitability of the information and materials found or offered on this website for any particular purpose. You acknowledge that such information and materials may contain inaccuracies or errors and we expressly exclude liability for any such inaccuracies or errors to the fullest extent permitted by law.
  • Your use of any information or materials on this website is entirely at your own risk, for which we shall not be liable. It shall be your own responsibility to ensure that any products, services or information available through this website meet your specific requirements.
  • All trade marks reproduced in this website which are not the property of, or licensed to, the operator are acknowledged on the website.
  • From time to time this website may also include links to other websites. These links are provided for your convenience to provide further information. They do not signify that we endorse the websites. We have no responsibility for the content of the linked websites.

These terms of service are subject to change without notice.


Sunday, December 30, 2012

Installing Windows Store Apps on a Microsoft Surface for Windows RT Tablet

imageMy (@rogerjenn) Windows Azure Mobile Services Preview Walkthrough–Part 5: Distributing Your App From the Windows Store post of 9/22/2012 described issues raised during Microsoft’s testing for hosting the OakLeaf ToDo sample application in the Windows Store. Testers reported the OakLeaf ToDo app’s failure to operate as expected during repeated attempts to have it listed.

imageIn order to test the app under conditions that better simulate Windows Store testing, I purchased a Microsoft Surface with Windows RT (a.k.a. Surface RT) tablet computer on 12/19 and received it on 12/20/2012. My initial tests were of a C# SharePoint App with a Visual Studio LightSwitch HTML 5 Client Preview 2 UI autohosted in Window Azure. My LightSwitch HTML Client Preview 2: OakLeaf Contoso Survey Application Demo on Office 365 SharePoint Site and Running the SurveyApplicationCS Demo Project under Windows 8 RT on a Microsoft Surface RT Tablet posts describe the SurveyApplicationCS project.

Following are posts by Magenic’s Rocky Lhotka and Larry Louisiana that describe the processes I’ll use for testing the OakLeaf ToDo Windows Store app. I’ll update this post with links to the test results when completed.

Updated Rocky Lhotka’s article on 12/30/2012 with a note and screenshot showing that an administrator can’t execute PowerScript’s Set-ExecutionPolicy unrestricted command.


Rockford Lhotka (@RockyLhotka), Magenics CTO and Principal Technologist, explained Testing a WinRT app on a Surface RT in a 12/20/2012 post to his blog:

imageA colleague of mine at Magenic recently posted on how to deploy and debug a WinRT app on a Surface RT [see post below.]

Another alternative is to install the app onto the Surface device via PowerShell. This won’t attach the debugger, but is often an appropriate solution for people who are just testing the app (QA testers, colleagues willing to provide feedback, etc.).

This is a multi-step process. At a high level it goes like this:

  1. Developer packages the WinRT app to a folder on their hard drive, then puts the package on a network share or USB key, etc.
  2. Tester unlocks PowerShell on their device (this is a one-time thing)
  3. Tester gets the WinRT app package and runs a PowerShell script to install the app on their device
Creating the Package

The developer needs to create a distributable package for the app. This is done by right-clicking on the WinRT project in the Visual Studio solution explorer, and choosing Store –> Create App Packages.

image

This brings up the Create App Package wizard. The first question is whether you want to deploy the the store, and the answer in this case is No.

Next, you’ll be asked where to create the package, how to create the package version number (different from the app version number) and what platforms to target.

image

The Neutral architecture in Release (Any CPU) allows testing on Intel and ARM devices.

When the Create button is clicked, the project is built and packaged, with the results placed in the specified folder.

image

The top level folder contains an appxupload file that you can safely ignore (it is used for uploads to the store). It also contains a sub-folder with the actual app package.

image

These are the files you must make available to the tester. You can put these files on a network share, a USB key, a SkyDrive folder, or any other location where the tester can gain access. The Add-AppDevPackage.ps1 file is the PowerShell script the tester will run to install the app.

Unlocking PowerShell

The tester’s device must be able to execute PowerShell scripts before they can install the app. By default PowerShell has security settings that prevent scripts from executing. This TechNet article discusses running PowerShell scripts. In summary, you need to open PowerShell as Admin and run this command:

Set-ExecutionPolicy unrestricted

Note: Users with an Administrative account can’t execute the above command. See screen capture below. You are given the opportunity to authorize the operation during PowerScript execution.

Be aware that this allows execution of any script, so you do assume some risk by enabling this policy.

Once this has been done your test device is now able to install WinRT apps by executing the PowerShell script generated by Visual Studio.

Installing the App

On the test device you must have access to the contents of the package folder created by the developer in Visual Studio. You might get those files from a network share, a USB key, or other location.

Simply execute the Add-AppDevPackage.ps1 file in PowerShell to install the app.

The script will ask permission to run.

image

If this device does not have a side-loading unlock key (MAK or developer key), you will be asked if you want to get a developer key. You should answer yes and walk through the wizard to get a developer key for this device. This step will require you to enter your Microsoft Account email address and password. The resulting key will expire after a short period of time (currently three months).

The PowerShell script will then ask for permission to install the certificate for the app. If you’ve already installed the certificate (perhaps you are installing a newer version of the same app) the script will skip this step.

image

image

Once the certificate is installed, the script will install the WinRT app itself.

image

At this point the WinRT app is installed and its tile should appear on the start screen along with all other apps installed on this device.

The user may now run the app like any other app.

Once the developer key for this device expires the app will stop working. Obviously the intent of this installation approach isn’t for the user to run the app forever, but rather so they can test it and provide feedback during the development process.

Here’s the screen shot showing that Surface RT administrators can’t access the registry key necessary to enable unrestricted script execution.

image


Larry Louisiana (@LarryLouisila, a.k.a. Ely Bob) described Step by step deploying App[s] to Surface in a 12/19/2012 post:

imageMagenic recently gave out it’s Christmas present, so the first thing I did was try to deploy code to it.. here is how you can:

  1. Download the ARM version of Remote Tools for Visual Studio 2012 to your Surface (I believe that you’ll need to be running Windows 8 on your development machine). Install it.

     
  2. Have something to Deploy, I’m using the DirectX marble maze game sample from MSDN.
  3. On your Surface start the Visual Studio Remote Debugging monitor.

     
  4. You will need to know your Surface’s IP address I used “IP Address” by Jujuba Software (it’s free). [Hyperlink added.]

    Jujuba IP Address Screen Shot

    Once I Installed this, I opened it up and copied the IP that it displayed for my local IP address (put that in a .txt file on my desktop). You will need that for later.

  5. Once you have your IP address saved and aside open the Marble Maze solution in Visual Studio.
  6. Next go into the solution settings and Set your solution to ARM.

     
  7. Then go into the Project Settings and set your IP (local) and set it to ARM if those settings didn’t propagate)

     
  8. You’re almost there, Now just select Remote Debugging in the Debug Drop-down and click debug.

     
  9. If you’re using a machine attached to another Domain you’ll be asked to supply login credentials for your Surface. Otherwise you will just deploy normally. Your login credentials for your surface device are the machine name followed by your full live email, So for this example it would be Centepede\{me}@hotmail.com.
  10. If you don’t have [?] and once the package deploys (might take a while the first time to get all the references up to date on your Surface) You will see the Marble Maze Splash Screen. and if you go back to your desktop you will see:

Based 2[on] the original MSDN Blog.


Friday, December 28, 2012

Windows Azure Mobile Services Preview Walkthrough–Part 1: Windows 8 ToDo Demo Application (C#)

imagePart 1 of 5: The Windows Azure Mobile Services (WAMoS) Preview’s initial release enables application developers targeting Windows 8 to automate the following programming tasks for Windows Store Apps*:

  1. Creating a Windows Azure SQL Database (WASDB) instance and table to persist data entered in a Windows 8 Modern (formerly Metro) UI application’s form
  2. Connecting the table to the generated data entry front end app
  3. Authenticating application users
  4. Pushing notifications to users

This walkthrough, which is simpler than the Get Started with Data walkthrough, explains how to obtain a Windows Azure 90-day free trial, create a C#/XAML WASDB instance for a todo application, add a table to persist todo items, and generate and use a sample oakleaf-todo Windows 8 front-end application. During the preview period, you can publish up to six free Windows Mobile applications.

• Updated 12/28/2012 with minor fixes for changes to the Windows Azure Management Portal’s new HTML version marked .

imageMy (@rogerjenn) Windows Azure Mobile Services Preview Walkthrough–Part 2: Authenticating Windows 8 App Users (C#) covers task 3 and Windows Azure Mobile Services Preview Walkthrough–Part 3: Pushing Notifications to Windows 8 Users (C#) covers task 4.

Links to later articles:

imagePrerequisites: You must perform this walkthrough under Windows 8 RTM with Visual Studio 2012 Express for Windows 8 or higher. Downloading and installing the Mobile Services SDK Preview from GitHub also is required.

Important: Login to Windows 8 using the Microsoft Account (Live ID) with which you applied for the Windows Azure Mobile Services Preview and the Windows Store when performing this walkthrough with Windows Studio. Using a different Account/ID is likely to lead to unexpected results.

Note: The WAMoS abbreviation for Mobile Services distinguishes them from Windows Azure Media Services (WAMeS).

Update 9/12/2012 4:00 PM PDT: * Mary Jo Foley (@maryjofoley) asserted ‘'Metro-style' apps are now to be known as 'Windows Store' apps, according to Microsoft officials’ in a deck for her Microsoft finally comes clean(er) on post-Metro naming plans article of 9/12/2012 for ZDNet’s All About Microsoft blog: 

image… The new official name for these Metro-style apps, according to Somasegar, is "Windows Store" apps. Rafael Rivera from Within Windows said he thought this would be the name once he looked at the Visual Studio 2012 RTM code back on August 7. Looks like Rivera was right on the money.

imageMicrosoft is slowly but surely substituting references to Metro-Style apps with Windows Store apps across its own Web sites. This is a move that will take some time given how many references already exist across Microsoft's own sites, Somasegar acknowledged. …


1. Navigate to http://www.windowsazure.com:

image 

2. Log in with your Windows Live or Office 365 ID and sign up for a 90-day free trial if you don’t have an account:

image

If you already have an account, skip to step 7.

image3. Click next to open the Verify Your Account form: area code

image

4. Replace the default with the numbers (no special characters) of your mobile phone area code and number, click the Send Text Message button and type the verification code from the text message you receive in the text box:

WindowsAzureFreeTrial-VerifyAccount

6. Click Next and complete the credit card form:

imageWindowsAzureFreeTrial-CreditCard

Note: Your credit card won’t be charged for usage in excess of free quotas unless you explicitly authorize usage charges in the Billing Portal.

7. Open the Management Portal’s Account tab and click the Preview Features button:

image

Note: My rogerj@sbcglobal.net Live ID is used for the above example because that account doesn’t have WAMoS enabled. The remainder of this walkthrough uses the subscription(s) associated with my roger_jennings@compuserve.com account.

8. Click the Mobil Services’ Try It Now button to open the Add Preview Feature form, accept the default or select a subscription:

image

image9. Click the submit button to request admission to the preview:

10. Follow the instructions contained in the e-mail sent to your Live ID e-mail account, which will enable the Mobile Services item in the Management Portal’s navigation pane:

1 - WAMoS - Get Started

image11. Click the Create a New App button to open the Create a Mobile Service form, type a DNS prefix for the ToDo back end in the URL text box (oakleaf-todo for this example), select Create a new SQL Database in the Database list, accept the default East US region.

image

Note: Only Microsoft’s East US data center supported WAMoS when this walkthrough was published.

• Update 12/28/2012: Other data centers, including West US, now support Mobile Services.

image12. Click the next button to open the Specify Database Settings form, accept the default Name and Server settings, and type a database user name and complex password:

image

Note: You don’t need to configure advanced database settings, such as database size, for most Mobile Services.

image13. Click the Submit to create the Mobil Service’s database and enable the Mobile Services item in the Management Portal’s navigation pane. Ready status usually will appear in about 30 seconds:

4 - WAMoS - ServiceCreated

14. If you click the Mobile Service’s URL, https://oakleaf-todo.azure-mobile.net/ for this example, the following page opens:

image

Note: Clicking the Tell Me More button opens the WAMoS landing page. 

15. Click the QuickStart (image) name (oakleaf-todo) button to open the Create Application page:

5 - WAMoS - CreateApp

16. Click the Create a New Windows 8 Application button to open the Get Started page. Click the Create Todoitem Table button to create a table to persist todo items:

6 - WAMoS - Tools, Table, App

17. Accept the default C# language, click download, open and extract the oakleaf-todo.zip file for a Windows 8 XAML front-end application generated from a WAMoS template to an appropriate location:

image

18. Open the oakleaf-todo.sln file in Visual Studio 2012 Express for Windows 8 or higher, expand Solution Explorer’s node, and open MainPage.xaml.cs to display the namespaces used:

8 - WAMoS - MainPage.xaml.cs

19. Press F5 to compile and run the front-end program. Type a few TodoItems in the text box, clicking the Save button to add each to the Query and Update Data list:

9 - WAMoS - OakLeafTodoWindow

Note: Click the Refresh button to display active list members when reopening the page. The XAML code for the Query and Update Data description has been modified to add a newline between sentences.

20. Mark the check box of completed TodoItems to delete them from the table.

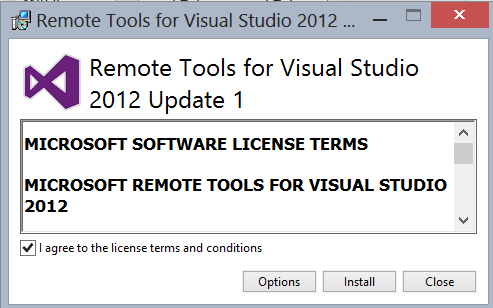
21. When the Developer License form opens:

Mobile Services - DeveloperLicenseDialog

22. Click the I agree button to obtain a 30-day license and display this form:

Mobile Services - DevLicenseObtained

You will use the Visual Studio project you created here as the foundation for the two later walkthroughs.